
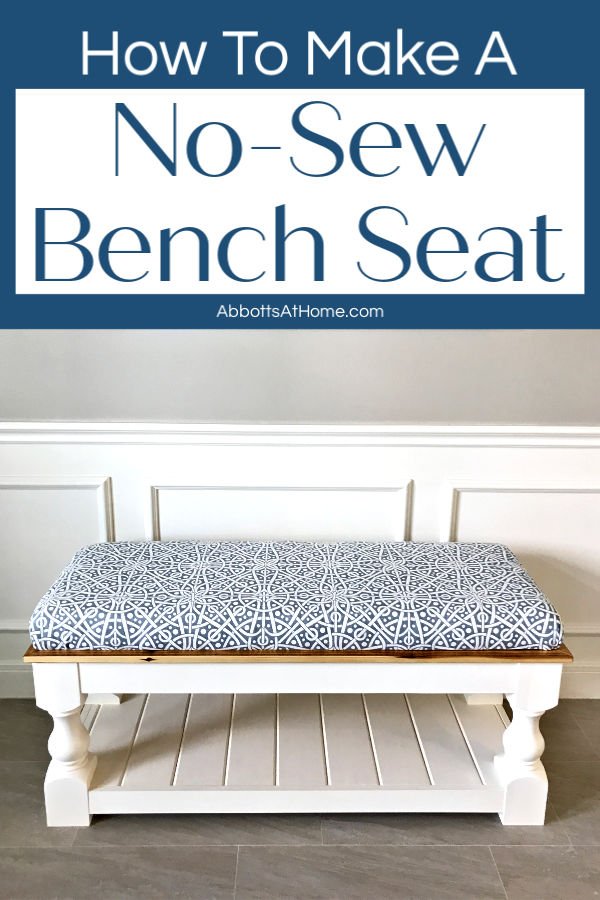
I LOVE this easy DIY to Make a No Sew Bench Seat with a Staple Gun. You can make a beautiful padded cushion seat on plywood in no time!
How to Make a No Sew Bench Seat
Hi guys! If you have a window seat, old table, or bench that you want to add a beautiful upholstered top to, it’s actually pretty easy.
And, you don’t need to do any sewing to make it. Here’s how to make a no sew bench seat on a 1/2″ MDF or plywood board using just a staple gun.

Using an upholstered board won’t work for every situation. You need to have a flat surface to rest the board on. With old tables or benches, you might be able to unscrew the old top and remove it completely.
OR, you might be able to use that top as the board base for the bench cushion. It all depends on what shape that old top is in and whether or not you think it will make a good cushion seat base.
If you’re a woodworker, you can also use these steps for how to make a no sew bench seat on furniture that you’re building. I use these steps to make upholstered bench seats all the time.
You can see the chunky leg farmhouse bench I built in this tutorial and a smaller upholstered bench using legs from Home Depot, in a previous post.
My DIY Upholsterd Ottoman Plans from Scratch is another easy project worth checking out.
Tools Needed
- Staple Gun & 5/16″ Staples
- Hammer
Materials Needed
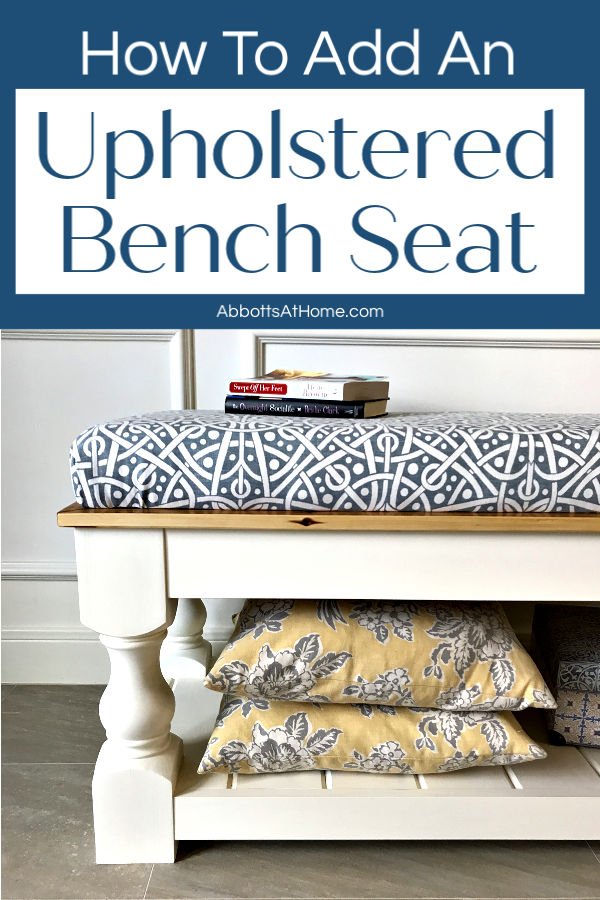
Build Note: You can use this DIY to add an upholstered seat to most benches, low cabinets, and even low, sturdy tables.
Just adjust the MDF and padding size to fit the space you want to upholster.
- 1 – 47 1/2″ x 17 1/2″ piece of 1/2″ Plywood or MDF
- Fabric, I used this one
- 3″ Foam Padding – check prices before buying, JoAnn’s sells this for twice as much
- Spray adhesive
- High-Loft or Extra-Loft Polyester Batting
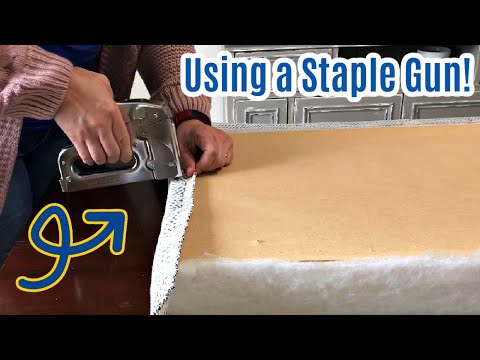
DIY Bench Cushion On Plywood Video
If any of the steps below are confusing, watch this short video to get a look at how to make a no sew bench seat using a staple gun.
Steps to Make a No Sew Bench Seat Cushion
Be sure to watch the no sew bench seat upholstery video above to see exactly how I did mine.
Step One – Cut Your Board
Cut your 1/2″ MDF or Plywood to the size you need to fit your opening or to cover your table top. Brush off all dust and take that board inside.
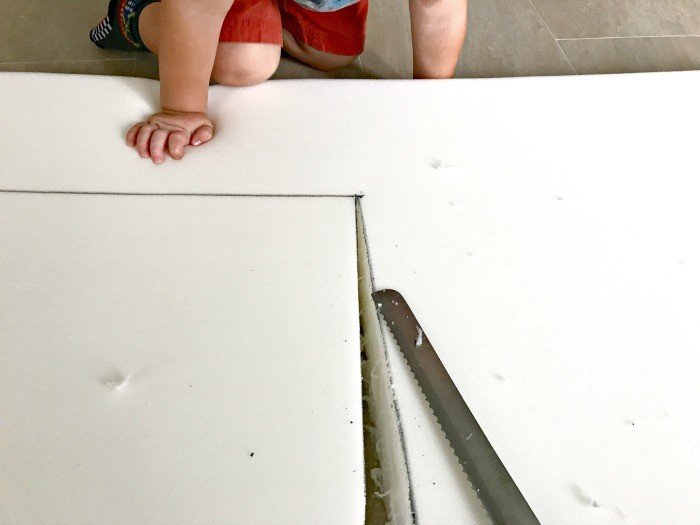
Step Two – Mark and Cut Your Upholstery Foam
Place the board on top of the 3″ Foam to mark the board outline on the foam. You should only have to cut 2 sides of the foam, if you set the board in the corner.
You can also use thinner foam, like 1″ or 2″ thick with these steps for how to make a no sew bench seat.
Move the board aside to cut your foam with a serrated knife or electric knife.
I used a long bread knife to cut mine, but electric knives are the fastest, smoothest way to cut through foam.
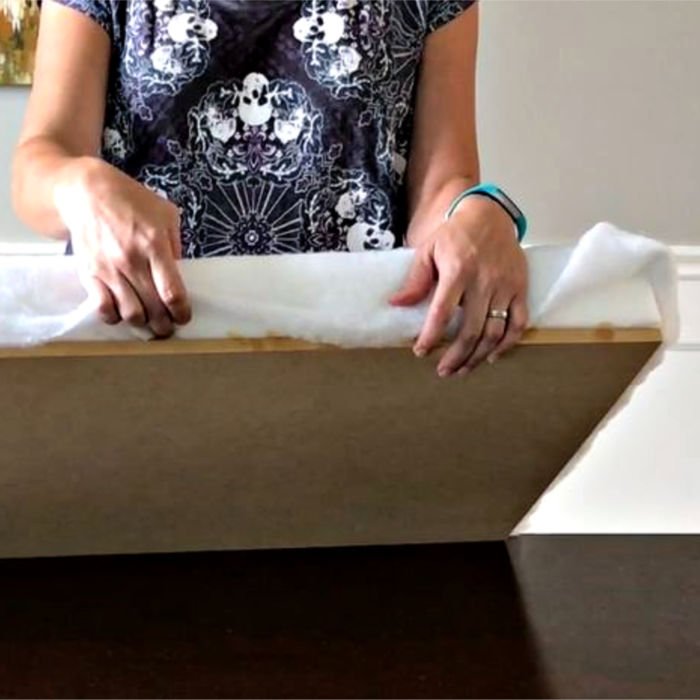
Step Three – Cut Your Batting
After the foam is cut, set the foam on the board and lay the batting on top of both pieces. Cut about 2″ longer than the batting needs to reach the bottom of the board on all 4 sides.
Batting doesn’t get stretched or stapled to the board. You just want it to lay evenly across the seat without any wrinkles.
Batting is what gives upholstered seats a “fluffy” look. It hides all the hard edges.

Step Four – Use Spray Adhesive to Attach the Foam
For the next step of this how to make a no sew bench seat tutorial, use a drop cloth for the spray adhesive steps. Some adhesives get everywhere.
Now use the spray adhesive on the board to attach the foam. Make sure everything lines up on all 4 sides before the adhesive can dry.
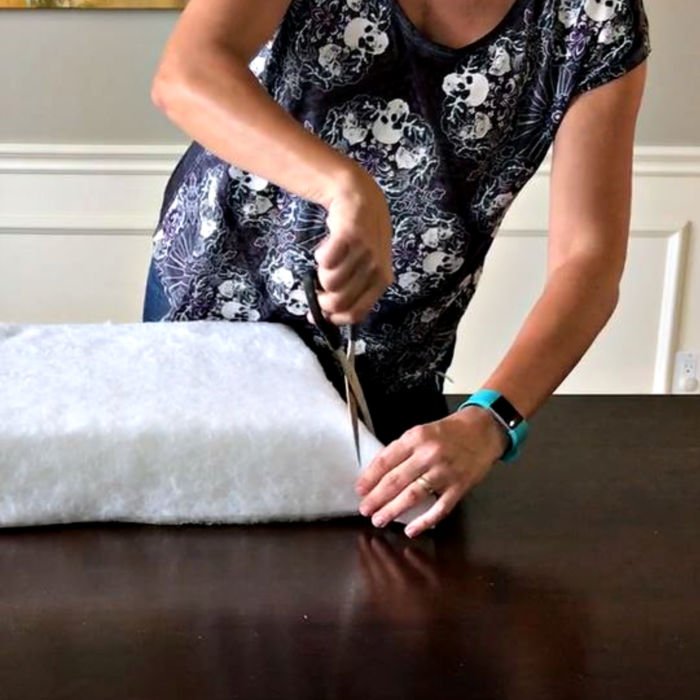
Step Five – Use Spray Adhesive to Attach the Batting
Now place the batting back on the foam and board. Spread it flat and even again. Use the spray adhesive just on the sides of the foam to hold the batting in place.
Leave the extra material on the corners unglued and sticking out, like a triangle.
Now trim the batting to size. You want the batting to reach the bottom of the board on all 4 sides, without wrapping underneath. Now trim that extra material off the corners too.
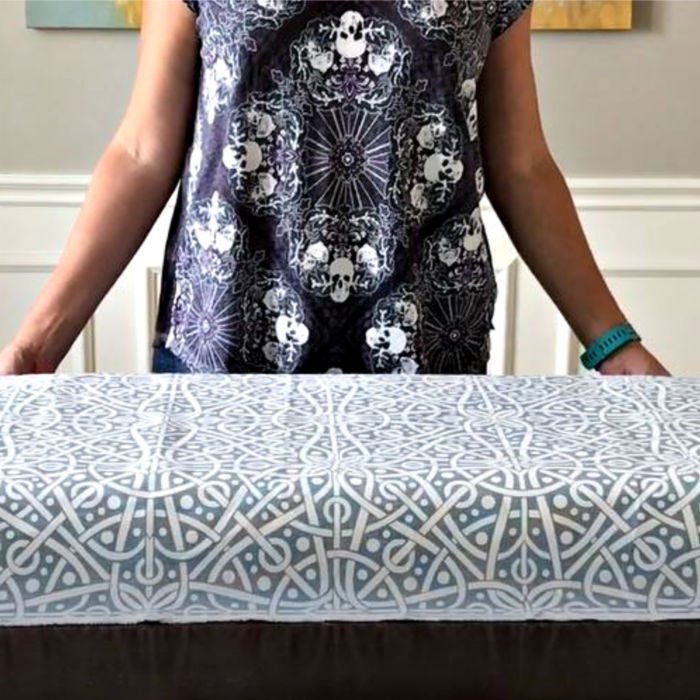
Step Six – Cut Your Fabric to Size
Place the fabric on top of the batting. Line it up so that the pattern looks straight and have an extra few inches on all 4 sides to wrap under the bench seat. Cut your fabric to that size.
Check out this post for my favorite fabric finds on Amazon.
Iron or steam your fabric, if needed. Be sure to follow the directions for your type of fabric.
Certain types of loose weaves or delicate fabrics probably shouldn’t be used for this upholstery method.
Be sure to pick an upholstery fabric so that it is thick enough for this how to make a no sew bench seat tutorial.
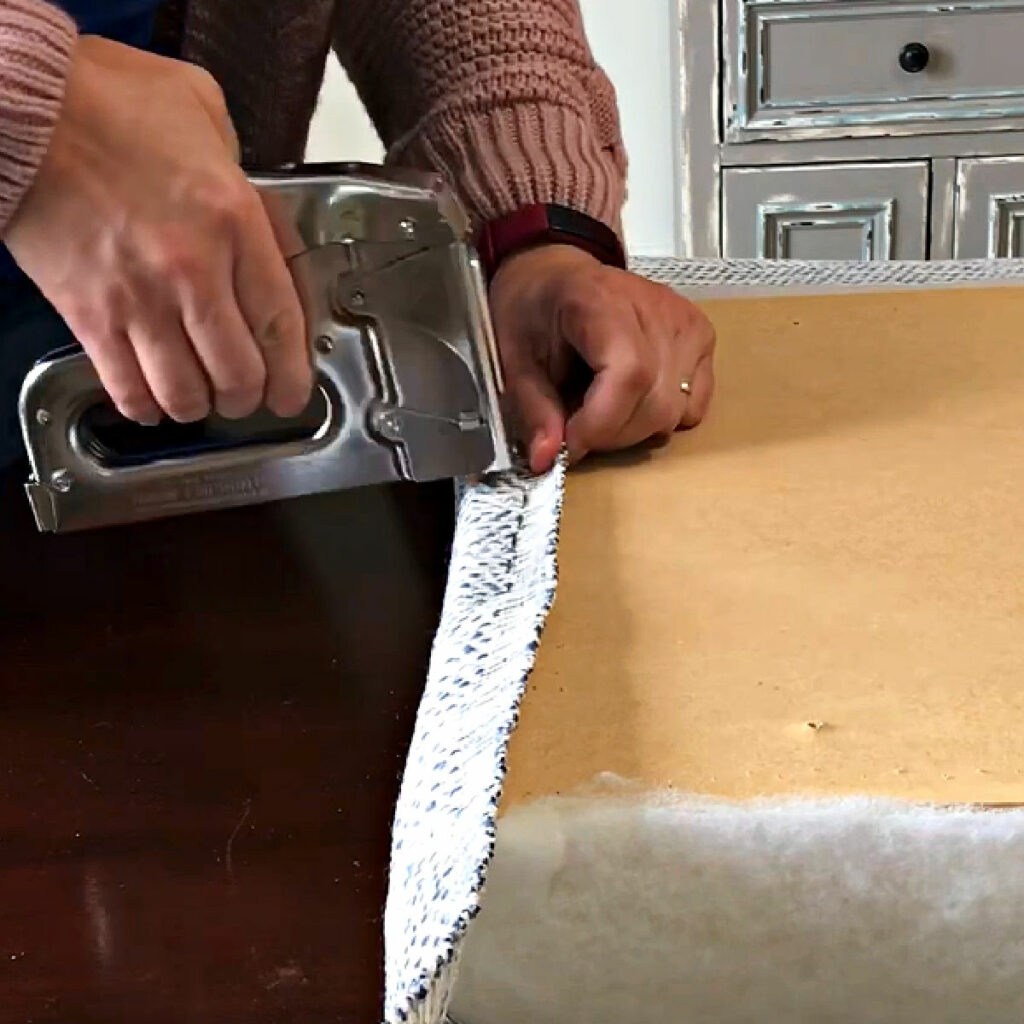
Step Seven – Start Stapling the Fabric to the Board
Place the fabric face down on a flat surface. Flip the seat, with foam and batting attached, over on the fabric.
Line everything up so that the seat is centered on the fabric. Use any patterns in the fabric or weave as a guide.
You want to staple each side, leaving 4″ at each corner alone. We’ll do the corners last.
When you staple the fabric to the board, pull with the same amount of tug all along the seat to prevent an uneven look.
Also, pull straight back to the board, not diagonally. You want the fabric to be tight enough to leave the top smooth and the edges slightly rounded.
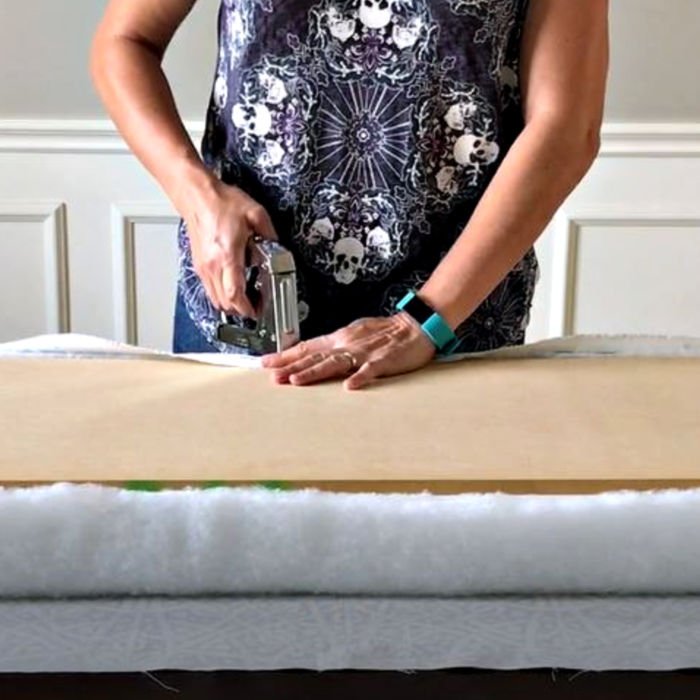
Make sure that you use a lot of staples, you don’t really want gaps between them. Gaps will cause extra pull on the stapled parts of the fabric.
The fabric might start to rip if part of it is held in place and others aren’t.
For the corners, I stapled the very center to the corner. Then I folded each sides extra fabric under to create a fold line at each side of the corner.
Then, you can finish stapling the rest of the corner down.
Step Eight – Finishing Touches
Trim away all excess fabric, you want a smooth bottom before setting the seat on the bench. Use a hammer to set the staples flush with the board.
My low-tech staple gun seems to always leave them just a little bit raised.
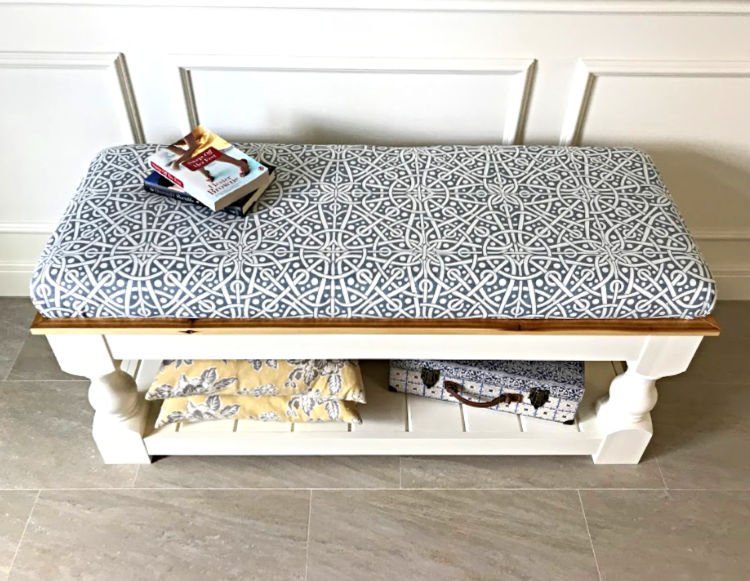
That’s it, your seat is done!!!
Flip it over and center it on the bench. Sometimes you can just leave the seat sitting unattached.
Some of you might be able to attach this bench seat with screws from beneath the table top or cabinet top.
You could also try Command 3M Velcro Strips, corner brackets, or adding molding around the seat to keep it from moving.
I’d go with whichever option works best and still leaves it easy for you to change the fabric in a few years, if you want to. 🙂
Looking for more furniture build plans? You can find more of my DIY Woodworking and Furniture Projects on my YouTube Channel. Check out the most popular videos on my channel here.

Here’s How to Clean A Couch At Home, the easy way.

You might also like this easy tutorial to whiten your grout. Or this Does Grout Renew Work post.
Or, have a look at how to faux paint 20 different metal patina looks.
I love this beautiful DIY Acrylic Paint Pouring Wall Art tutorial.

Looking for Instant Curb Appeal? Here’s the 30 Best Outdoor Door Mats for any home.

Feeling inspired? Now you’re ready to make your own How to Make a No Sew Bench Seat.
Let me know if you have questions. Don’t forget to sign up for the Abbotts At Home email newsletter to get DIY, Remodeling, and Crafty ideas in your inbox.

Stephanie Abbott has been remodeling homes, updating & building furniture, and working on DIY home maintenance and cleaning tips for over 20 years. Her remodeling has been featured in Better Homes and Gardens Magazine. And, her DIY YouTube channel has had more than 8 million views.
Most of the DIY tutorials and videos on this site focus on beginner to intermediate level DIY Projects that can be done in an affordable way without high-end, expensive tools. All of the cleaning tips on this website have been tested in her home.