
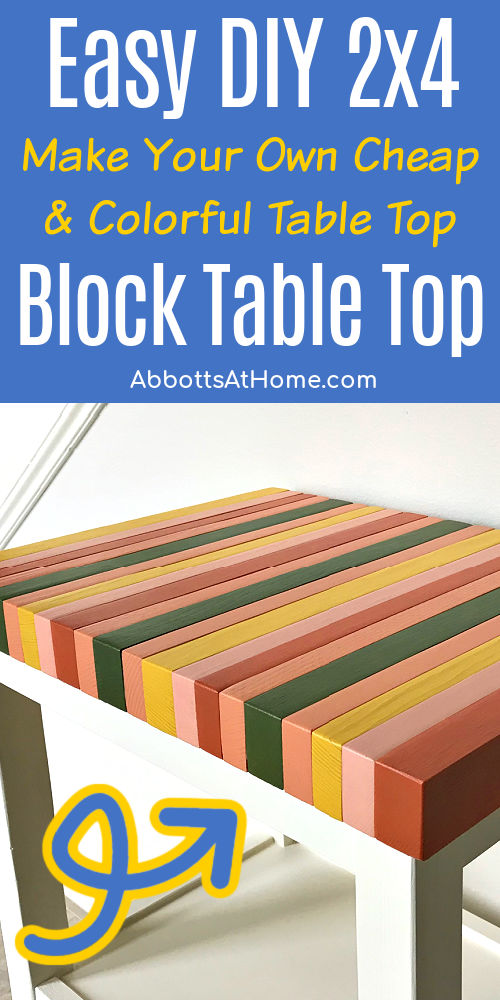
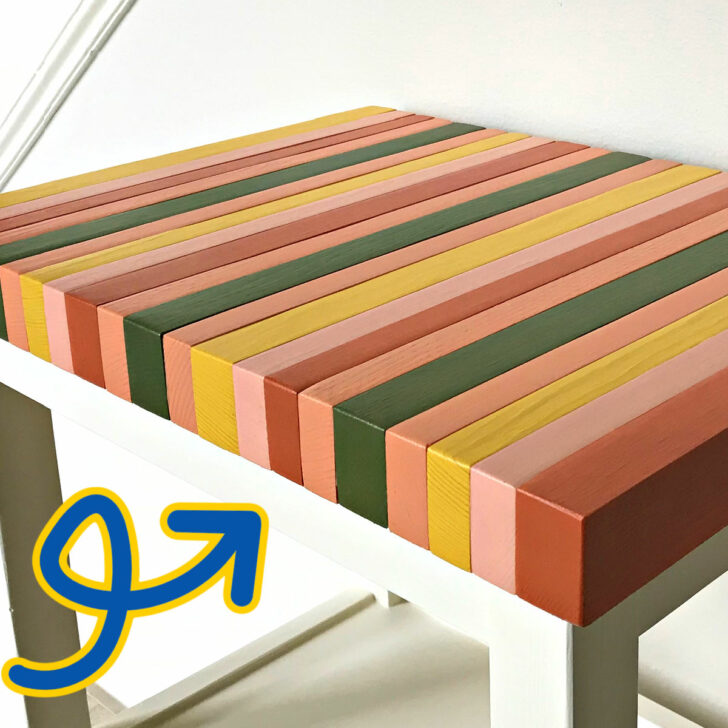
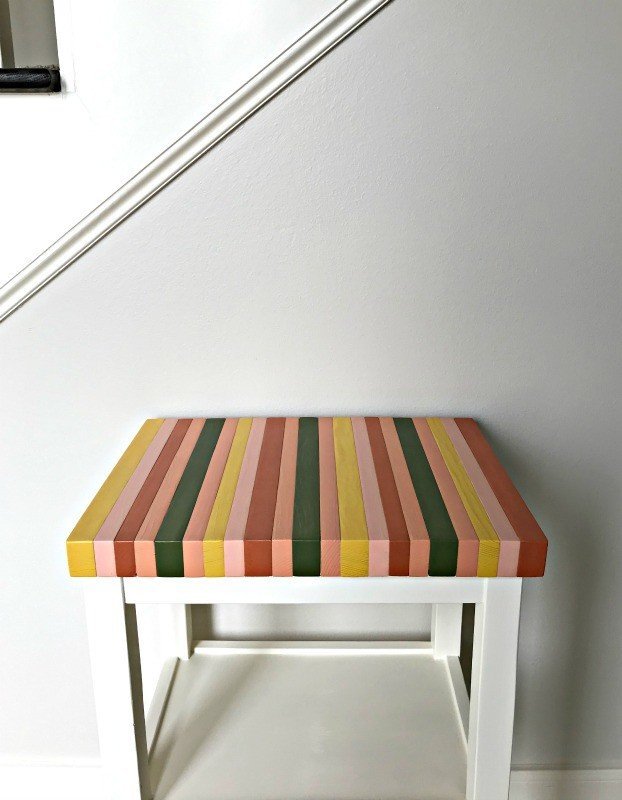
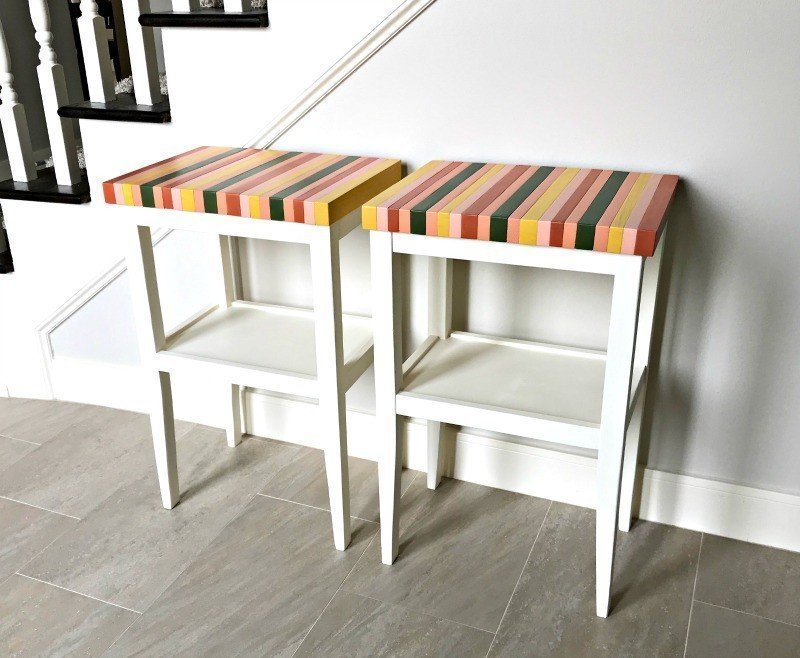
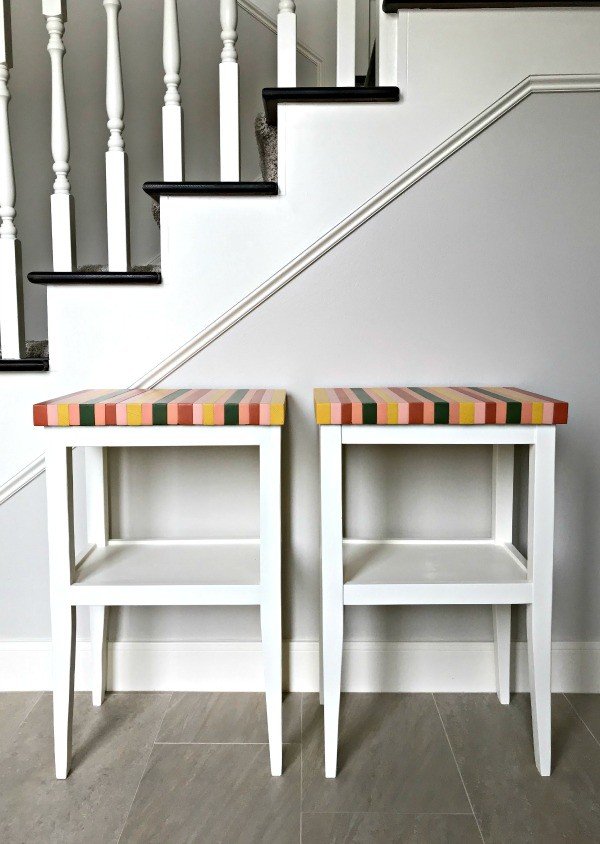
Build a unique, pretty & super cheap table top with this DIY Wood Color Block Table Top tutorial! This DIY would make a great bench top too.
DIY Wood Color Block Table Top
Hi guys! I’m so excited to share this little 2×4 project with you all today.
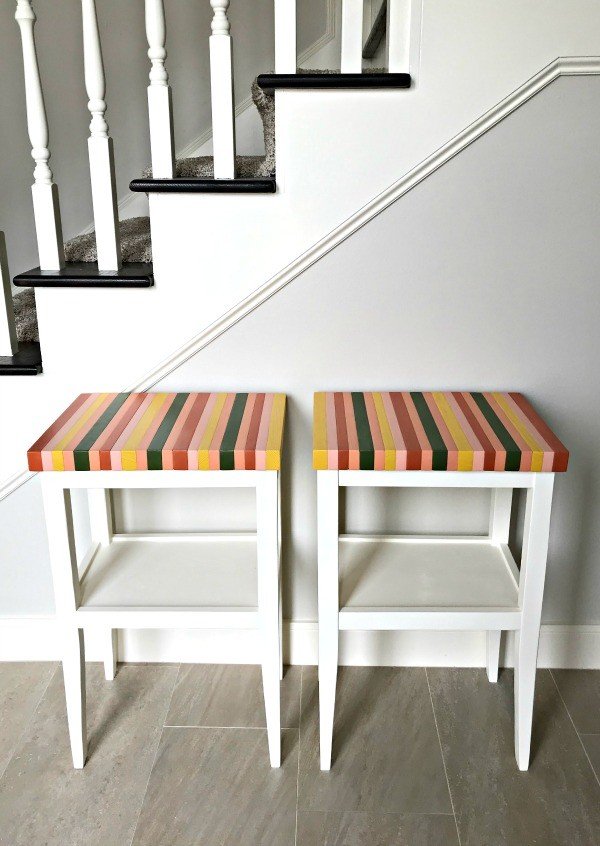
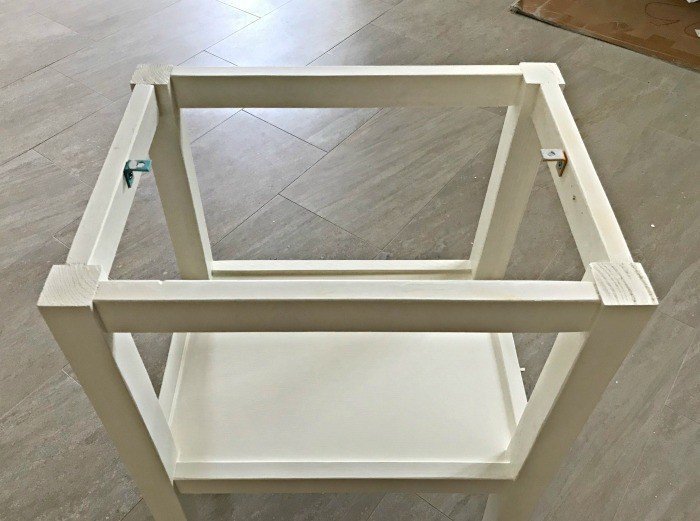
I dreamed up this project a few months ago and thought it’d be a perfect excuse to replace the tops on this $20 DIY Side Table, I shared a couple years ago.
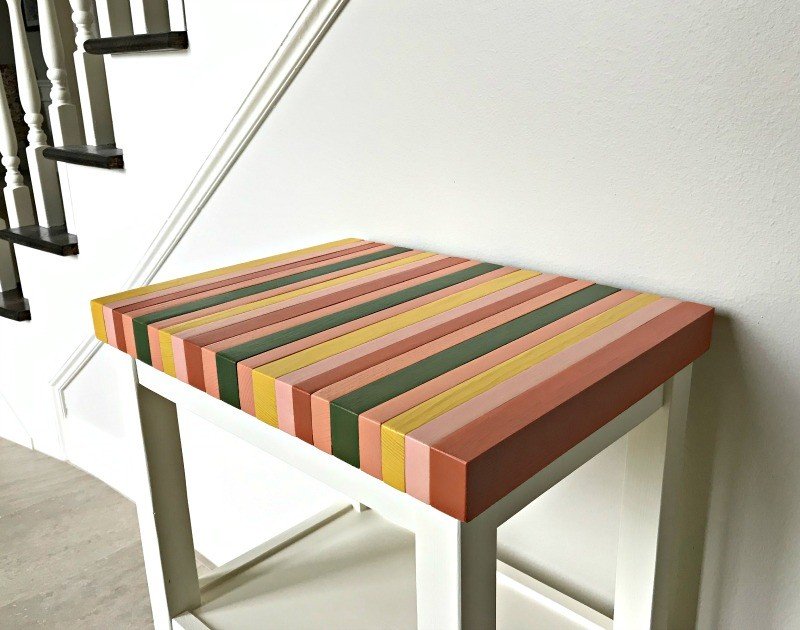
And, I’m loving how the new Wood Color Block Table Top DIY from 2×4’s looks on that Side Table.
Using 2×4’s and a table saw can be a great way to save money on a build.
It’s is a great way for new woodworkers to practice building without spending too much money. And, it can look just as pretty as the expensive wood.
I built these color block table tops for less than $10 each, paint included.
Now, let’s get to those Wood Color Block Table Top Build Steps.
Materials Needed
DIY Note: My Wood Color Block Table Top DIY from 2×4’s is 12 3/4″ x 17 1/4″. You’ll need to adjust the measurements to fit your table.
- 2×4 framing studs
- 2 – 1″ Corner Braces
- Wood Glue & Clamps
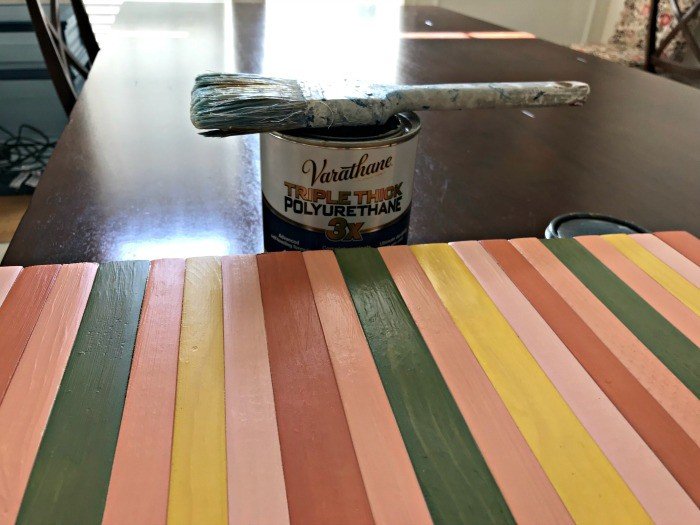
- Water-based Polycrylic or Polyurethane
- Acrylic paints, like this 18 color set
- Floetrol, to thin the paint while maintaining color
- Miter Saw
- Table Saw
- Power Sander, with 60 and 150-grit paper
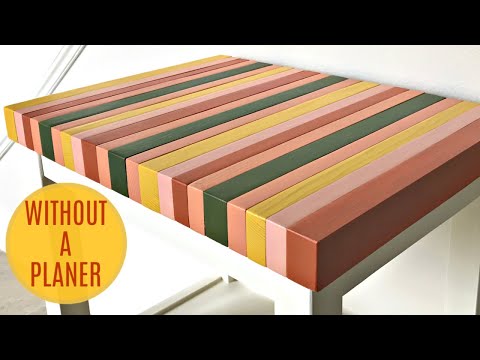
Watch the 5-Minute Build Video
You can find the steps below this video. If any of the steps are confusing, watch this video for a look at the steps.
Wood Color Block Table Top Build Steps
Build Note: You can see me cutting my blocks in the build video above.
Step One
Pick straight, dry 2×4 studs with the least amount of knot holes and dings. Don’t buy pressure treated studs. You want the nicest indoor framing studs because they will be easiest to work with.
I used 2x dimensional lumber because the 1 1/2″ wood gives a pretty, chunky look that I wanted. AND, it’s nice and cheap. I spent about $2.50 per stud. That’s pretty cheap, right!
Step Two
Cut the boards to length with your Miter Saw. I went with 12 3/4″ because I wanted to see the ends of the boards from the front of my tables.
BUT, you could run them the other way too. Try to use a stop block (see video) to easily cut boards the exact same length.
Step Three
Then resaw across the length of the boards on the table saw to get perfectly squared blocks.
Start by cutting 1/4″ off one side to cut the rounded edge off. Then cut 2 – 3/4″ pieces and 1 – 1″ piece from each 12 3/4″ piece.
This gives a nice variation in size and ended up being a safer way to cut the blocks, using my push stick.
Be sure to use every safety precaution when cutting; push sticks, masks, and eye protection are your best friends when using a table saw.
Set your 3/4″ cut up, then make all of those cuts before switching to the 1″ cut. It’ll make the work faster.
Step Four
Sand all of your 3/4″ and 1″ blocks smooth with 60-grit sandpaper. Don’t round off any of the squared edges. AND, don’t sand down the ends too much.
You want to keep the lengths the same. Dust off every piece. Then sand with 150 grit to get a nice smooth finish for this Wood Color Block Table Top DIY from 2×4’s.
Now, dust off every piece again.
Step Five
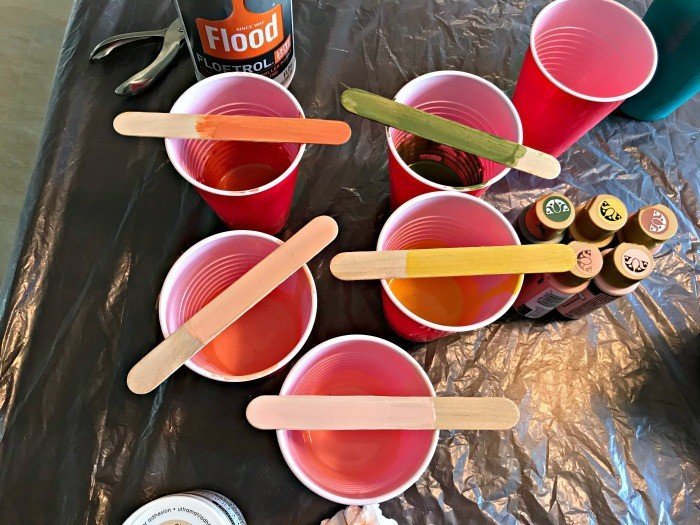
Next, mix about 2 parts floetrol to 1 part acrylic paint. I used floetrol to thin the paint so that the grain would show through while leaving the color rich.
I also hoped the floetrol would not raise the grain on that pine, too much. It did raise it a little on some pieces, but not too much. 🙂
I used craft sticks and plastic cups to prep my paints. I like to hold the craft sticks together to make sure the colors look good together. You can also see me do the same thing with my acrylic paint pour art on canvas.
Getting great looking and matching colors is a big part of loving your final piece. So put a lot of effort in here.
I added some of the darker orange-y color I used to the 2 lighter pinks to help them look better together. It made them look like they were in the same “color family”. If that makes sense. 😉
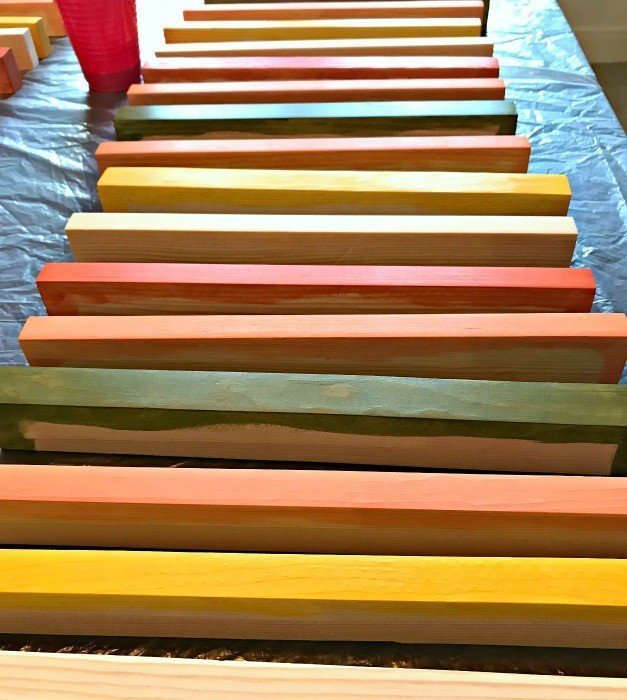
Step Six
Put your blocks in order, then paint each color on the top and ends of the blocks. I also painted on the corners of the tops to make sure I had them completely covered before glueup.
Some colors may need 3 coats to get full coverage, so make sure they’re all covered in an even layer of color before moving to the next step.
Step Seven
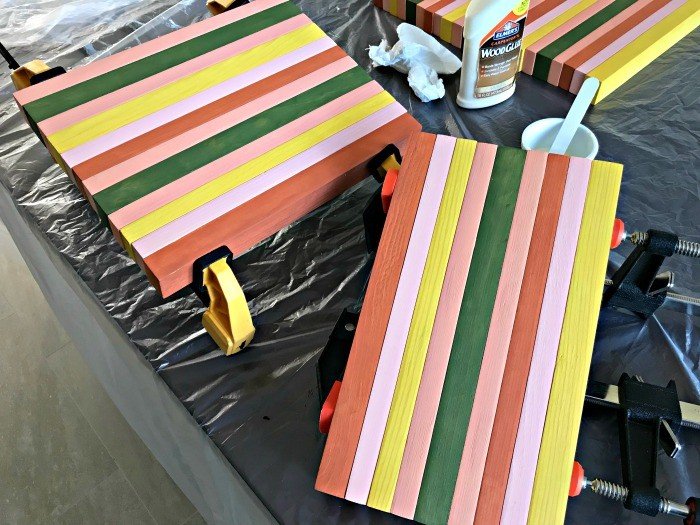
Once the blocks are all painted and dry, you can glue them together. I used this wood glue and a craft stick to spread the glue on each piece, stacking them together as I went.
After each piece, I made sure the top and the front of the table top were as straight as possible. Again, see video for a look at how I did it.
WIPE AWAY ANY GLUE that squeezes out with a damp rag. Try not to use too much glue because you want to keep your painted pieces looking nice.
I ended up gluing my tops in 2 sections because I need longer clamps. Once those 2 sections dried, I glued them together and clamped with my Bessey Strap Clamp. I love that thing!
Step Eight
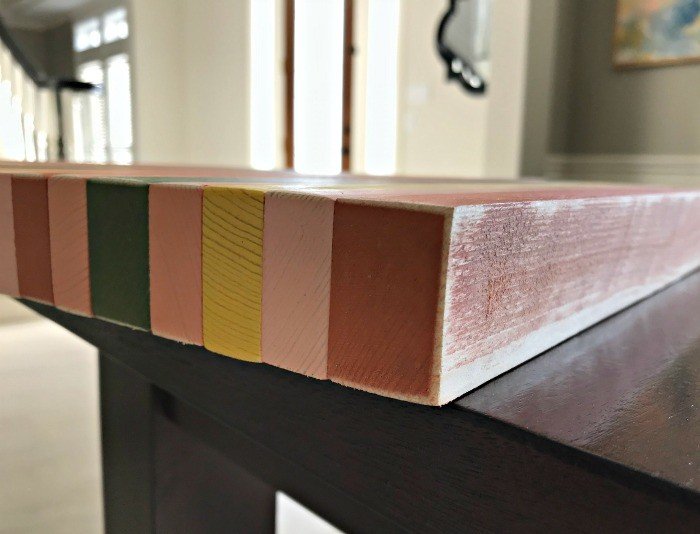
After the table top is glued, you can ligthly sand the corners, if you’d like. Then clean off and touch up the paint. Let that dry. Then apply your favorite water-based polycrylic. 🙂
You can attach your table top with the corner braces once it dries. Yay! You can see the tutorial for building those low cost side tables here.

That’s pretty much it for this DIY Wood Color Block Table Top from 2×4’s tutorial.
More DIY Woodworking Projects For You
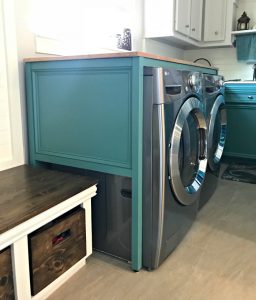
Looking for more woodworking projects? How about this Easy DIY Over Washer and Dryer Laundry Table.
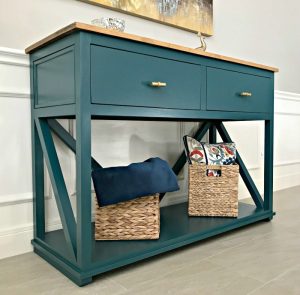
And, check out this DIY Farmhouse Console Table Tutorial.
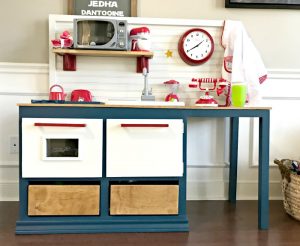
Check out my sweet DIY Play Kitchen for Kids – Easy Build Plan too. Your kids will love it!
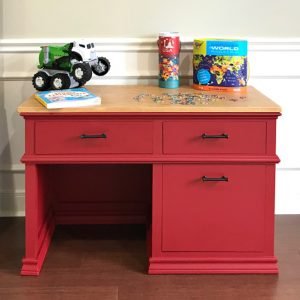
I also LOVE this DIY Childrens Desk Plans with Storage.
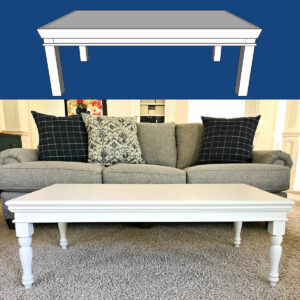
And this easy DIY Coffee Table Build Plans with Turned Legs.
OR, you can find all of my DIY furniture tutorials and build plans here.
Thanks for checking out my DIY Wood Color Block Table Top tutorial. Please let me know if you have questions. Don’t forget to sign up for the Abbotts At Home email newsletter to get DIY, Remodeling, and Crafty ideas in your inbox.

Stephanie Abbott has been remodeling homes, updating & building furniture, and working on DIY home maintenance and cleaning tips for over 20 years. Her remodeling has been featured in Better Homes and Gardens Magazine. And, her DIY YouTube channel has had more than 8 million views.
Most of the DIY tutorials and videos on this site focus on beginner to intermediate level DIY Projects that can be done in an affordable way without high-end, expensive tools. All of the cleaning tips on this website have been tested in her home.