
A random drive through my neighborhood scored me this awesome wooden office chair. But, it needed a lot of love to turn it from trash into a shabby chic beauty.
Today, I have all of the easy to follow details behind this DIY Office Chair Makeover for you.
DIY Office Chair Makeover
Like a lot of people, my family loves cruising through neighborhoods to see what’s going on. Checking out the landscaping and latest new home builds is oddly relaxing and entertaining. Right?
But it’s extra exciting when you find a bit of curbside treasure on the drive. I stumbled across this awesome wooden office chair just as it was put out.
The guy even helped me load it up. How nice is that?!
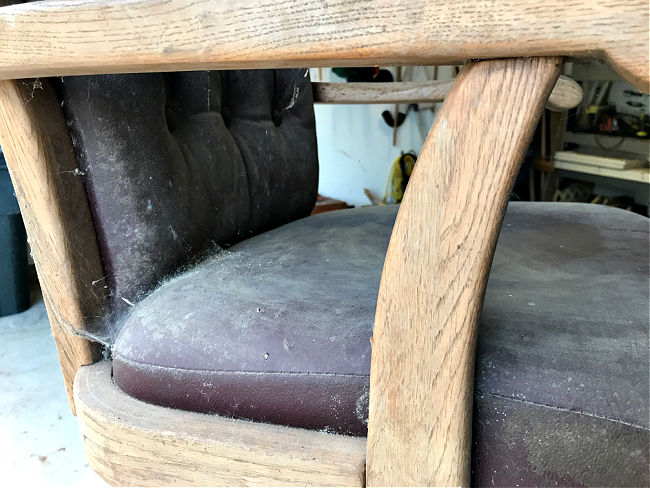
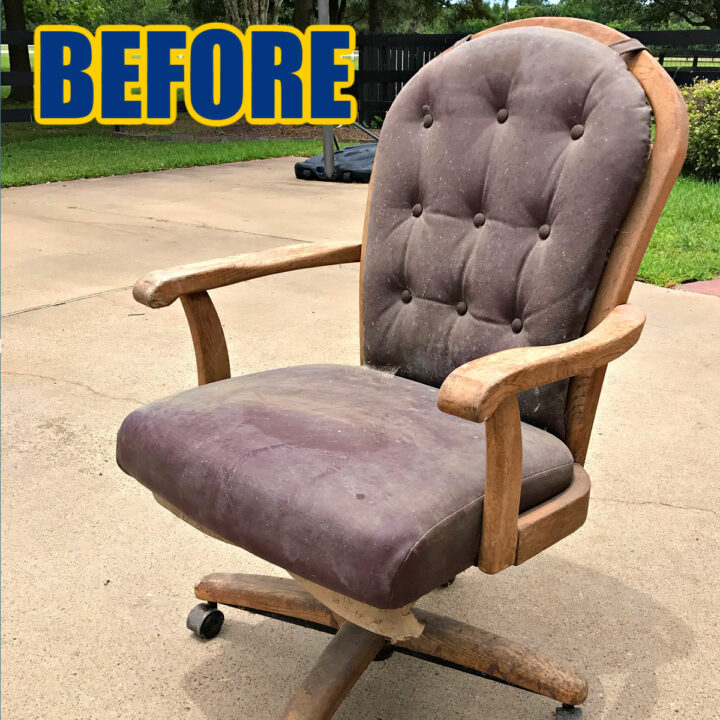
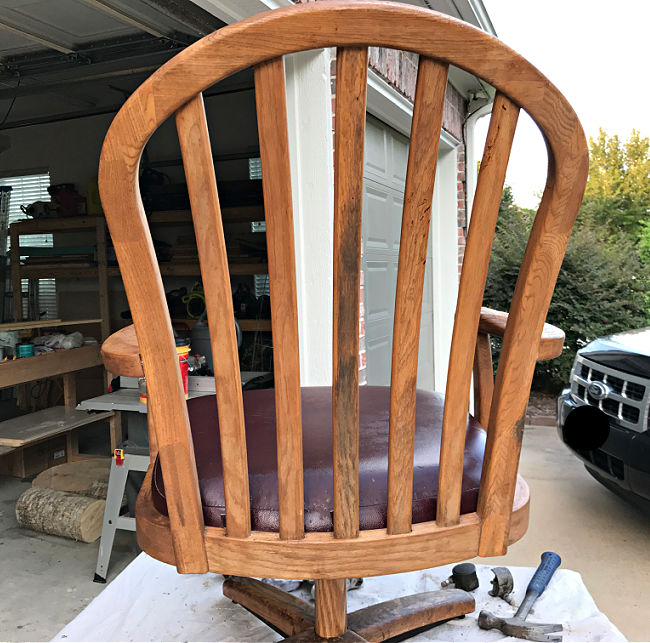
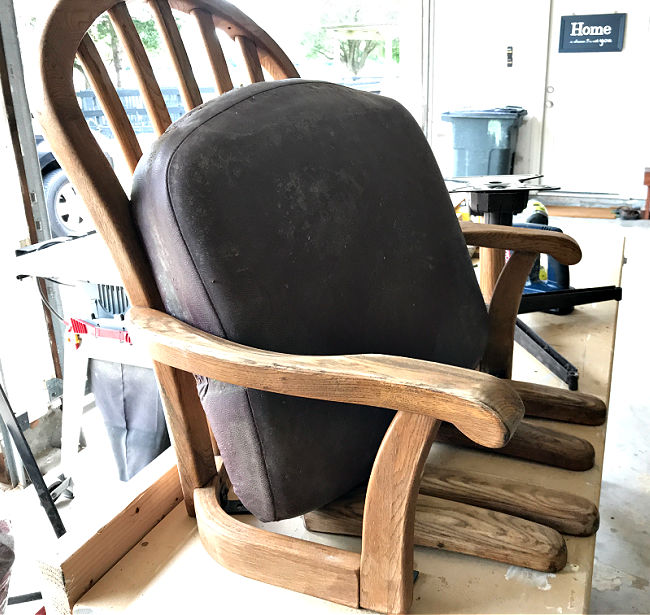
When I unloaded this chair at home, it was covered in dust, rust, and cobwebs. It looked like it had probably lived in someone’s barn for a few years.
Before Chair Makeover Photos
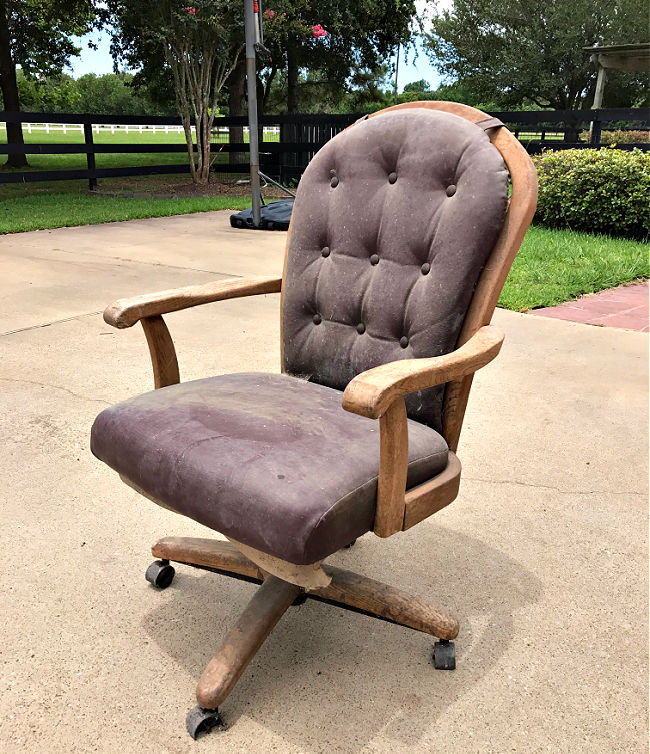
Two of the roller wheels were even broken. BUT the best part was that the chair was actually in excellent condition. The wooden frame was perfect, nothing loose or damaged. So, I knew this DIY office chair makeover would be pretty easy.
And finding this chair is such a great coincidence. When we moved from Egypt back to the US, we literally had no furniture.
It was a little chaotic and expensive trying to furnish a new house, while remodeling it, and getting ready for our first baby.
I originally bought a cheap desk chair and it was so uncomfortable. So, I needed this office chair as much as it needed me. I can’t believe I found this great piece on someone’s curb. Can you?
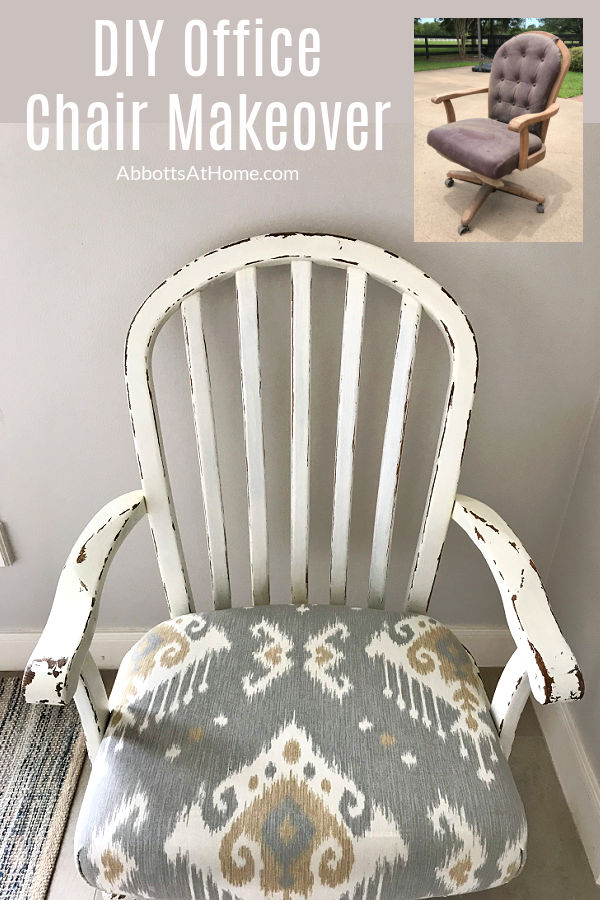
This DIY Office Chair Makeover turned out even more beautiful than I had hoped. Let’s get started on how I restored this dirty worn out wooden office chair.
DIY Office Chair Makeover – Quick Step Guide
Here’s a quick overview of the steps I used in this DIY Office Chair Makeover. Detailed explanations of each step are below.
- Clean off all of that built up dirt and grime.
- Take apart the office chair frame.
- Paint or stain the wooden frame.
- Reupholster the cushion seat and back.
- Replace the office chair roller wheels.
Materials for this DIY Office Chair Makeover
- New upholstery fabric, I used this Magnolia Home Fabric. Check out more beautiful and trendy fabric finds here.
- Staple Gun and staples
- Needle Nose Pliers, Hammer, Screw Driver
- Wood cleaner
- Chalk Paint, I used Behr’s Polished Pearl mixed into a chalk paint with my recipe
- Vaseline
- Rust-oleum Matte Varathane
- 120-grit sandpaper or sanding block
How to Clean Dirty Wood Furniture
I like to use this easy homemade wood cleaner on dirty wood furniture. This cleaner worked amazingly well. Even on this super dirty office chair. You can also use store-bought cleaners that are safe for wood and metal.
I dusted off all of the loose dirt with a dry rag first. Then I use the cleaner with scrap rags or paper towels to really scrub off all the built up dirt. Keep switching to clean rags or paper towels as they get too dirty to use.
To make my favorite homemade furniture cleaner, mix 3/4 cup olive oil, 1/4 cup distilled white vinegar, and 1 tbsp of lemon juice. I mix and keep mine in mason jars or anything with a tight lid. Shake it up before each use.
You need to clean old thrift store or curb side furniture finds to get a good look at what needs to be done to restore and refinish it. Once this chair was clean I was ready for the next step in this DIY Office Chair Makeover.
Taking My Office Chair Apart
After cleaning my office chair, I removed the roller wheels. They should be pretty easy to pull out with a glove or pliers to protect your hand.
Then, I flipped the chair upside down and removed the seat. The seat on my chair was held on with screws. So, it was easy to unscrew those to remove the seat.
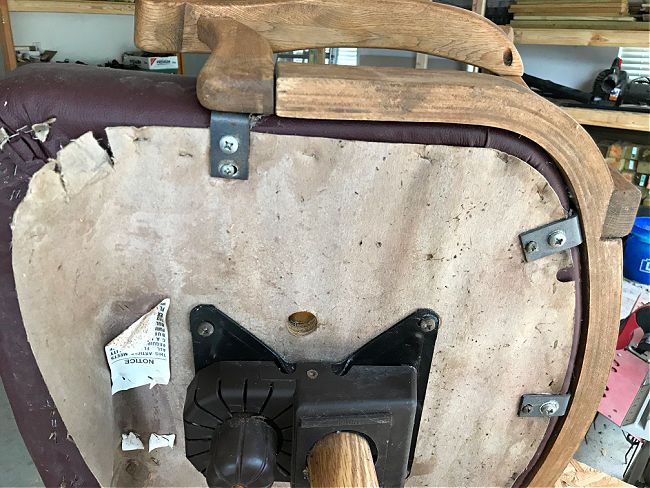
I also removed the screws that were holding the wood caps on the legs. I also unscrewed the seat back from the bottom of the office chair frame. Removing those made it easier to paint and distress the wood pieces.
If any of the screws are rusty, buy matching screws to replace them, for assembly later. Take the old screw to the hardware store to find an exact match in width and length.
Now, I was ready to move onto the painting step of this DIY Office Chair Makeover.
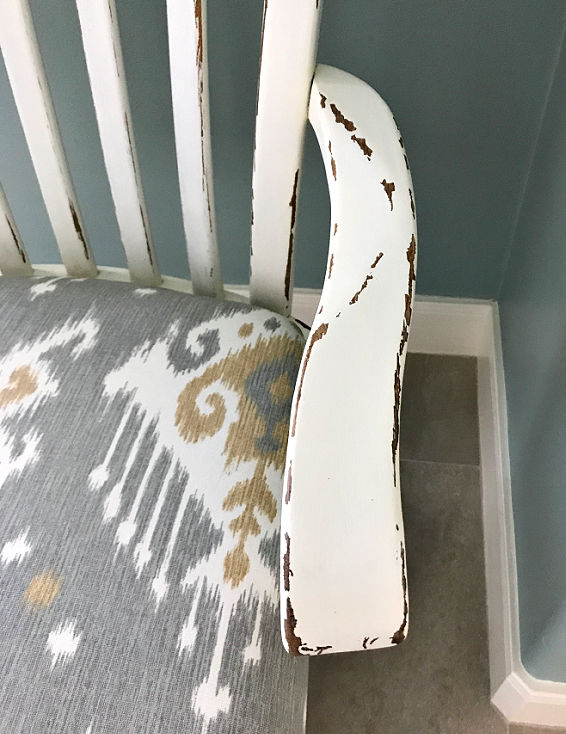
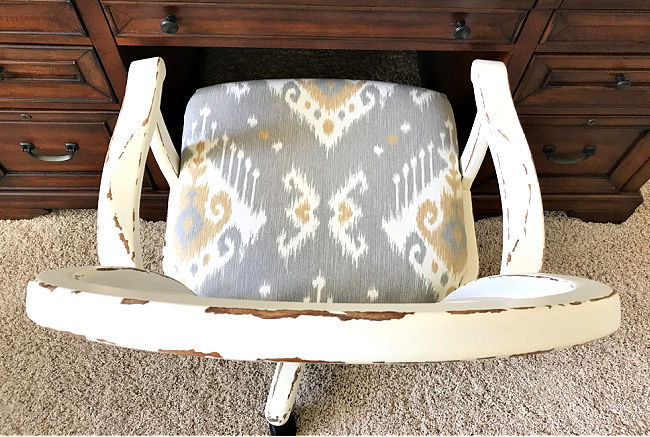
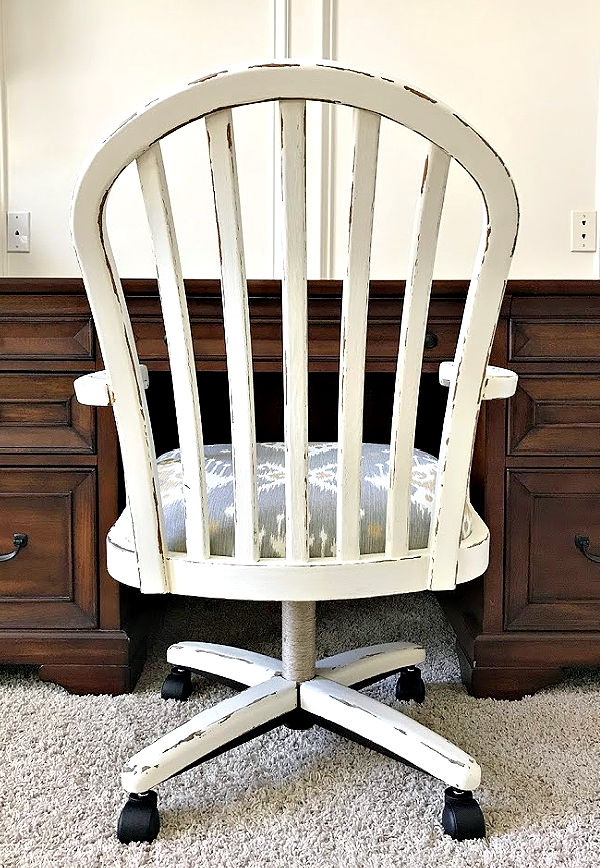
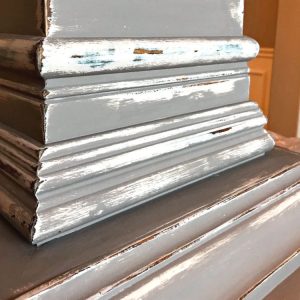
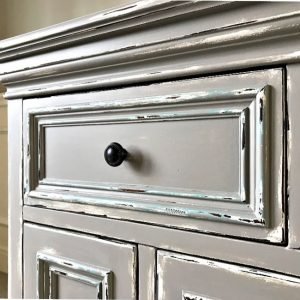
DIY Shabby Chic Distressed Paint Look
I wanted a shabby chic distressed paint look for this DIY office chair makeover. I thought that chippy white chalk paint over stain would look great with the fabric I picked out for the seat.
How to Get this Shabby Chic Look
If necessary, strip off old varnish or paint. I was able to just sand my wooden pieces with 120-grit sandpaper. It was pretty smooth already.
Apply Vaseline on edges and raised areas that would naturally get chipped or worn with use. You can use a Q-tip or your finger tip to apply the Vaseline.
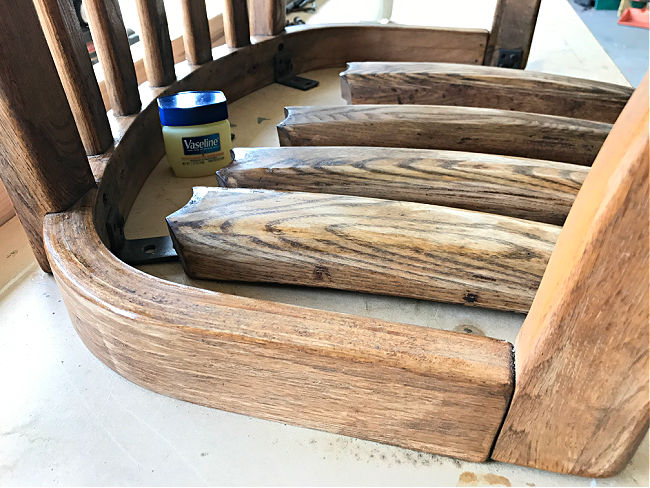
The Vaseline will stop the chalk paint from bonding to the furniture anywhere you apply it. So, be sure to only use it where you want to reveal stain later.
Next, I painted all of the wood with 3 layers of chalk paint to get a fully covered finish. Allow proper drying between layers. If you want to save money, you can use this DIY chalk paint recipe from latex paint. That homemade chalk paint works just like the pricey store bought chalk paint.
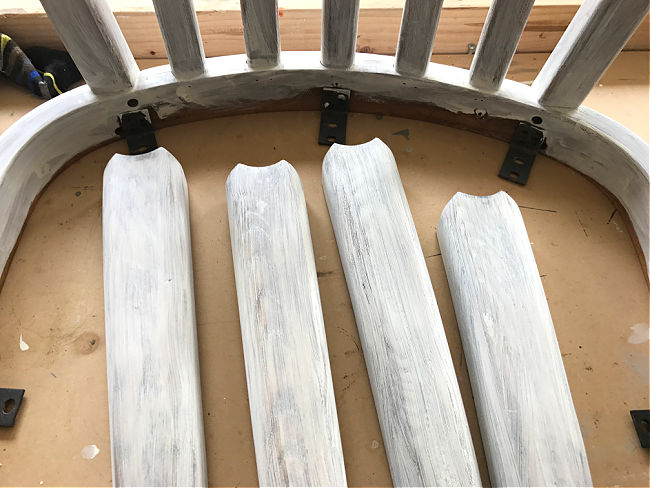
Once the last layer of chalk paint dries, distress the areas you put Vaseline on with a slightly damp sanding block. Wet sanding is one of my favorite tricks for getting a super smooth finish with chalk paint too.
Stop distressing a spot when you like the amount of stain showing through. Distressing furniture is all about personal preference. Some people like just a little stain showing through. Some people love that super distressed vintage look.
Wipe off all of the chalk paint residue with a clean, damp rag. Then protect all of the wood with 2-3 coats of polyurethane. I love the Matte finish and extra smooth feel of this fast-drying Matte Urethane.
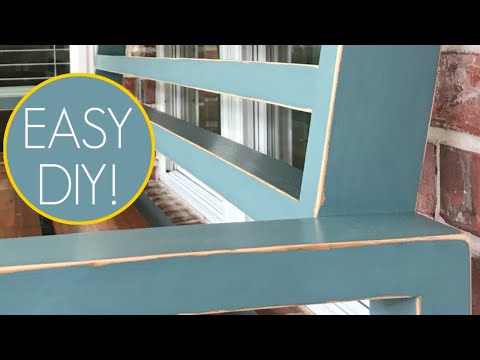
See A DIY Video With A Similar Look
I did this DIY Office Chair Makeover before I started my YouTube Channel. But, if you want to see an example of how I use vaseline, stain, and chalk paint to get a layered, distressed look watch this video. You can find the written steps for that DIY Distressed Blue Chalk Paint Makeover here.
How to Upholster an Office Chair Seat Cushion
OK, we’re getting close to the end of this DIY Office Chair Makeover. Yay! it’s time to reupholster the seat cushion.
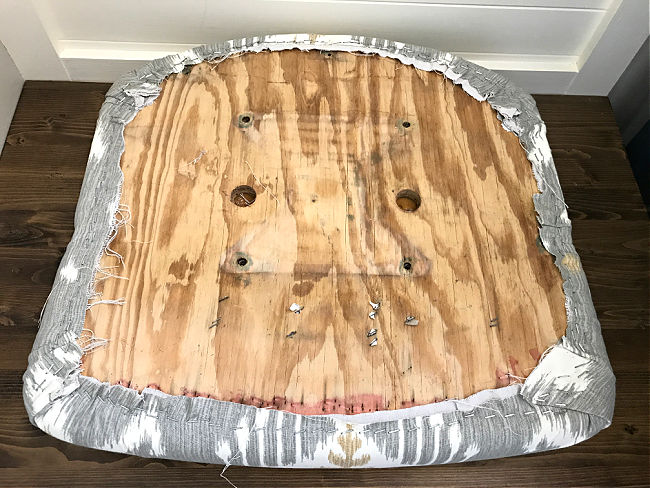
Remove the old fabric from the seat cushion with needle nose pliers. Decide whether or not the foam needs to be replaced.
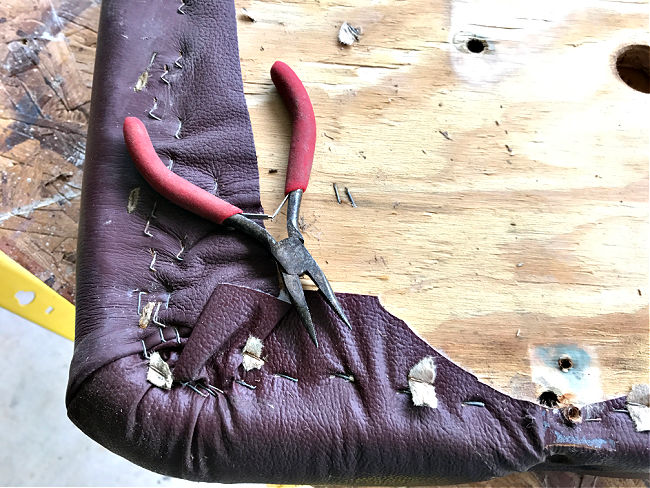
I was lucky, this foam was in great condition. Probably because the old fabric was leather, so an extra thick and mostly waterproof protector.
To be doubly-safe, I put a layer of a clean, thick cloth drop cloth between the fabric and old foam on the chair seat cushion.
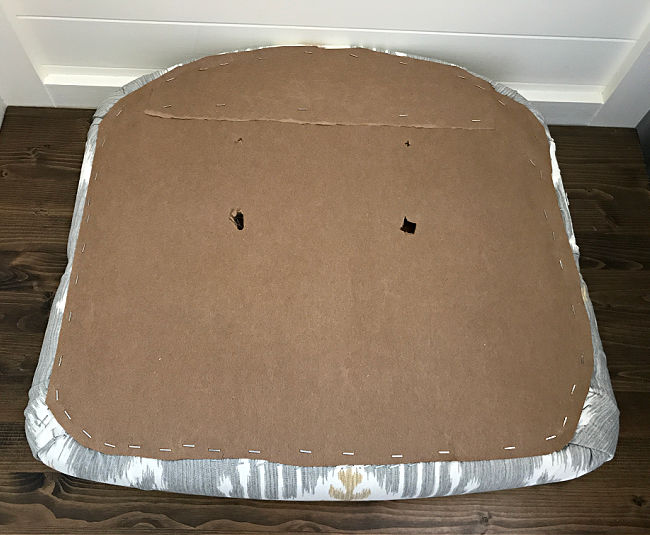
Line up the fabric pattern with the seat before stapling. Staple the center of one side, pulling tightly as you go. Do not staple corners until the 4 sides are finished. Staple the middle of the opposite side next. Again, be sure to pull tight. Do the same for the other 2 sides.
Make sure to use a lot of staples. Don’t leave gaps between staples. This will stop the fabric from ripping in spots that are trying to hold the fabric in place by too few staples.
Staple the corners, paying attention to how you want the fabric to fold at the corners. Make those corners match and always pull them tight for a professional look.
Once everything is completely stapled, trim any excess fabric. Then add a thick paper liner across the bottom. This prevents thread and fabric from being visible.
You can protect the fabric with Scotch Guard to keep it looking nice longer.
Reassemble the Office Chair
After cleaning, painting, and upholstering the seat cushion, the last step in this DIY Office Chair Makeover is to put everything back together.
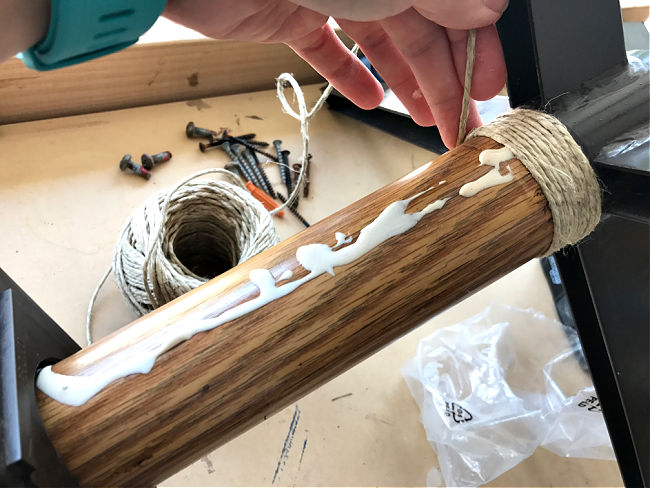
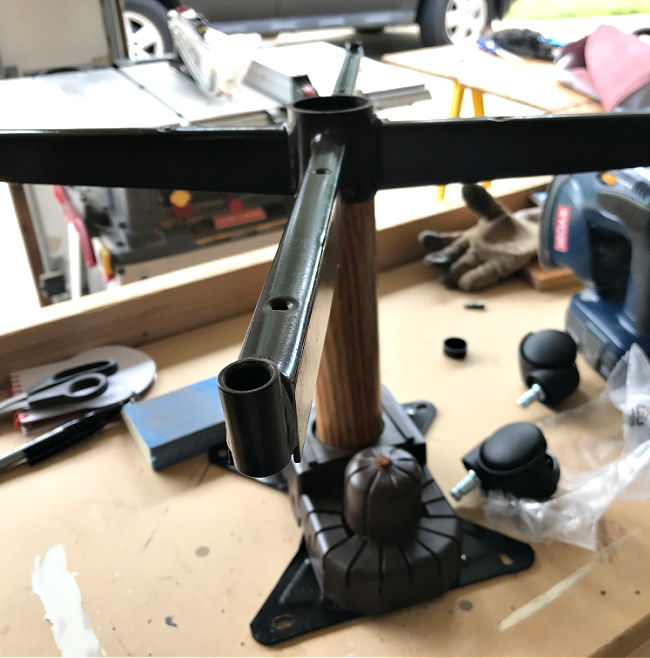
Before assembly, I wrapped my post with a jute twine. I used a mix of spray adhesive and Elmer’s Glue to hold it in place.
Then, working backwards from the way I took it apart, I screwed all of the pieces back on. So, I attached the seat to the lower base of the office chair. Then I screwed the wood caps onto the legs.
The last bit of assembly was to replace the office chair caster, or roller wheels.
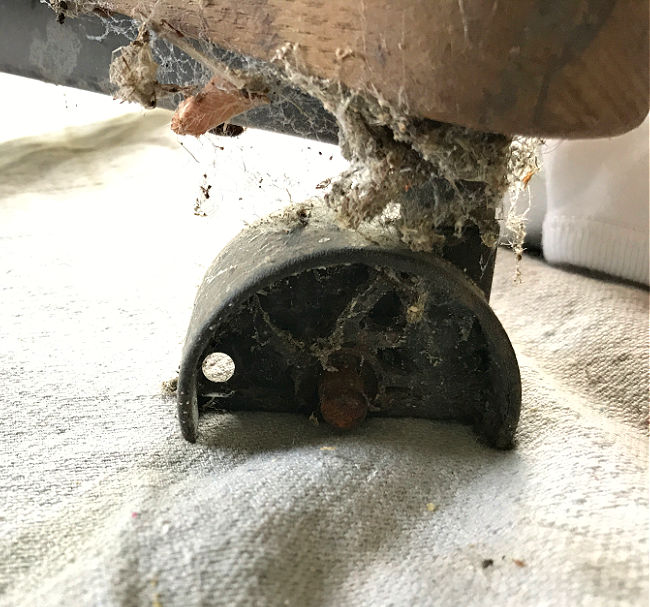
Can you Replace Office Chair Wheels
Yes! Fixing roller wheels, also called casters, on an office chair is shockingly easy. Did you know that the roller wheels on office desk chairs are generally a universal size??
That universal size makes fixing roller wheels as easy as pulling out the old ones and popping in new ones. I was able to pull my casters, or wheels off with just my hands. But, you can use pliers to grip onto the old wheels if they are a little stuck.
Before putting in the new wheels, clean out the slot for the wheels with a Q-tip and a little cleaner. Then, just push the new office chair roller wheels into place. If they don’t go in easily, just pound a bit with a rubber mallet. Seriously easy, right?!
I used these chair roller wheels, they are very durable and glide easily on thick carpet. You can find lots of great replacement roller wheels on Amazon. Pick the one with the look you like.
Scroll down for a printable version of this tutorial.
That’s it for this DIY Office Chair Makeover! Time to enjoy that new-to-you office chair!
More DIY Projects For You
Check out the tutorial and video for this No Sew Upholstered Bench Seat.
I love this DIY White and Grey Distressed Chalk Paint Furniture Makeover.
And, this great DIY Gray Distressed Furniture Makeover.
This How to Patina Paint Faux Metal Finishes Tutorial is a fun way to make or update decor and furniture.
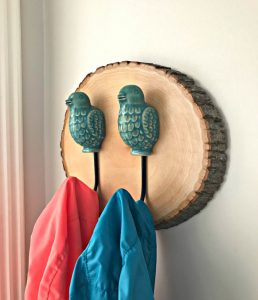
Try this easy Wood Slice Wall Hook DIY that looks so great in our kitchen!
Feeling inspired? Get out there and do your own DIY Office Chair Makeover. Have fun and let me know if you have questions. Or post pictures of your work and tag Abbotts At Home on FB, I’d love to see it!
DIY Office Chair Makeover
Try this beautiful DIY Office Chair Makeover. Easy steps for new cushion upholstery, paint, and how to replace roller wheels on a chair.
Tools
- Screwdriver
- White Chalk Paint
- Vaseline
- Water-based Polyurethane
- Wood Safe Cleaner
Instructions
DIY Office Chair Makeover - Quick Step Guide
Here's a quick overview of the steps I used in this DIY Office Chair Makeover. Detailed explanations of each step are below.
- Clean off all of that built up dirt and grime.
- Take apart the office chair frame.
- Paint or stain the wooden frame.
- Reupholster the cushion seat and back.
- Replace the office chair roller wheels.
How to Clean Dirty Wood Furniture
I like to use this easy homemade wood cleaner on dirty wood furniture. This cleaner worked amazingly well. Even on this super dirty office chair. You can also use store-bought cleaners that are safe for wood and metal.
I dusted off all of the loose dirt with a dry rag first. Then I use the cleaner with scrap rags or paper towels to really scrub off all the built up dirt. Keep switching to clean rags or paper towels as they get too dirty to use.
To make my favorite homemade furniture cleaner, mix 3/4 cup olive oil, 1/4 cup distilled white vinegar, and 1 tbsp of lemon juice. I mix and keep mine in mason jars or anything with a tight lid. Shake it up before each use.
You need to clean old thrift store or curb side furniture finds to get a good look at what needs to be done to restore and refinish it. Once this chair was clean I was ready for the next step in this DIY Office Chair Makeover.
Taking My Office Chair Apart
After cleaning my office chair, I removed the roller wheels. They should be pretty easy to pull out with a glove or pliers to protect your hand.
Then, I flipped the chair upside down and removed the seat. The seat on my chair was held on with screws. So, it was easy to unscrew those to remove the seat.
I also removed the screws that were holding the wood caps on the legs. I also unscrewed the seat back from the bottom of the office chair frame. Removing those made it easier to paint and distress the wood pieces.
If any of the screws are rusty, buy matching screws to replace them, for assembly later. Take the old screw to the hardware store to find a good match.
Now, I was ready to move onto the painting step of this DIY Office Chair Makeover.
DIY Shabby Chic Distressed Paint Look
I wanted a shabby chic distressed paint look for this DIY office chair makeover. I thought that chippy white chalk paint over stain would look great with the fabric I picked out for the seat.
How to Get this Shabby Chic Look
If necessary, strip off old varnish or paint. I was able to just sand my wooden pieces with 120-grit sandpaper. It was pretty smooth already.
Apply Vaseline on edges and raised areas that would naturally get chipped or worn with use. You can use a Q-tip or your finger tip to apply the Vaseline.
The Vaseline will stop the chalk paint from bonding to the furniture anywhere you apply it. So, be sure to only use it where you want to reveal stain later.
Next, I painted all of the wood with 3 layers of chalk paint to get a fully covered finish. Allow proper drying between layers. If you want to save money, you can use this DIY chalk paint recipe from latex paint. That homemade chalk paint works just like the pricey store bought chalk paint.
Once the last layer of chalk paint dries, distress the areas you put Vaseline on with a slightly damp sanding block. Wet sanding is one of my favorite tricks for getting a super smooth finish with chalk paint too.
Stop distressing a spot when you like the amount of stain showing through. Distressing furniture is all about personal preference. Some people like just a little stain showing through. Some people love that super distressed vintage look.
Wipe off all of the chalk paint residue with a clean, damp rag. Then protect all of the wood with 2-3 coats of polyurethane. I love the Matte finish and extra smooth feel of this fast-drying Matte Urethane.
How to Upholster an Office Chair Seat Cushion
OK, we're getting close to the end of this DIY Office Chair Makeover. Yay! it's time to reupholster the seat cushion.
Remove the old fabric from the seat cushion with needle nose pliers. Decide whether or not the foam needs to be replaced.
I was lucky, this foam was in great condition. Probably because the old fabric was leather, so an extra thick and mostly waterproof protector.
To be doubly-safe, I put a layer of a clean, thick cloth drop cloth between the fabric and old foam on the chair seat cushion.
Line up the fabric pattern with the seat before stapling. Staple the center of one side, pulling tightly as you go. Do not staple corners until the 4 sides are finished. Staple the middle of the opposite side next. Again, be sure to pull tight. Do the same for the other 2 sides.
Make sure to use a lot of staples. Don't leave gaps between staples. This will stop the fabric from ripping in spots that are trying to hold the fabric in place by too few staples.
Staple the corners, paying attention to how you want the fabric to fold at the corners. Make those corners match and always pull them tight for a professional look.
Once everything is completely stapled, trim any excess fabric. Then add a thick paper liner across the bottom. This prevents thread and fabric from being visible.
You can protect the fabric with Scotch Guard to keep it looking nice longer.
Reassemble the Office Chair
After cleaning, painting, and upholstering the seat cushion, the last step in this DIY Office Chair Makeover is to put everything back together.
Before assembly, I wrapped my post with a jute twine. I used a mix of spray adhesive and Elmer's Glue to hold it in place.
Then, working backwards from the way I took it apart, I screwed all of the pieces back on. So, I attached the seat to the lower base of the office chair. Then I screwed the wood caps onto the legs.
The last bit of assembly was to replace the office chair caster, or roller wheels.
Can you Replace Office Chair Wheels
Yes! Fixing roller wheels, also called casters, on an office chair is shockingly easy. Did you know that the roller wheels on office desk chairs are generally a universal size??
That universal size makes fixing roller wheels as easy as pulling out the old ones and popping in new ones. I was able to pull my casters, or wheels off with just my hands. But, you can use pliers to grip onto the old wheels if they are a little stuck.
Before putting in the new wheels, clean out the slot for the wheels with a Q-tip and a little cleaner. Then, just push the new office chair roller wheels into place. If they don't go in easily, just pound a bit with a rubber mallet. Seriously easy, right?!
I used these chair roller wheels, they are very durable and glide easily on thick carpet. You can find lots of great replacement roller wheels on Amazon. Pick the one with the look you like.
That's it for this DIY Office Chair Makeover! Time to enjoy that new-to-you office chair!

Stephanie Abbott has been remodeling homes, updating & building furniture, and working on DIY home maintenance and cleaning tips for over 20 years. Her remodeling has been featured in Better Homes and Gardens Magazine. And, her DIY YouTube channel has had more than 8 million views.
Most of the DIY tutorials and videos on this site focus on beginner to intermediate level DIY Projects that can be done in an affordable way without high-end, expensive tools. All of the cleaning tips on this website have been tested in her home.