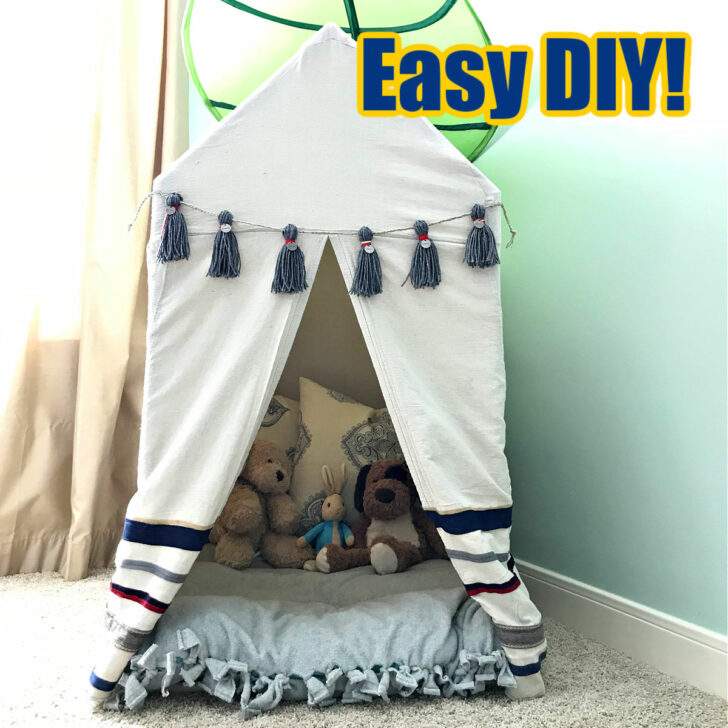
Build a FUN & Easy DIY Kids PVC Pipe Tent Frame and Drop Cloth Tent Cover with these simple steps and a short video.
How To Make A Kids PVC Pipe Tent
I built the original version of this kids PVC Pipe Tent a few years ago. It’s been a favorite play place for my kids ever since.
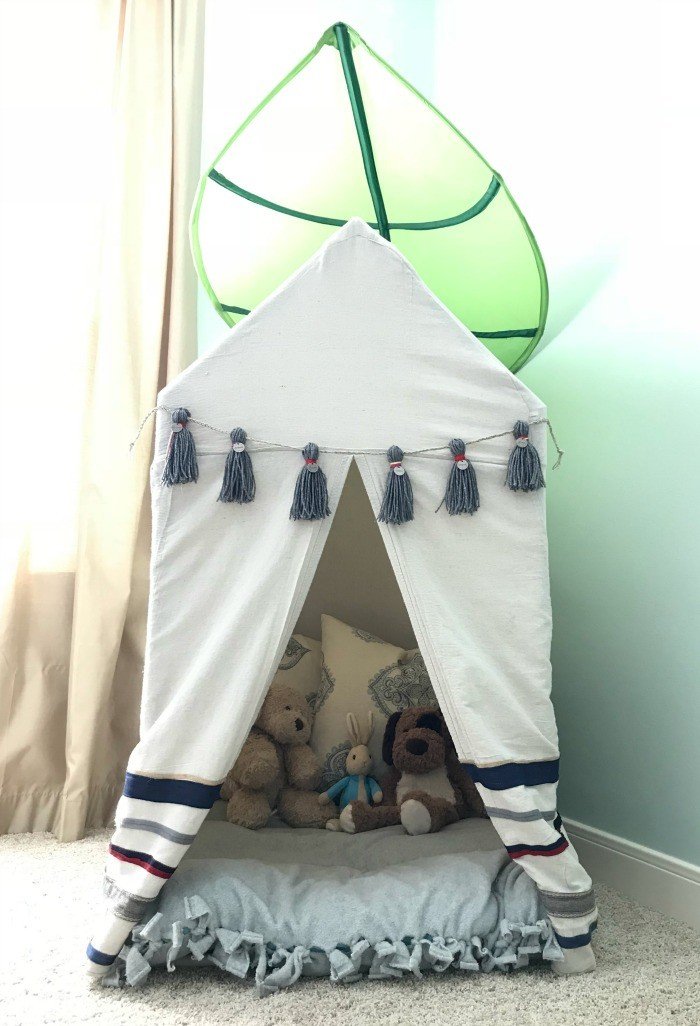
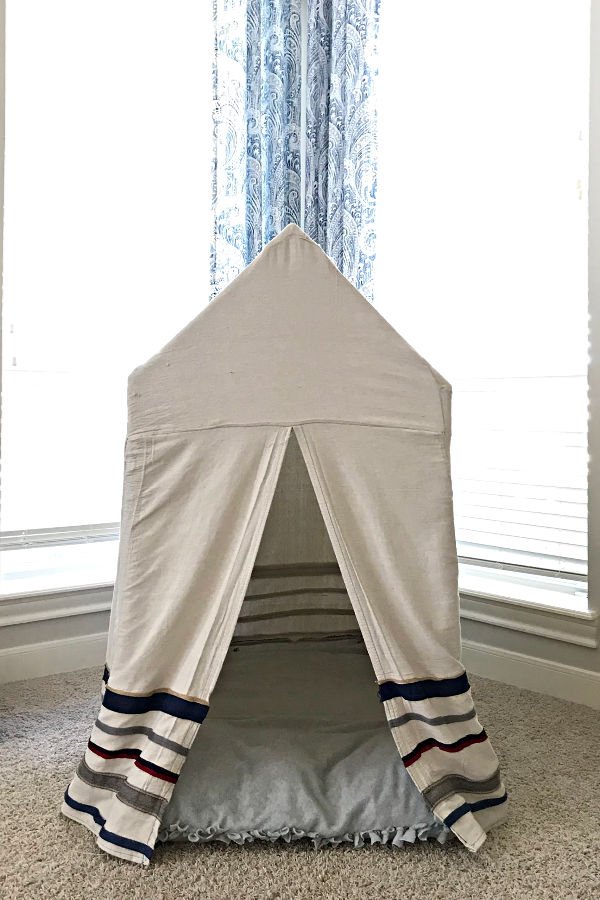
Now I’m giving the kids’ bedroom a bit of an update. So, I decided to give the tent a new Camp Blanket look. What do you think?
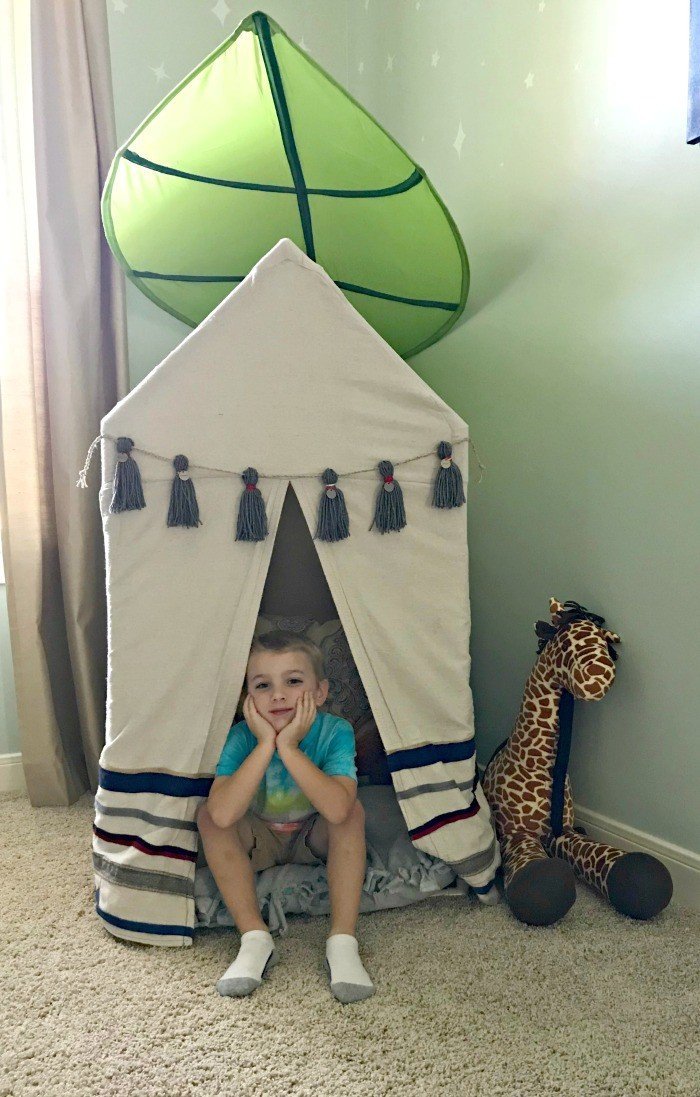
I love sharing my plans with all of you. Especially when it’s for something this fun! This tent is big enough to hold 2 kids with lots of toys or books.
But it’s small enough to push through standard door frames. So, no need to take it apart when you need to move it. Yea!
In fact, when I built this tent 3-years ago, I skipped the glue. But, eventually my kids figured out they could take it apart.
So, I recommend using gorilla glue or PVC cement now. Unless you want 30 pieces of PVC laying around your house. 😉
Easy DIY Kids Tent Frame Video
If any of the written steps are confusing, watch this video for a short build overview, my favorite glue, and how I decorated our tent. 🙂
OK, let’s get started with this kids PVC pipe tent build!
Materials Needed
- Pipes
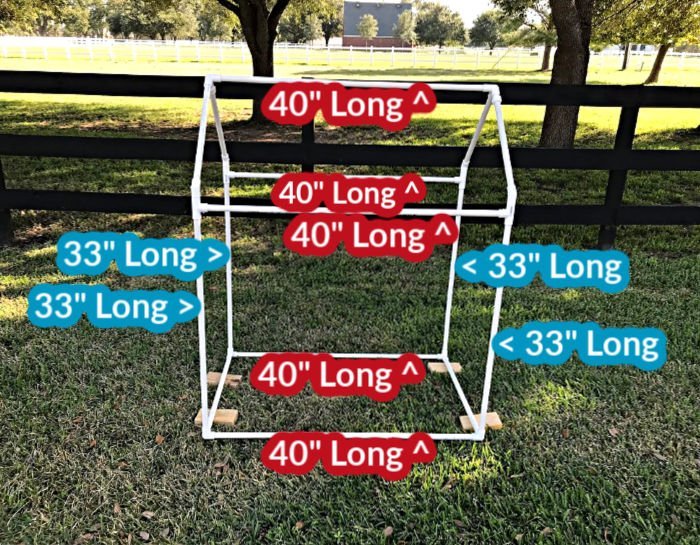
- 5 – 40″ long pieces of 1/2″ PVC Pipe (sides on floor, sides of the roof and top of roof)
- 4 – 33″ long pieces of 1/2″ PVC Pipe (walls)
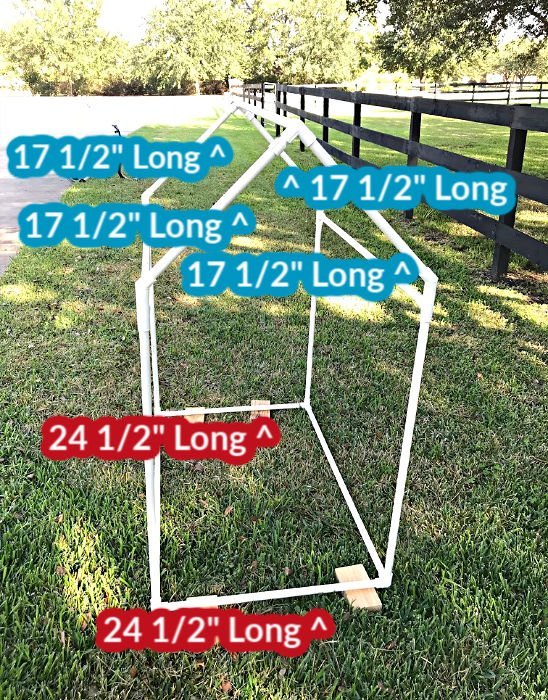
- 2 – 24 1/2″ long pieces of 1/2″ PVC Pipe (front and back floor pieces)
- 4 – 17 1/2″ long pieces of 1/2″ PVC Pipe (roof)
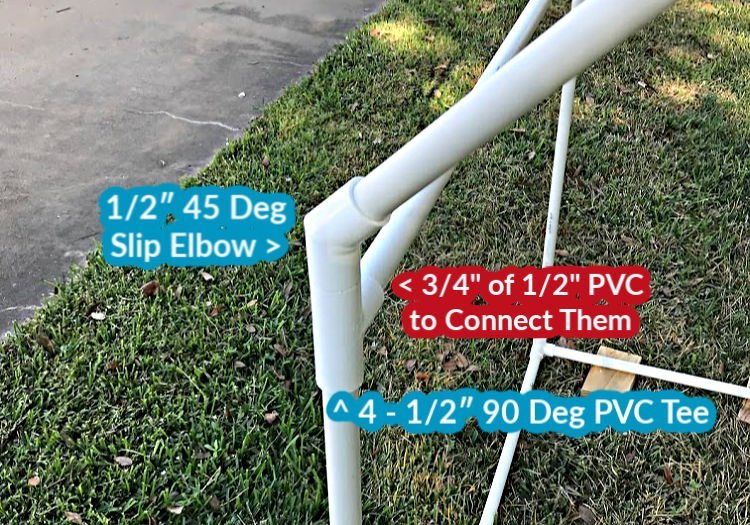
- 4 – 3/4″ long pieces of 1/2″ PVC Pipe (connects 2 fittings where walls and roof meet) (Not in Picture)
- Fittings
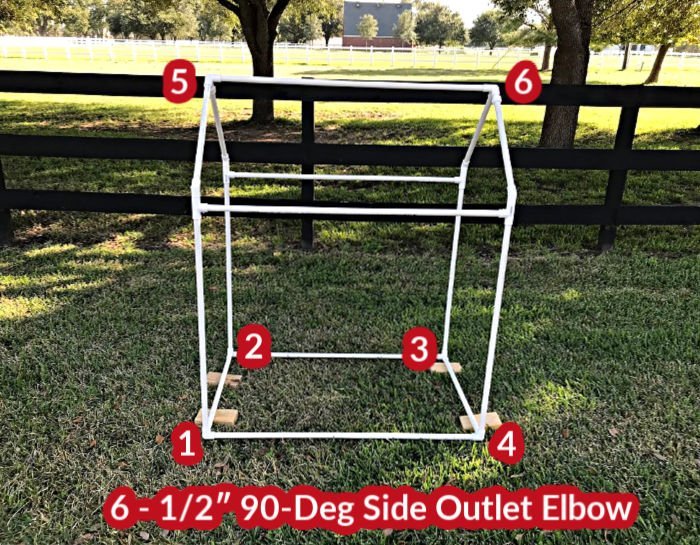
- 6 – 1/2″ 90-Degree PVC Sch 40 Side Outlet Elbow (all three sides non-threaded) (4 floors at corners and 2 at roof)
- 4 – 1/2″ 90-Degree PVC Sch 40 Tee (top of each wall, top of this gets half of the 3/4″ piece of pipe)
- 4 – 1/2″ 45-Degree PVC Sch 40 Slip Elbow (on top of each tee, connected to that 3/4″ piece of pipe)
Other Items Needed
- A quick and easy pipe cutter
- Paint to match your cover and hide the writing on the PVC
- Spray Polyurethane
Directions for this DIY Kids Tent Build
Step One
Make your cuts using the measurements above. You can watch this short video to see how I cut PVC pipes, the easy way, below.
Step Two
Assemble the frame, with or without glue in the joints, according to the notes on the measurements and the diagrams below. Let the glue dry for 30 minutes or so.
Step Three
Spray paint the whole frame. This will probably take 4 different coats to cover each area. Then spray with the polyurethane to protect that paint finish. Now you should have a completed frame.
Materials for the Canvas Cover for the Kids PVC Pipe Tent
Note: If you can’t sew, don’t have a sewing machine, or want to save time, I have 2 ideas for you!
- You can just drape a large drop cloth over the frame, kids fort-style.
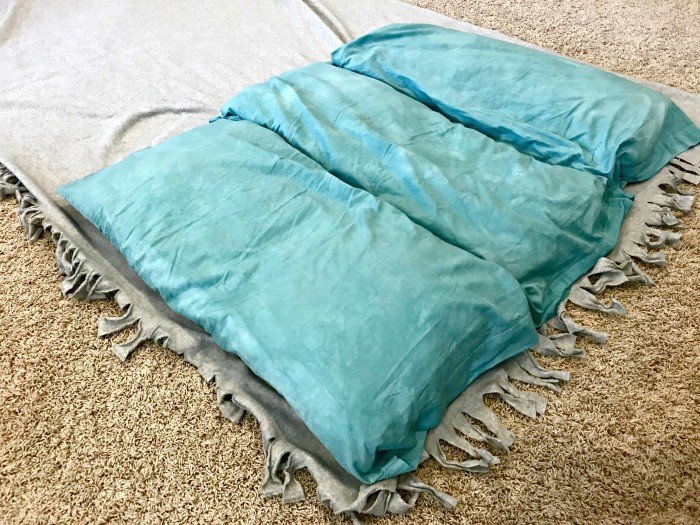
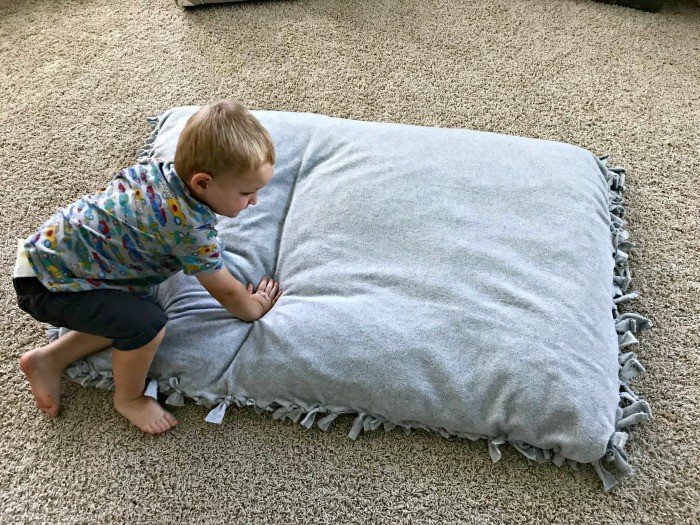
- My original cover was fleece just tied together at the seems. Like the grey pillow cover below.
- 9′ x 12′ drop cloth canvas, 8 oz. or higher cotton
- A Sewing Machine, mine is extremely easy to use and set up. With a step by step picture guide for threading.
- Thread and Ribbon for sewing and decorating the tent

RECOMMENDED: DIY Kids Activity Wall Board & 20 Fun Ways to Use It!
Directions for the Canvas Cover
My sewing skills are pretty average. I just sew straight lines. So, most people with a sewing machine should be able to do this.
But, this isn’t a sewing skills lesson. So, this assumes you already have a general idea how to sew things. Sorry, I don’t have any pictures of pinning the cloth. It’s pretty basic. 🙂
- Wash the fabric on a gentle cycle and dry. This will get it clean for the kiddos and pre-shrink it.
- Cut one long strip of the drop cloth to cover the side walls and roof. Be sure to leave a few extra inches on each side and the bottom.
- Drape that strip bad side out, across the frame. Measure and cut a single piece for the back of the kids pvc pipe tent.
- Turn that back piece bad side out and pin it to the longer strip across the whole back area. You want it to fit somewhat loosely.
- Sew those 2 pieces together and remove pins
- Put the canvas back onto the frame, bad side out again.
- I cut the top section for the tent entrance from a part of the canvas that already had a hem. Saves you work and gives you a pretty hem to work with.
- I cut 2 sides to create the opening. I used the existing hem on the canvas again for the opening.
- Pin those sides to the top, then pin that to the original long strip to finish the tent.
- Sew and remove pins.
- Now, hang that tent on the frame, bad side out again. Pin a bottom hem all around.
- Sew your hem and remove pins.
- Now you can pick your favorite ribbons to mix and match and sew along the bottom of the tent.
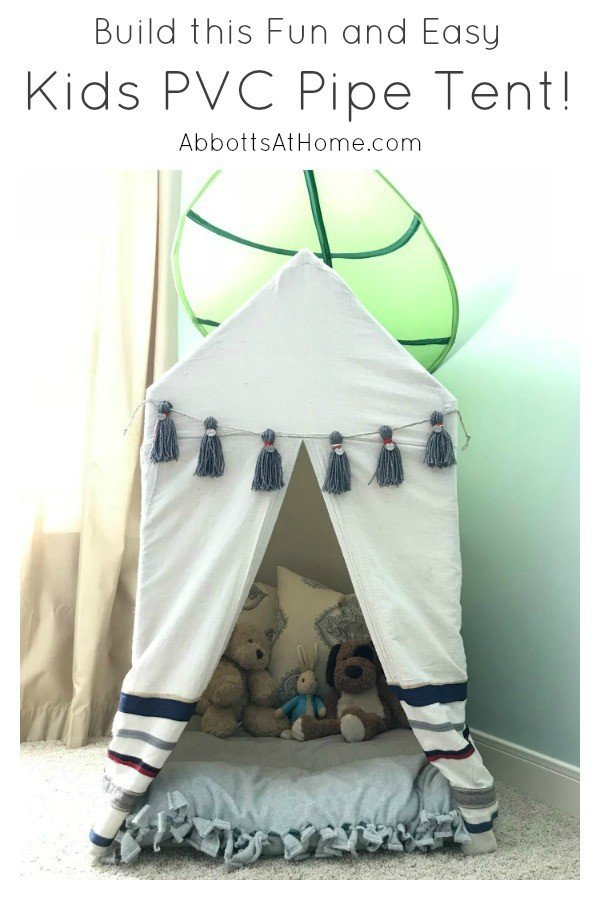
Kids PVC Pipe Tent
Here are the quick and easy DIY steps to build a fun Kids PVC Pipe Tent Frame. No power tools required for this cute kids play tent.
Materials
- 5 - 40″ long pieces of 1/2″ PVC Pipe (sides on floor, sides of the roof and top of roof)
- 4 - 33″ long pieces of 1/2″ PVC Pipe (walls)
- 2 - 24 1/2″ long pieces of 1/2″ PVC Pipe (front and back floor pieces)
- 4 - 17 1/2″ long pieces of 1/2″ PVC Pipe (roof)
- 4 - 3/4″ long pieces of 1/2″ PVC Pipe (connects 2 fittings where walls and roof meet) (Not in Picture)
- 6 - 1/2″ 90-Degree PVC Sch 40 Side Outlet Elbow (all three sides non-threaded) (4 floors at corners and 2 at roof)
- 4 - 1/2″ 90-Degree PVC Sch 40 Tee (top of each wall, top of this gets half of the 3/4″ piece of pipe)
- 4 - 1/2″ 45-Degree PVC Sch 40 Slip Elbow (on top of each tee, connected to that 3/4″ piece of pipe)
Instructions
How to Build the Kids PVC Pipe Tent
Step One
Make your cuts using the measurements above. You can watch a short video to see how I cut PVC pipes, the easy way, below.
Step Two
Assemble the frame, with or without glue in the joints, according to the notes on the measurements and the diagrams in the photos. Let the glue dry for 30 minutes or so.
Step Three
Spray paint the whole frame. This will probably take 4 different coats to cover each area. Then spray with the polyurethane to protect that paint finish. Now you should have a completed frame.
Materials for the Canvas Cover for the Kids PVC Pipe Tent
Note: If you can’t sew, don’t have a sewing machine, or want to save time, I have 2 ideas for you! 1. You can just drape a large drop cloth over the frame, kids fort-style. 2. My original cover was fleece just tied together at the seems. Like the grey pillow cover below.
Directions for the Canvas Cover for the Kids PVC Tent Frame
Note: My sewing skills are pretty average. I just sew straight lines. So, most people with a sewing machine should be able to do this. But, this isn’t a sewing skills lesson. So, this assumes you already have a general idea how to sew things. Sorry, I don’t have any pictures of pinning the cloth. It’s pretty basic.
- Wash the fabric on a gentle cycle and dry. This will get it clean for the kiddos and pre-shrink it.
- Cut one long strip of the drop cloth to cover the side walls and roof. Be sure to leave a few extra inches on each side and the bottom.
- Drape that strip bad side out, across the frame. Measure and cut a single piece for the back of the kids pvc pipe tent.
- Turn that back piece bad side out and pin it to the longer strip across the whole back area. You want it to fit somewhat loosely.
- Sew those 2 pieces together and remove pins
- Put the canvas back onto the frame, bad side out again.
- I cut the top section for the tent entrance from a part of the canvas that already had a hem. Saves you work and gives you a pretty hem to work with.
- I cut 2 sides to create the opening. I used the existing hem on the canvas again for the opening.
- Pin those sides to the top, then pin that to the original long strip to finish the tent.
- Sew and remove pins.
- Now, hang that tent on the frame, bad side out again. Pin a bottom hem all around.
- Sew your hem and remove pins.
- Now you can pick your favorite ribbons to mix and match and sew along the bottom of the tent.
Notes
I love sharing my plans with all of you. Especially when it’s for something this fun! This tent is big enough to hold 2 kids with lots of toys or books. But it’s small enough to push through standard door frames. So, no need to take it apart when you need to move it. Yea!
In fact, when I built this tent 3-years ago, I skipped the glue. But, eventually my kids figured out they could take it apart. So, I recommend using gorilla glue or PVC cement now. Unless you want 30 pieces of PVC laying around your house.
Watch the video to see this Kids PVC Pipe Tent.
If you are loving that tassel rope, here’s the Easy DIY Tassel Video Tutorial. That’s it, your Kids PVC Pipe Tent Frame is done. Step back, relax, and let the kids have fun! 😉
More DIY Projects For You
How about another easy DIY or Craft? Try using felt to give Wall Art a fun and easy pop! I have 12 free patterns to get you started.
Or this Fun and Easy DIY Nerf Gun Target Build.
You might also like this Super Easy DIY Outer Space Bedroom Wall.

And, this DIY Table Over Washer and Dryer is always popular.
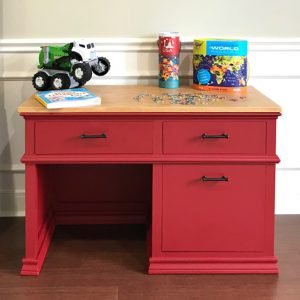
If you need a great little desk for your elementary age kids. Check out this DIY Childrens Desk with Storage Drawers.
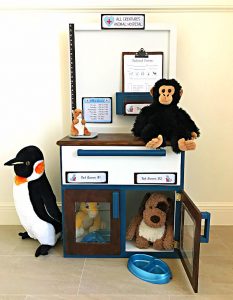
We love this DIY Play Animal Doctor Office Too. Build Plans and Printable Signs Available.
Feeling inspired? Now that you know how to build this fun Kids PVC Pipe Tent Frame, get out there and build your own. Have fun and let me know if you have questions. Or post pictures of your work and tag Abbotts At Home on FB, I’d love to see it!

Stephanie Abbott has been remodeling homes, updating & building furniture, and working on DIY home maintenance and cleaning tips for over 20 years. Her remodeling has been featured in Better Homes and Gardens Magazine. And, her DIY YouTube channel has had more than 8 million views.
Most of the DIY tutorials and videos on this site focus on beginner to intermediate level DIY Projects that can be done in an affordable way without high-end, expensive tools. All of the cleaning tips on this website have been tested in her home.


