
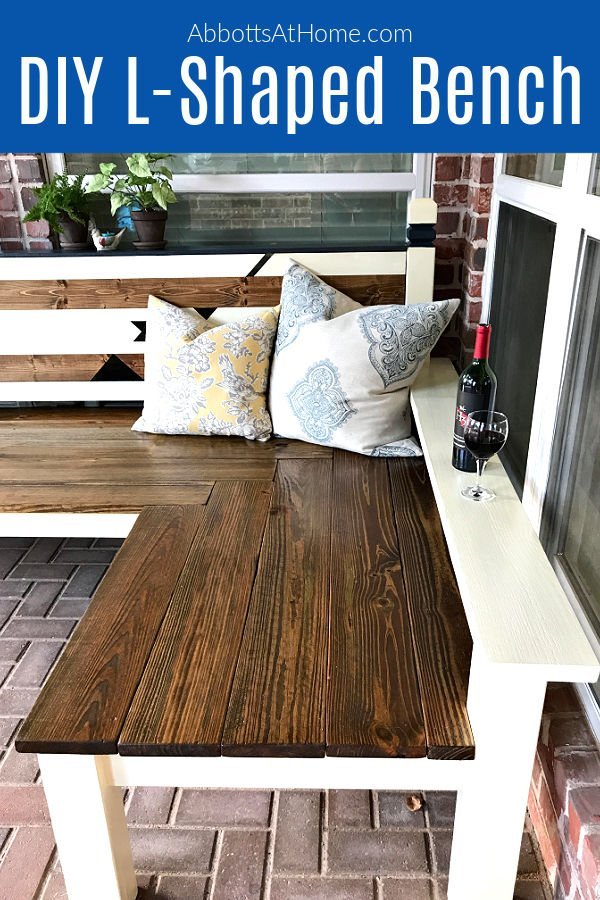
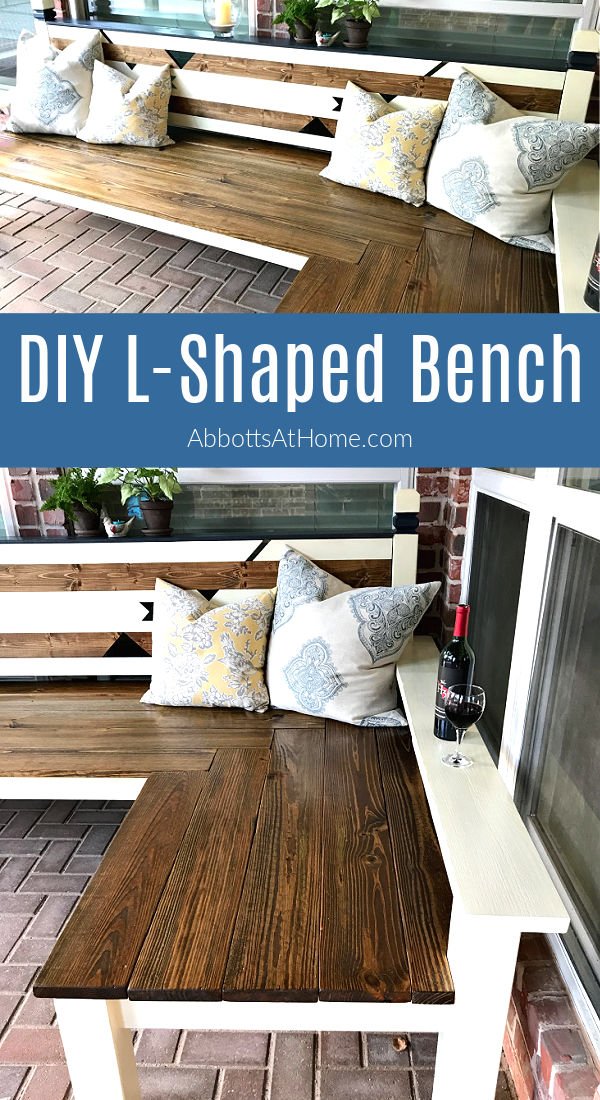
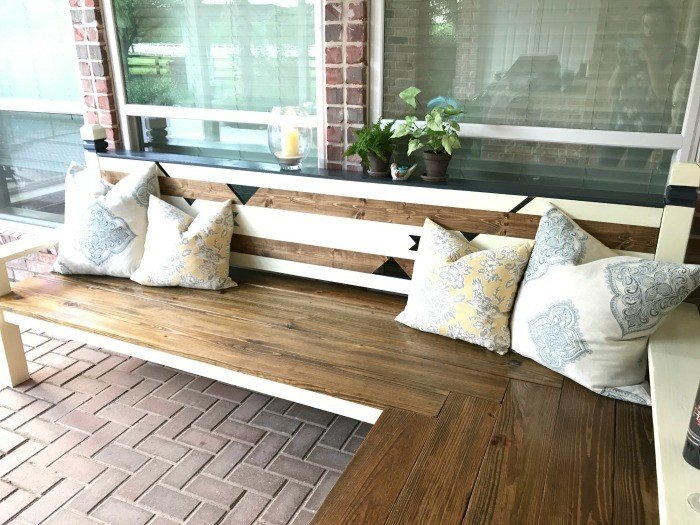
Want to build a beautiful L Shaped Bench for your space? I can help. Today, I’m sharing details about how I built this DIY Outdoor Corner Bench for $130.
DIY Outdoor Corner Bench
This build might look complicated but it’s actually pretty easy. You can build this bench to any size so that it’s perfect for your space!
Quick announcement first. So honored, amazed, and flattered to have my DIY Outdoor Corner Bench awarded 1st runner up status in the 3rd season of the Builders Challenge.
I am still amazed to have been awarded 2nd place, guys! Too cool.
See the end of this post for links to pics from some of the other entries. They’re all so inspiring and beautiful!
How I Designed my L Shaped Bench
I designed this custom bench to fit our space and needs. See 10 Helpful Tips For Planning An Outdoor Seating Area You’ll LOVE to see why I decided this size and design would work best for our space.

Since this piece is large and really custom to our space, I’m going to focus this DIY on how I built it more than the measurements.
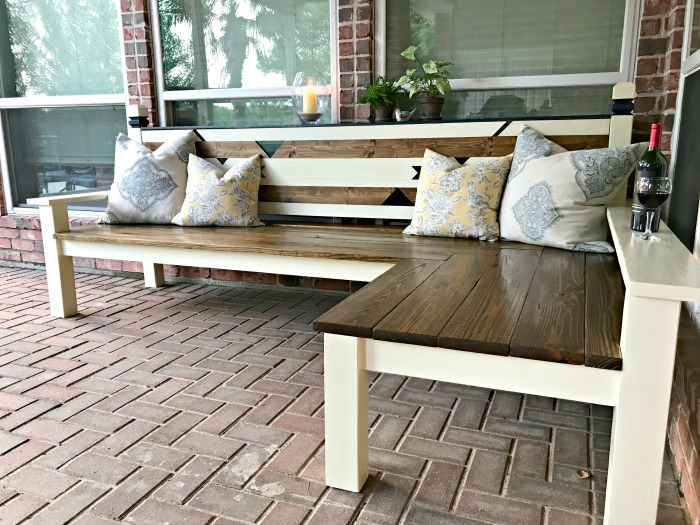
This is a large bench (about 8 1/2′ by 5′) and won’t work for most spaces, but you can easily change the scale and make your own with these steps.
I spent about $130 on the lumber to build this bench. That’s cheaper than one of those Cracker Barrel rocking chairs, guys. Winning!
Watch this DIY Outdoor Corner Bench build overview video here.
DIY Outdoor Corner Bench - L Shaped Bench Build Overview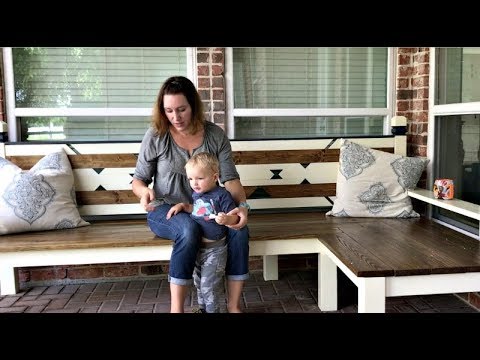
Tools Used For This Build
- Circular Saw
- Jigsaw
- Table Saw
- Brad Nailer
- Kreg R3 Jig
& Kreg Screws appropriate for boards
- Drill
- Clamps of various sizes
- Speed Square
- Tape Measure
Building the DIY Outdoor Corner Bench Frame
I used mostly 4×4 posts and corral boards for this build. I chose them based on strength, durability, look, and because I thought the scale would work best for the size of this piece.
Corral boards are used for building fences and barn stalls. They are a true 1″ x 6″ board. They don’t carry them at our local Lowes or Home Depots.
We buy them from a local lumber supply yard. They are a great price too. About $8 for a 16′ board. You would need to figure out how to get these super long boards home.
I’m not sure that a local lumberyard would offer board cutting services. We actually use these to build the fences around our yard. So, they charge us a flat $35 fee to deliver a lot at once.
For the bench back 4×4 posts, I chose a 4×4 deck post from Lowes with a geometric design around the top. It adds a bit more style to the piece and works well with the geometric cutouts on the bench back.
I needed those 2 tall posts (41 1/2″) on either side of the bench back, 2 arm height posts (22″) , and 3 seat level posts (16″) that would be under the seat boards.
For a smaller version of this DIY Outdoor Corner Bench, you probably only need 2 seat level posts. If this bench was only 6′ wide or less, I would only have used 2 seat level posts.
Since the back of my bench spans 8 1/2′, I wanted extra support across the back of that bench. If you look at the pictures, you can see where I set that middle post in the back.

To customize this DIY Outdoor Corner Bench to your space, sketch your base out on paper with all the measurements you’ll need. I started with the back of the bench.
I needed to span those 2 windows so that the bench looked like it fit that spot. My bench is 8 1/2′ long, including the posts. The depth of the base between the posts is 22″.
If I had made this depth much bigger, it would have been too deep for most people to sit comfortably while leaning against the back of the bench.
So, be careful when designing your bench. Using other furniture that you love to base your measurements on is always a good idea.
I wanted the long arm of the bench to span the other set of windows, but had to shorten it by a few inches to prevent our kitchen door from hitting the bench.
So, that side is about 5′ long. Once the back, side, and depth lengths are set, it just takes a bit of math to determine the length of the 2 front boards. Make sure to include the posts in your calculation.
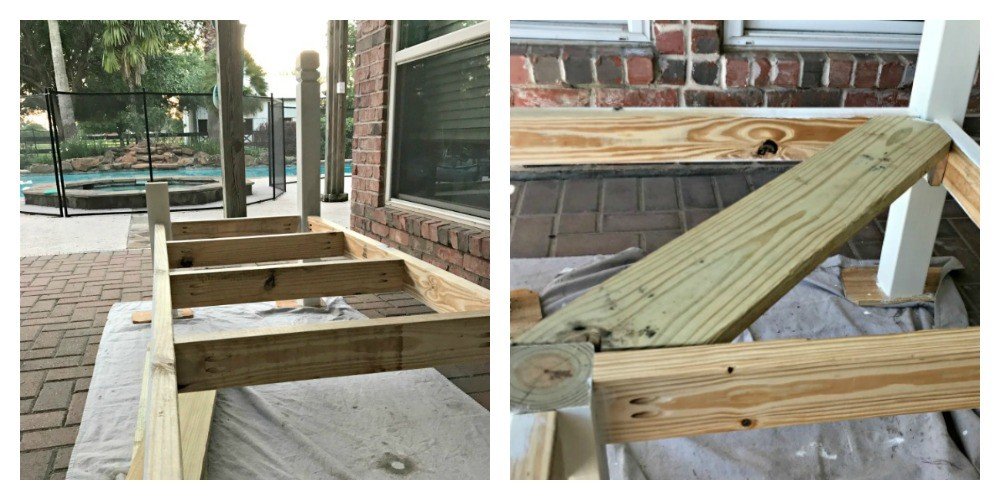
As you can see, I assembled this bench in it’s final location. The size and weight would have been too difficult and awkward to move from my garage.
I used my Kreg Jig to put 2 pocket holes in each corral board where it would meet a 4×4 post. If you don’t have a Kreg Jig, you could also use metal corner brackets or other methods to join the wood.
Before screwing the board and post together, I applied wood glue. If you look at the pictures, you can see that I set the board back about 1″ from the outside end of the 4×4.
This just kicks up the style a bit. To easily make that setback, use a scrap piece of the 1″ thick corral board to rest the board on while screwing the pieces together.
Adding Extra Support to the Frame of this L Shaped Bench
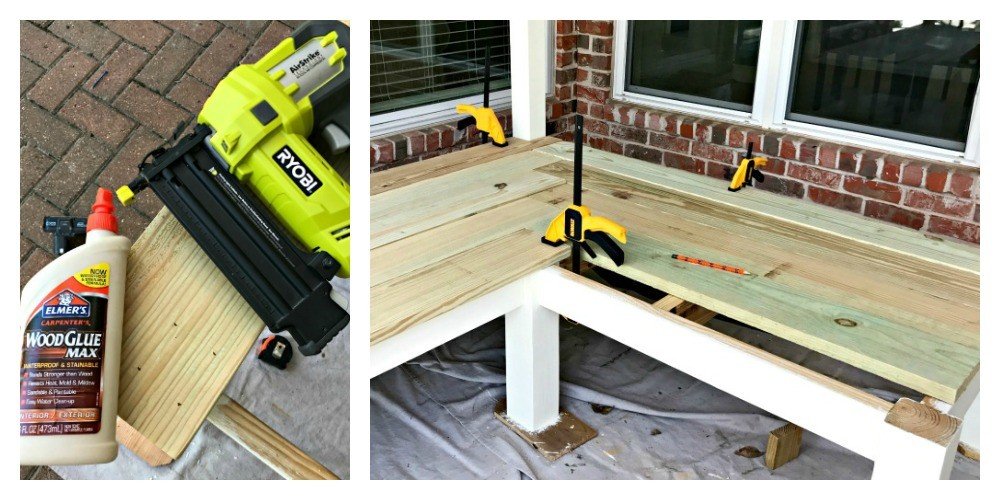
After the outside of the bench frame is complete, it’s time to add more supports for those seat boards. Adding cross supports will keep those long seat boards from bending with weight.
I think I read that best practice is to place the cross supports every 18 to 24″. Lean towards 18″ with 3/4″ seat boards and 24″ for 1″ or 2″ thick boards.
I used my Kreg Jig here too. Use 2 pocket holes at the end of each board again. I haven’t mentioned yet, but make sure to base your screw length off of the thickness of your actual materials. Use Kreg’s charts to select the right size.
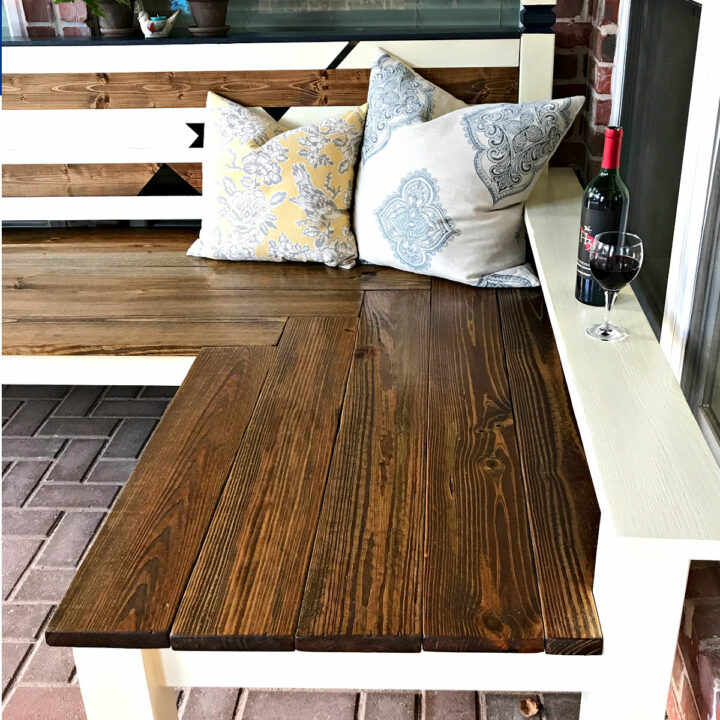
I went with a stepped or herringbone look at the corner of my bench. Another corral board is cut to size to support the boards in that corner.
I created a simple shelf for that board with small blocks on either end. I used 1 1/2″ deck screws to attach those blocks.
It’s important to get the top of that corner corral board flush with the rest of the base of the bench so that it can properly support the seat.
At this point, I recommend sanding, painting, and applying poly to the base before attaching the seat slats.
This just makes everything easier, especially if you use stain on the seat and paint on the frame. Taping off anything just takes more time.
I sanded with 80 then 120 to get a smooth finish. Then dusted off my boards. I painted with Behr’s Polished Pearl and Benjamin Moore’s Hale Navy to accent near the detail on the back posts.
Then sealed with Minwax’s Polycrylic. It’s water-based, which makes it easy to clean up. And it doesn’t yellow like some polyurethanes. Now your L Shaped bench frame is done.
Adding the Seat Boards
Now you can dry fit those seat boards on your DIY Outdoor Corner Bench. Pick boards that are fairly straight for the seat. You want to avoid uneven gaps as much as possible.
I even milled a 1/8″ off a few boards with my table saw to get a straight edge. Start by figuring out how many rows you’ll need. Measure from the back of the back posts to the front of the front posts. That was 29″ for me.
I figured out that I could use 5 full 6″ wide boards with just an extra 1″ overhang (1″ past the 4×4) on the front boards. This worked well for me.
But I could have easily cut 1″ off the back board of both sides to prevent that extra 1″ overhang.
The back of the bench is so close to the seat that it would have hidden the size difference in the boards. So, no one would notice it. I like everything to look visually balanced.
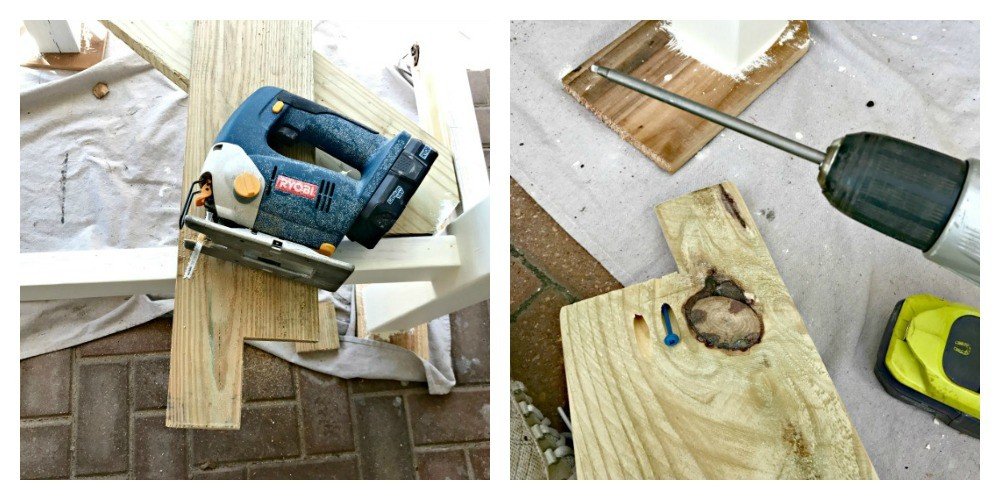
Let’s start cutting. Start with the back on the long side for your measurements. You’ll need to use your jigsaw to notch out around the posts.
Leave each board in place as you finish to get the exact measurement for the next piece. You might want to use clamps to hold the back board on either side in place.
This will make the dry fitting for this step of the DIY L Shaped Bench Build easier. After doing the back board on the longer side, do the back board on the shorter side.
Alternate sides until you have all of boards on either side cut and fitted to their spot. Make sure to snuggly secure the last board in place before measuring for the next.
Once everything is cut perfectly, you can take your boards off to sand and stain. Sand the whole board with a coarse grit, like 40 or 60 to remove any blue coloring, marks, and stamps made during manufacturing.
Then sand with 120 to smooth the board. Dust off the boards and prep with wood conditioner. Be sure to follow the directions on the container.
I used Minwax’s Pre-Stain Wood Conditioner. After letting that set for 10 minutes, I applied this beautiful stain.
Let that dry per the instructions before applying a second coat, if needed. Once that dries, apply Minwax’s Polycrylic. I went with 2 coats on the seats, since they will take the most abuse from my boys. 😉
I glued and nailed the seat boards in place with my beloved Ryobi Brad Nailer. That thing just makes life easier. Be sure to glue and nail at the outside of the frame and the cross supports.
Adding the Arms to the DIY Outdoor Corner Bench
Start by marking the spot 22″ from the ground on the back posts. This is where the bottom of your arm needs to be to make it even with the 22″ high front arm posts.
I went with the 6″ corral boards for the arms too. The scale just seemed right with the rest of the bench and this makes plenty of room for setting drinks, books, toys, etc.
I decided to have the board overhang on the outside of the bench, wrapping the front and side of the back posts. I also went for an extra 1/2″ overhang on the front. Both of these decisions were made to give it a style boost.
I needed my short arm to be 29 1/2″, with a notched out spot for the back post. The long arm needed to be 61 1/4″ with a notched out spot.
I used my jigsaw to make the notches and my Kreg jig to put 2 pocket holes on the back post end of the arms. I didn’t want any visual supports messing up the style on my DIY Outdoor Corner Bench.
Before attaching, sand, paint, and poly your arms. Then attach the arms. I used glue and a nail gun for the front posts.

Designing the Back of this DIY L Shaped Bench
I wanted a solid back for extra comfort, but wanted to incorporate the X’s into the design. I could have made a nice back with my miter saw in a simple pattern like my Farmhouse-style coffee table remodel.
Or gone a bit more complex, maybe something with an Aztec feel. But I didn’t love that idea for the bench.
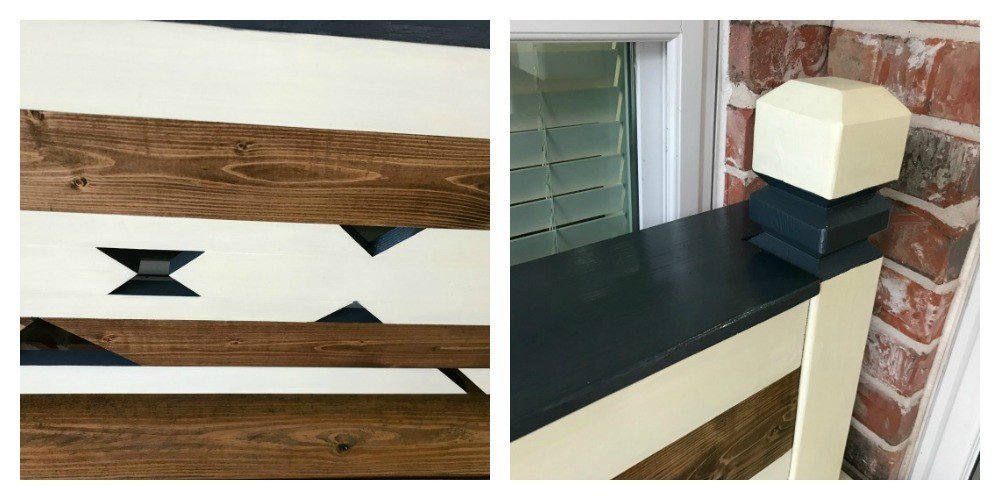
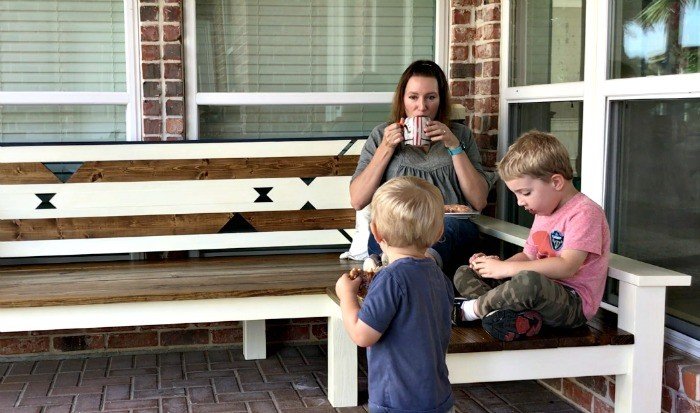
With cutouts, I could incorporate elements of an X design, while trying something new and giving me another spot to add a pop of color. Yea!
To create the design for the back of this DIY Outdoor Corner Bench, I laid out 7 – 8′ long boards varying in size (2- 1×2’s, 3 1×3’s, and 2 1×4’s). These were a mix of Select Pine and Whiteboard. The 2 stained boards are whiteboard.
The key to the pattern is to only work from 1 side. That side will be kept and attached to it’s post. The other side will have to be cut back down to 8′ to fit the opening.
If that sounds confusing, hopefully I can clear that up a bit.
For the top and bottom board, I measured 18″ from right and marked. Then I measure 18″ from left and marked.
I made opposite 45-degree miter cuts on either end of the top board, then flipped that for the bottom board. Then I just put about an inch of space between those gaps.
For the 2nd board from the top and bottom, I simply made 1 miter cut about 36″ from left on the top and 36″ from right on the bottom. Then flipped one side of the board to make the large triangles.
For the 3rd board from the top and bottom, I made 2 45-degree miter cuts in opposite directions 26″ from each end of the board. Then I flipped the middle piece of each board to make the 2 small triangles.
For the center board, I marked 31″ in from either in. This is the middle of my X-shaped cutouts. I used my speed square to mark a straight line across this 1×3.
Then I marked the very center of that line. I set up a right 45-degree miter cut to hit right on that center. Then I switched to the left 45-degree miter cut to hit that center again.
This left me with 2 small triangle cutouts. I did the same thing for the other side of the board. Then I pulled those spots about an inch apart to create the open X design. Now for the fun part. 😉
Adding tons of pocket holes with the Kreg Jig to the pieces for the back of this DIY Outdoor Corner Bench.

Finishing the Back of the Bench
You can see from the picture of the backside of the DIY Outdoor Corner Bench, that I spaced my holes about 8 ” apart. I didn’t want to risk warping as the bench ages, so played it safe. I only put holes in every other board too.
Those holes were enough to connect all 7 boards together. I cut the extra lengths off the left side of the bench back after it had been assembled. This was the easiest way to ensure a perfectly straight line on each end of the bench back.
Before screwing them together, paint or stain the pieces. You can touch up after they’re joined. Once everything has completely dried, you can assemble.
I used lots of clamps to keep everything straight and level while screwing. I also added 2 cross braces along the back.
With 8′ long boards, even screwed together they are going to have a bit of movement in the middle. The cross braces reduced most of that.
After all boards are screwed together and braced, measure the left side, mark a straight line from top to bottom, then make your cut with a circular saw.
I screwed supports into the back posts, then attached the back of the bench to those supports with Elmer’s Wood Glue and 2 deck screws on each end.
The screw holes were then filled with wood filler and painted. I had one more piece to add to finish this bench.
I added a full corral board shelf, painted in Hale Navy, along the top of the bench. This was designed to hold drinks and to hide the view of the back of the bench.
But it served as another support to keep the bounce out of that long back. I created a rabbet in that shelf. I made it 1/2″ high and 3/4″ deep to accommodate the 3/4″ thick boards of the bench back.
Now the shelf and the bench back actually prevent each other from dipping.
Now that the full bench is assembled, I painted the whole back of the bench in Hale Navy since it’s slightly visible from inside, due to my low windows.
After the back was painted that shade of dark blue, you don’t even notice it anymore. It just fades into the shadows behind the bench. Next I had to poly the back and that shelf with 2 coats of the Minwax Polycrilic.
Now give yourself a pat on the back. That was a lot of hard work, but the DIY Outdoor Corner Bench is done!
And yes, I am giving myself a pat on the back too!

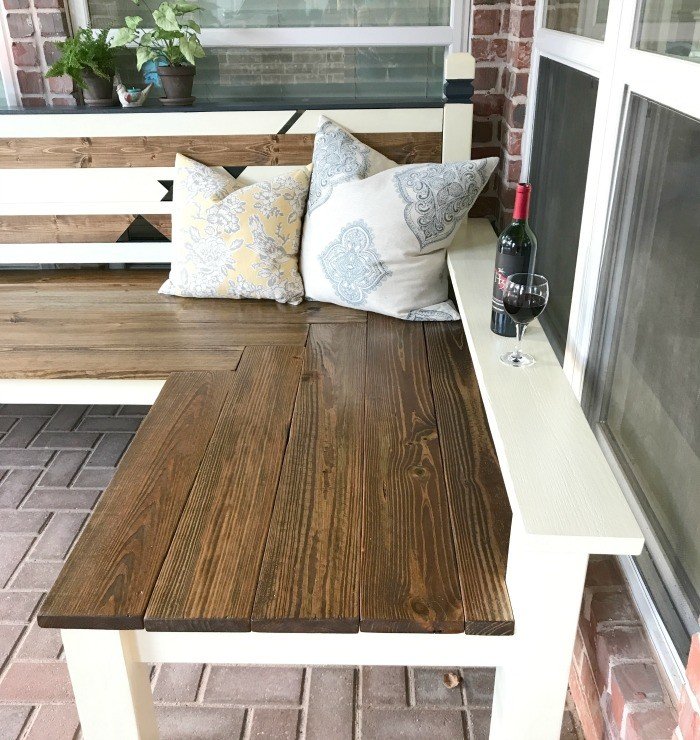
Loving those extra wide seats for putting my feet up! 🙂

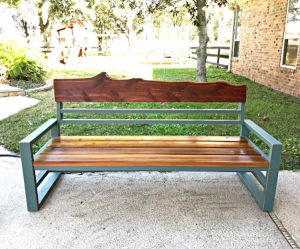
You might also like this beautiful DIY Outdoor Sofa, with build video and printable plans. Looks great with and without cushions. Or this DIY Rustic Outdoor Bench.
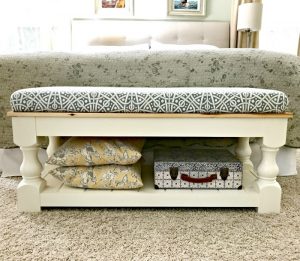
Looking for an indoor bench with lots of style? This DIY Chunky Leg Farmhouse Bench can be made with or without an upholstered seat!
And, this DIY Table Over Washer and Dryer is always popular.

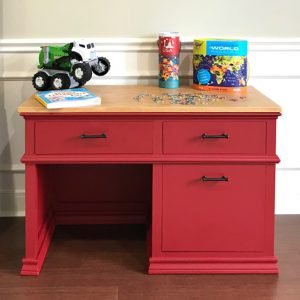
If you need a great little desk for your elementary age kids. Check out this DIY Childrens Desk with Storage Drawers.
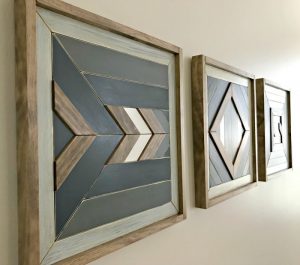
And use up your scraps building beautiful DIY Scrap Wood Wall Art.
DIY Outdoor Corner Bench
Build this beautiful DIY Outdoor Corner Bench with this step by step tutorial with lots of photos to help you build your own.
Materials
- 4x4 Pressure Treated Posts
- 1x6 Corral Boards
Tools
- Miter Saw
- Circular Saw
- Jigsaw
- Kreg Jig
Instructions
Build Your Own DIY Outdoor Corner Bench
- Start by deciding what size you want your bench to be. Make sure it will fit your space without blocking any doors. And, won't look to big or small for that area.
- Sketch up a drawing with measurements to use as a reference for your build.
- Build the frame for your DIY Outdoor Corner Bench. I have detailed tips about how to make sure the seat won't be too deep below.
- Add the seat boards to the DIY Outdoor Corner Bench frame.
- Build a Mosaic Style back for your L Shaped Bench using 1x4 and 1x3 pine boards.
- Attach the back to the frame.
Notes
I used mostly 4×4 posts and corral boards for this DIY Outdoor Corner Bench build. I chose them based on strength, durability, look, and because I thought the scale would work best for the size of this piece. Corral boards are used for building fences and barn stalls. They are a true 1″ x 6″ board. They don’t carry them at our local Lowes or Home Depots.
We buy them from a local lumber supply yard. They are a great price too. About $8 for a 16′ board. You would need to figure out how to get these super long boards home. I’m not sure that a local lumberyard would offer board cutting services. We actually use these to build the fences around our yard. So, they charge us a flat $35 fee to deliver a lot at once.
For the bench back 4×4 posts, I chose a 4×4 deck post from Lowes with a geometric design around the top. It adds a bit more style to the piece and works well with the geometric cutouts on the bench back. I needed those 2 tall posts (41 1/2″) on either side of the bench back, 2 arm height posts (22″) , and 3 seat level posts (16″) that would be under the seat boards.
For a smaller version of this DIY Outdoor Corner Bench, you probably only need 2 seat level posts. If this bench was only 6′ wide or less, I would only have used 2 seat level posts. Since the back of my bench spans 8 1/2′, I wanted extra support across the back of that bench. If you look at the pictures, you can see where I set that middle post in the back.
To customize this DIY Outdoor Corner Bench to your space, sketch your base out on paper with all the measurements you’ll need. I started with the back of the bench. I needed to span those 2 windows so that the bench looked like it fit that spot. My bench is 8 1/2′ long, including the posts. The depth of the base between the posts is 22″.
If I had made this depth much bigger, it would have been too deep for most people to sit comfortably while leaning against the back of the bench. So, be careful when designing your bench. Using other furniture that you love to base your measurements on is always a good idea.
I wanted the long arm of this DIY Outdoor Corner Bench to span the other set of windows, but had to shorten it by a few inches to prevent our kitchen door from hitting the bench. So, that side is about 5′ long. Once the back, side, and depth lengths are set, it just takes a bit of math to determine the length of the 2 front boards. Make sure to include the posts in your calculation.
As you can see, I assembled this bench in it’s final location. The size and weight would have been too difficult and awkward to move from my garage. I used my Kreg Jig to put 2 pocket holes in each corral board where it would meet a 4×4 post. If you don’t have a Kreg Jig, you could also use metal corner brackets or other methods to join the wood.
Before screwing the board and post together, I applied wood glue. If you look at the pictures, you can see that I set the board back about 1″ from the outside end of the 4×4. This just kicks up the style a bit. To easily make that setback, use a scrap piece of the 1″ thick corral board to rest the board on while screwing the pieces together.

Stephanie Abbott has been remodeling homes, updating & building furniture, and working on DIY home maintenance and cleaning tips for over 20 years. Her remodeling has been featured in Better Homes and Gardens Magazine. And, her DIY YouTube channel has had more than 8 million views.
Most of the DIY tutorials and videos on this site focus on beginner to intermediate level DIY Projects that can be done in an affordable way without high-end, expensive tools. All of the cleaning tips on this website have been tested in her home.