
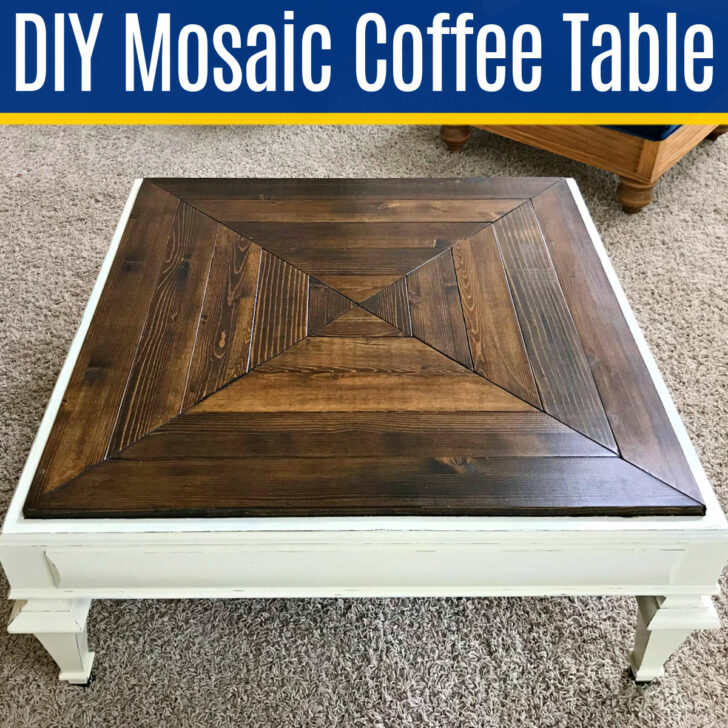
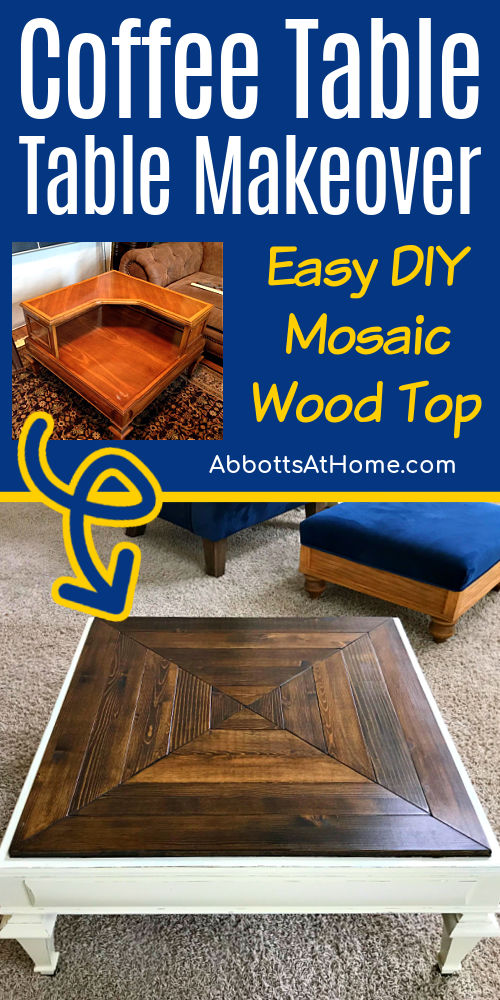
See how I turned an OUTDATED two tier end table into a STYLISH mosaic coffee table in this before & after DIY Coffee Table Makeover tutorial.
Beautiful DIY Coffee Table Makeover
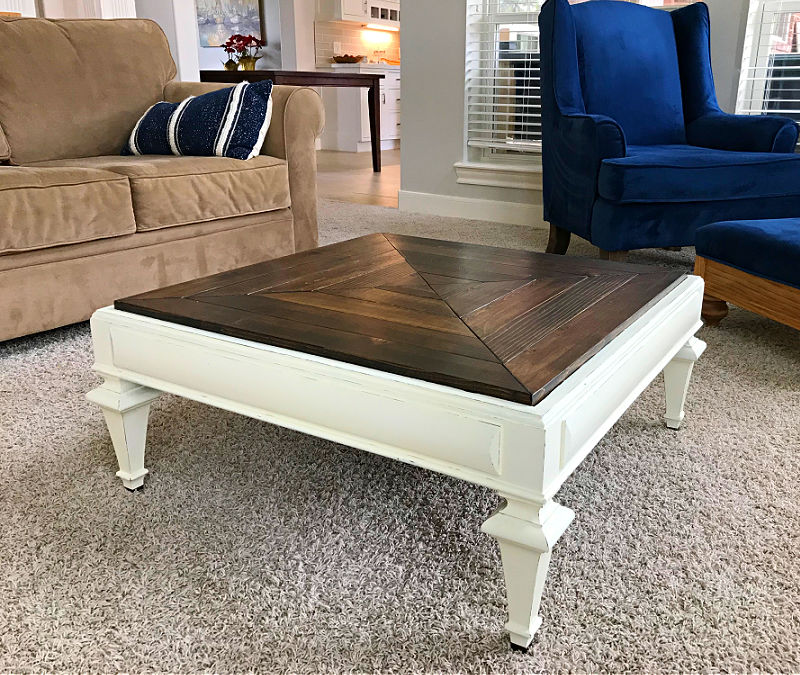
Whether your looking for mosaic coffee table DIY ideas or ideas to cover a damaged table top, this tutorial is for you. I LOVE how great this DIY coffee table makeover turned out.
You won’t believe what it looked like when I found it. I doubt the last owner would even recognize it.
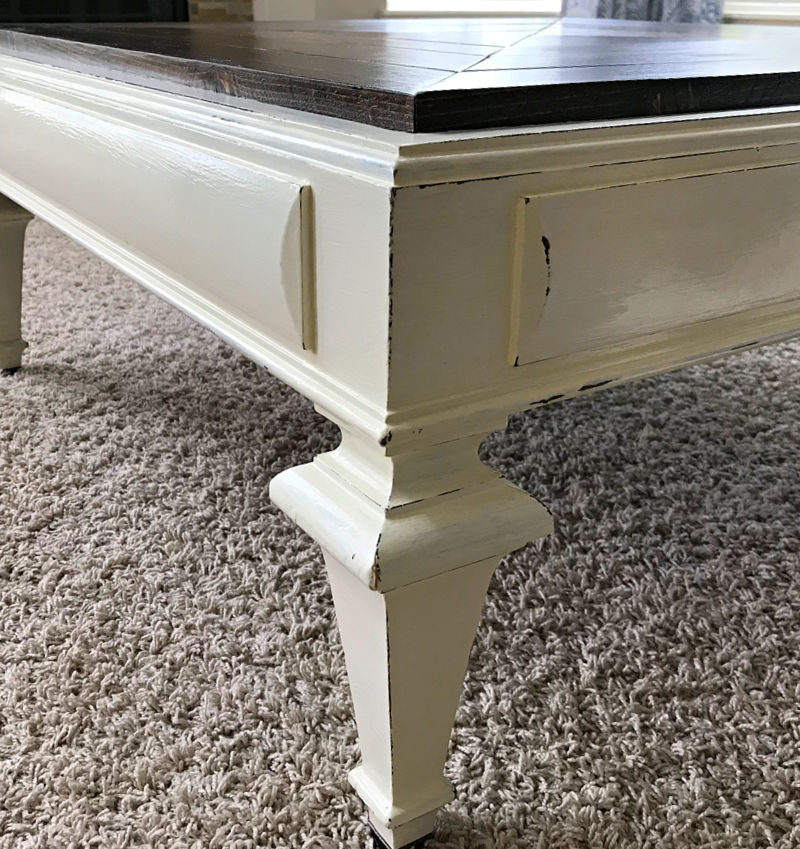
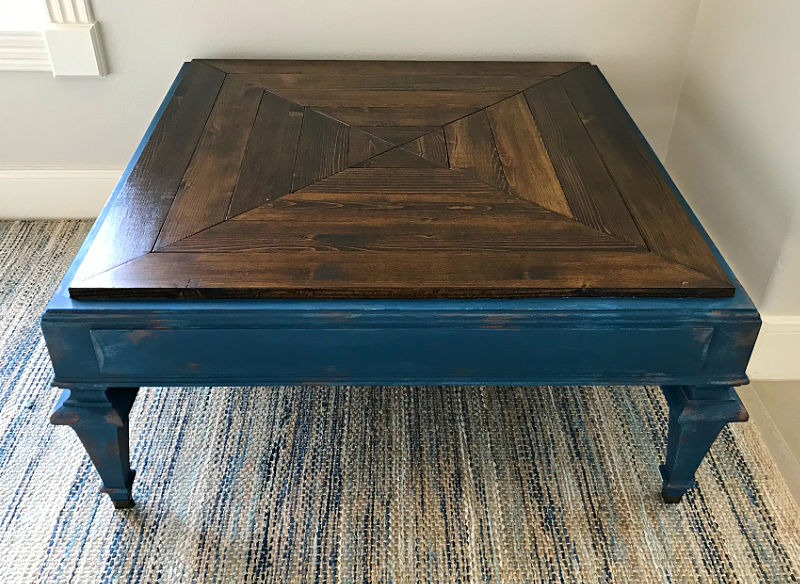
The truth is this coffee table started out as one of those huge two tier end tables that was so popular in the 80’s and 90’s. But a table that size (32″x32″) just doesn’t fit into most living rooms as an end table.
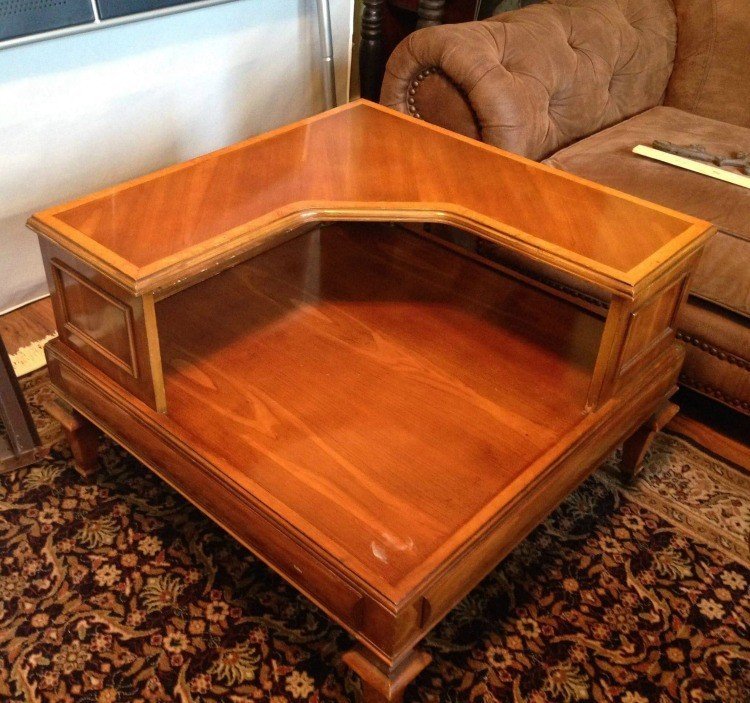
I wasn’t sure I even wanted it at first, but the legs are absolutely beautiful and the price was great. So, I bought it off Facebook Marketplace. I just had to figure out what to do about that second tier.
My first thought was to upholster it and turn it into an oversized ottoman, kind of like this DIY Upholstered Ottoman. Then I realized this table top would be perfect for a mosaic design.
Check out these posts for more DIY mosaic wood project ideas:
- Beautiful DIY Geometric Wood Table Top Design
- DIY Wood Mosaic Table Top Design
- Easy DIY Scrap Wood Wall Art
- Easy DIY Wood Color Block Table Top, from 2×4’s!
OK, let’s get to that DIY mosaic coffee table makeover.
Mosaic Coffee Table DIY Steps
Step 1: Optional
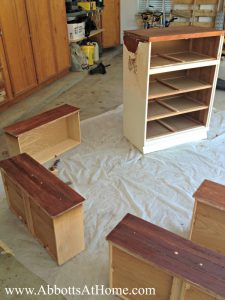
This first step only applies to anyone doing a two tier end table makeover. I started by removing the second tier as carefully as possible. I was able to carefully use a hammer to pop the second tier off.
Then I just wiggled the supports back and forth to loosen the glue holding them in place. Then I pulled them out of the holes they were glued into.
This left me with a slightly damaged table top because of the holes. BUT, I was covering the whole top with wood, so that didn’t matter.
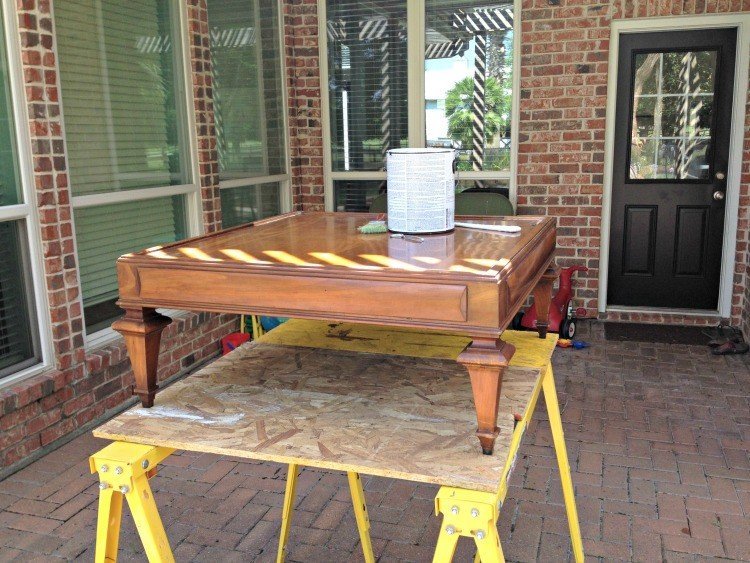
Step 2: Sand Or Strip The Coffee Table Top
2023 UPDATE: So, I attached my wood pieces to the coffee table top after I lightly sanded and primed the entire coffee with KILZ 2 Primer. But, after years of working with projects like this, I would do this differently today. I’m going to tell you the correct way to do it instead of what I did do.
To really make sure your wood glue gets a strong bond to the coffee table top, you should strip off the old stain or paint finish or sand it completely off.
You can see steps for Stripping Paint from Wood Furniture With Citristrip in a previous post.
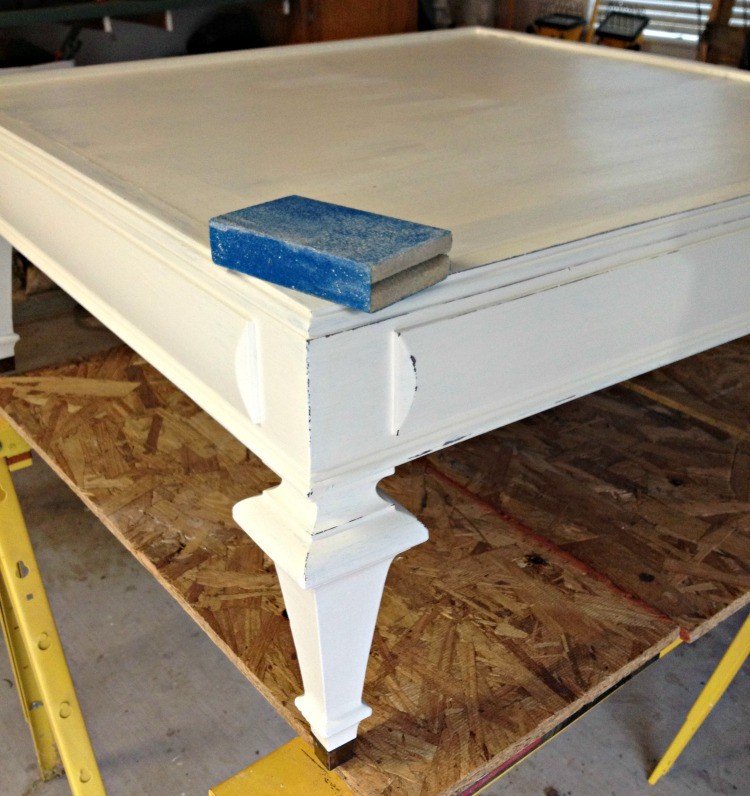
After stripping the top, I recommend painting or staining everything except the coffee table top to get it looking great before attaching the mosaic pieces.
Check out 25 Beautiful And Easy Furniture Painting Tutorials For Beginners if you need painting ideas. Or, check out How To Stain Wood Furniture Without Stripping if you want an easy way to get a stained look.
Step 3: Cut Your Pieces To Size
I started by drawing an X all the way across the table, from one corner to the other. This pencil mark would work as a guide for my measurements.
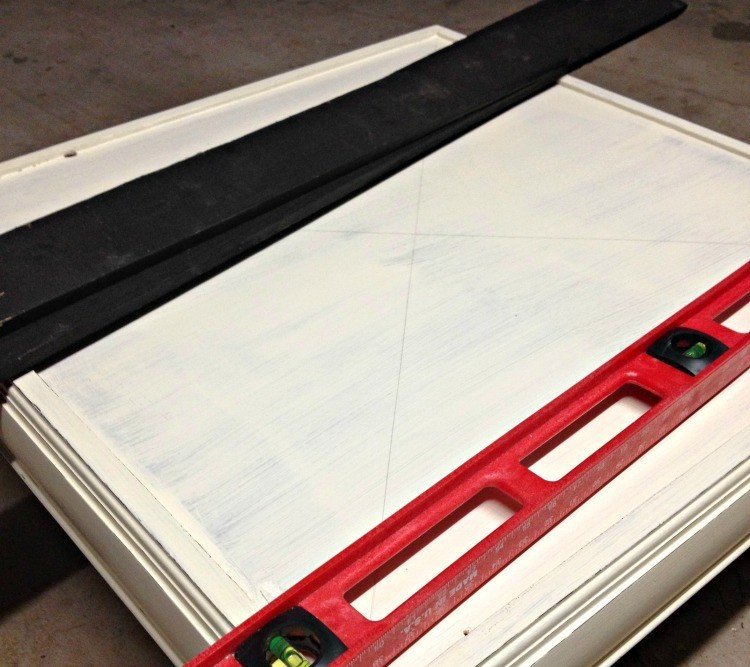
My coffee table top is square, that makes all of my Miter Saw cuts set to 45 degrees. I used 1×3 common board for this DIY Coffee Table Makeover.
I decided to cut and install the pieces from the outside in to make it as easy as possible. So, I measured the outside length of each side to make my first row of cuts.
Once, the 4 outside pieces of the square were cut, I measured the inside edge of one of those pieces to cut the next 4 pieces. Then I repeated that for each row until I needed to cut my 4 center pieces.
You’ll still cut the center row on your Miter Saw, but depending on your square size, your pieces might be smaller than mine.
Check out 4 Easy Ways To Safely Cut Small Wood Pieces On A Miter Saw, if you need tips for safely making those cuts.
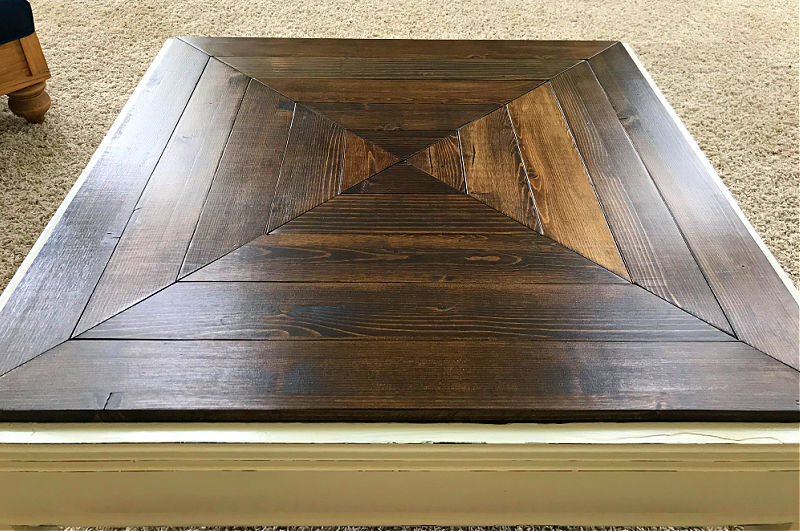
Step 4: Sand And Stain The Pieces
Once you have all of your pieces cut, it’s time to sand them. I sanded the tops and sides of all of the pieces with 150 grit sandpaper. Then I removed all of the dust with a tack cloth.
Before staining, I always use wood conditioner. It helps the wood absorb the stain evenly. If you ever have blotchy stain, you probably needed wood conditioner.
Then I stained the top and sides of the mosaic wood pieces. Follow the directions on your wood conditioner and stain to get the best result. After staining I used 3 coats of water-based Polycrylic.
What do you think about this DIY Table Top Makeover? I love how this turned out. 🙂
More Furniture Makeovers You Might Like
- How to Cut and Modify Vanity Drawers for Plumbing
- I LOVE This Easy DIY Cabinet Door Trash Can
- 10 Best Ways To Make Cabinets Look Like Built In Furniture
- Beautiful DIY Distressed Gray Chalk Paint Furniture Makeover
- Make A DIY Round Table Top Out Of Plywood
See how I cut this old dresser in half to create a bathroom vanity and cute toy storage.
Check out this popular Easy DIY Laundry Table Over Washer and Dryer Build Plan.

Feeling inspired? Now you know how to do this wood mosaic DIY Table Top Makeover. Have fun and let me know if you have questions. Or post pictures of your work and tag Abbotts At Home on FB, I’d love to see it!

Stephanie Abbott has been remodeling homes, updating & building furniture, and working on DIY home maintenance and cleaning tips for over 20 years. Her remodeling has been featured in Better Homes and Gardens Magazine. And, her DIY YouTube channel has had more than 8 million views.
Most of the DIY tutorials and videos on this site focus on beginner to intermediate level DIY Projects that can be done in an affordable way without high-end, expensive tools. All of the cleaning tips on this website have been tested in her home.