
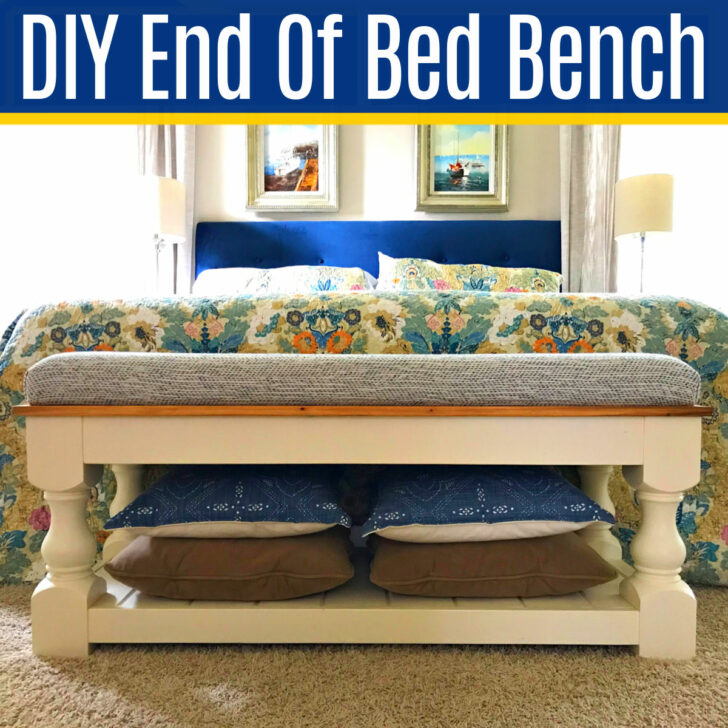
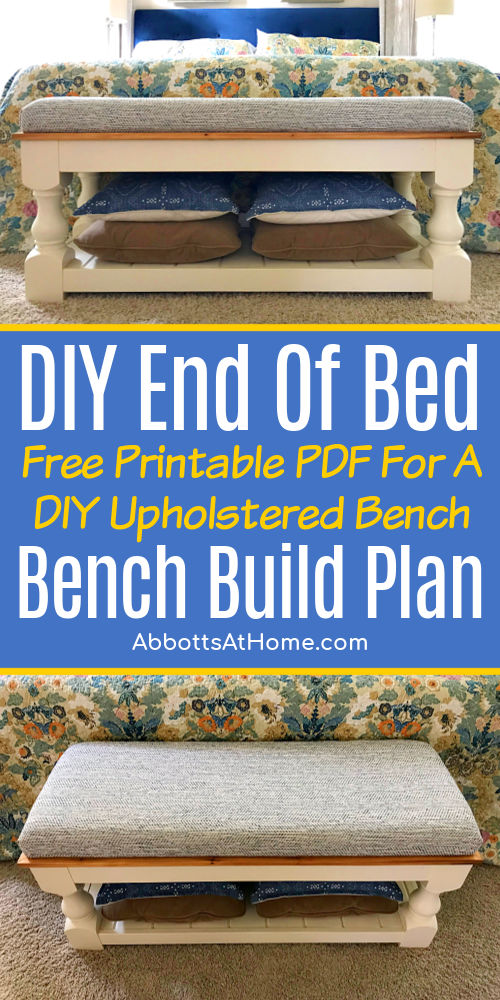
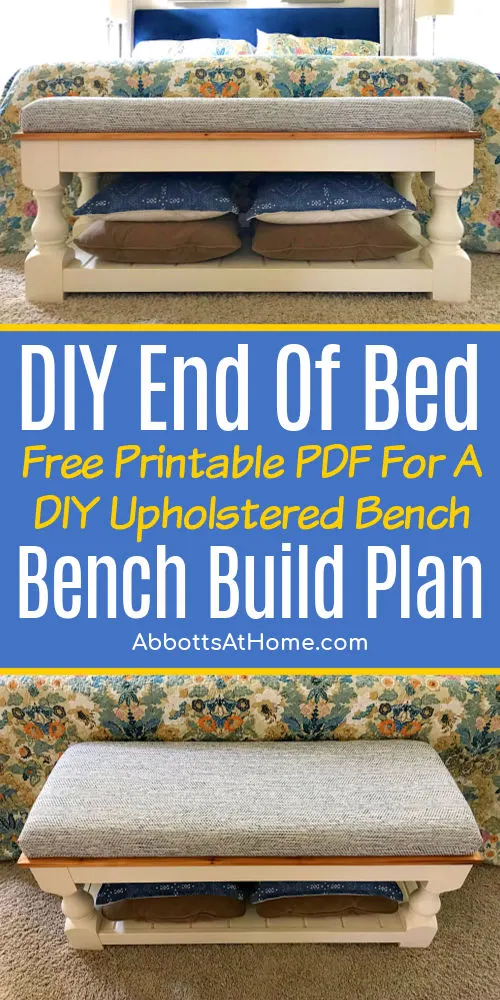
I LOVE this beautiful DIY Farmhouse Bench that also works as a great DIY End Of Bed Bench because of the easy upholstered top!
Beautiful DIY Farmhouse Bench
Want to know how to build a beautiful DIY Farmhouse Bench or upholstered DIY End Of Bed Bench? You’ve come to the right place.
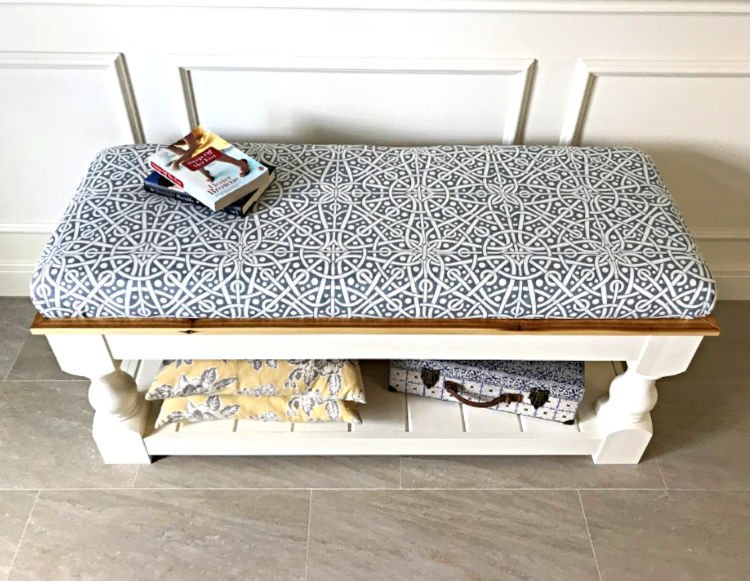
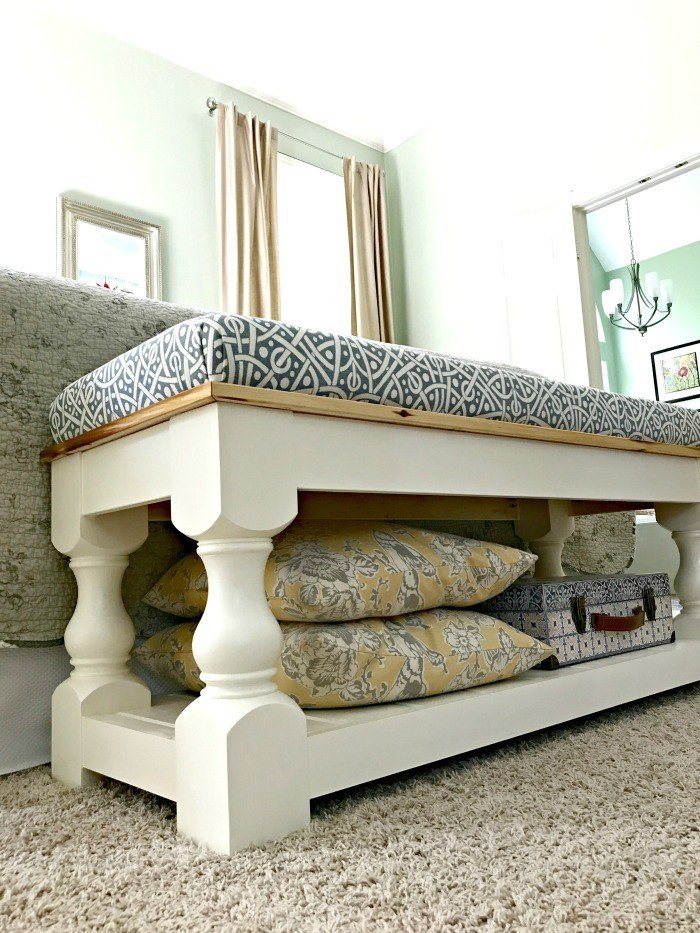
This pretty Farmhouse Upholstered Bench looks like something you’d find at your favorite home stores, but will save you hundreds of dollars.
AND at 49″ x 19″, it’s perfectly scaled to be a comfy End Of Bed Bench for your king or queen sized bed. This woodworking project is so versatile it looks great as either type of bench.

This build was completely inspired by the chunky legs I used for this build. Those beautiful table legs were given to me by Osborne Wood Products. Gorgeous, right?
They were actually designed with Ana White for this great coffee table build from Shanty 2 Chic. If it wasn’t for my daredevil boys, I would have built that coffee table.
But coffee tables have been banned from our living room until the boys grow out of the jumping off of everything stage. So 20 years or so, right? 😉

Now, let’s get started with this DIY Farmhouse Bench. This post covers all of the build and finishing for this bench. I’ll cover the easy upholstery in the next post.
And, for all of my woodworking friends, don’t worry. This upholstery requires no sewing and even uses tools. You got this!
How To Build A DIY End Of Bed Bench
Materials Needed
Bench Frame Cut List & Supplies
- 4 – Knotty Pine Shanty 2 Chic Coffee Table Legs
- 2 – 10″ long 1″x4″ Select Pine boards
- 2 – 10″ long 1″x3″ Select Pine boards
- 2 – 40″ long 1″x4″ Select Pine boards
- 2 – 40″ long 1″x3″ Select Pine boards
- 2 – 10″ long 1″x2″ boards (ledge for T&G)
- 2 – 40″ long 1″x2″ boards (ledge for T&G)
- 2 – 49″ long 1″x4″ 45-degree Miter Cut Cedar boards
- 2 – 19″ long 1″x4″ 45-degree Miter Cut Cedar boards
- 9 – 16 1/8″ or 16 1/4″ long 1″x6″ Tongue and Groove Pine (double-check your required measurement before cutting)
- Zinsser 123 Primer, or your favorite
- White paint, I used Behr’s Polished Pearl mixed into a chalk paint with my recipe
- Minwax Clear Matte Polycrylic
- Minwax Helmsman Spar Urethane (for cedar only, will yellow over paint)
- Foam Brushes
- Wood Filler
- Wood Glue
Bench Seat
- 1 – 47 1/2″ x 17 1/2″ piece of 1/2″ Plywood or MDF
- Fabric, I used this one
- 3″ Foam Padding – check prices before buying, JoAnn’s sells this for twice as much
- Spray adhesive
- High-Loft or Extra-Loft Polyester Batting

Tools Needed for this Build
Bench Frame
- Kreg Jig & Kreg 1 1/4″ Coarse Thread Screws
- Drill
- Brad Nailer
- Miter Saw or Circular Saw
- Jig Saw (to notch out the T&G end pieces)
Bench Seat
- Staple Gun & Staples
- Hammer

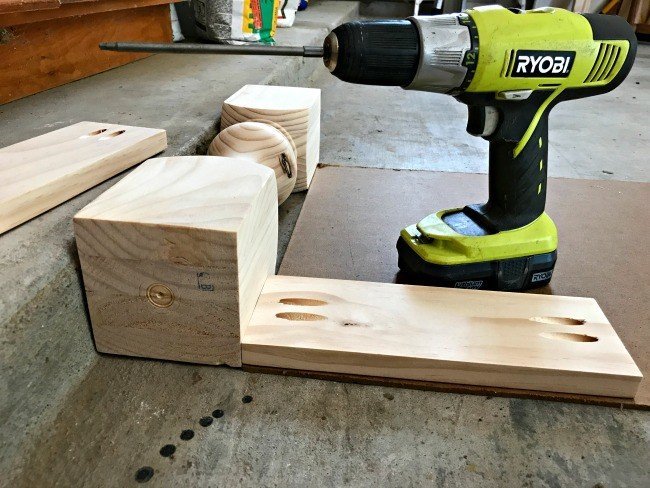
Step 1 – Cut Your Pieces And Prep
Make your cuts using the measurements in the cut list above. Remember, don’t cut the Tongue & Groove until the bench frame is fully assembled so that you can double-check measurements before cutting.
Use your Kreg Jig, set to 3/4″ thick wood, to put 2 pocket holes on each end of the 1″x4″ and 1″x3″ Select Pine boards (8 boards, 32 pocket holes total)
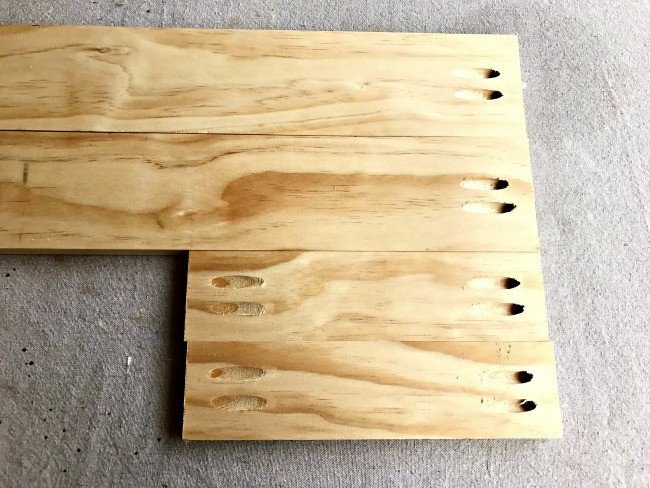
Sand those Select Pine boards and legs with 120-grit sandpaper. Sand all 4 sides of board and smooth down the long edges to give it a softer look. Keep the edges that connect to the legs square.
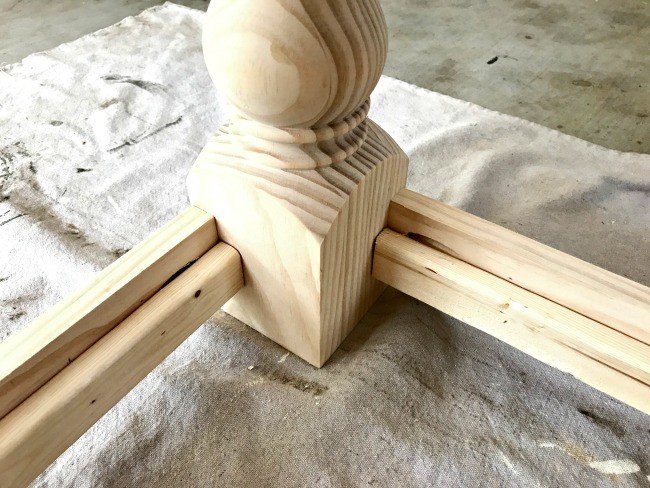
Step Two – Assemble The Short Sides
Use the Kreg Drill Bit, Screws, and glue to assemble the bench. Make sure to always wipe away glue with a damp cloth as you go. The 1″x4″ boards are used for the top apron.
Start by assembling the short sides of the bench. The top apron should be level with the top of the legs. I used a scrap piece of 1/8″ thick paneling to get the 1/8″ set back on the apron.
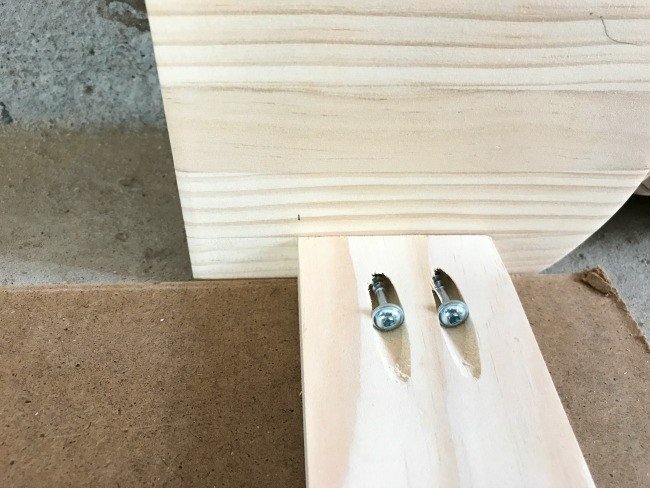
Use the 1″x3″ boards for the bottom apron, using the 1/8″ setback again. The bottom of these boards sits 1 3/8″ from the bottom of the legs.
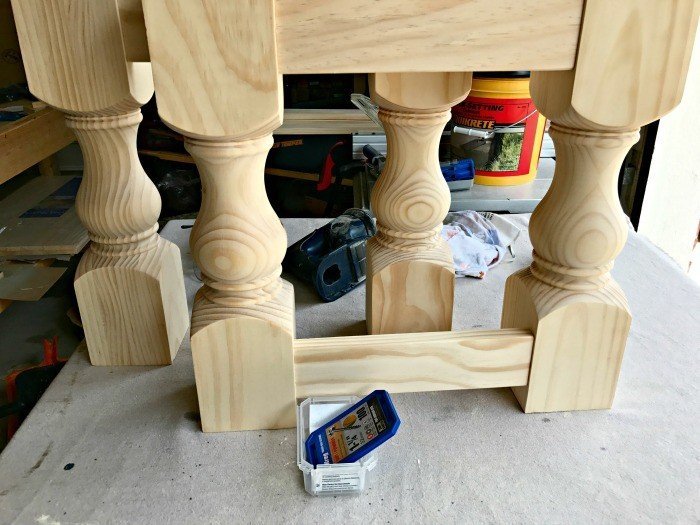
Step Three – Connect The Short Sides
Assemble the short sides completely before moving on to the long sides. Once they are done, assemble the longer sides following the same steps.
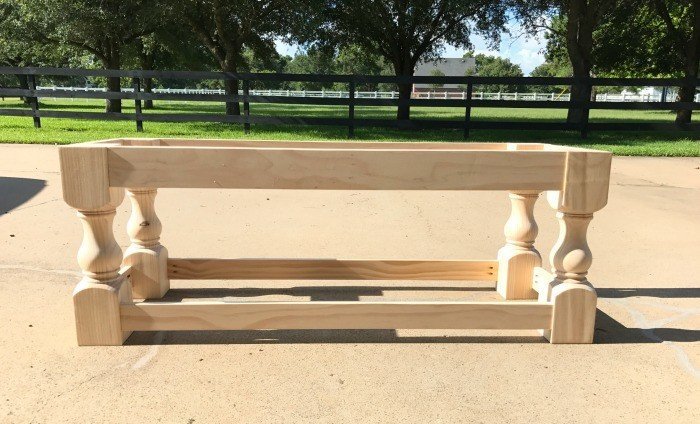
Add the ledge for the Tongue & Groove to the inside of the 1″x3″ apron. The T&G is 3/4″ thick, so the ledge should be glued and nailed 3/4″ down from the top.
Cut 9 T&G boards at about 16 1/8″ long. Get the exact measurements from your bench. This will vary based on whether or not you got that 1/8″ setback in step 5 perfect.
Cut the tongue off (leaving the groove) of 1 of those 9 to have it fit against one side. Once the tongue is off, measure and cut your notch outs for the legs. Use your jigsaw to cut.
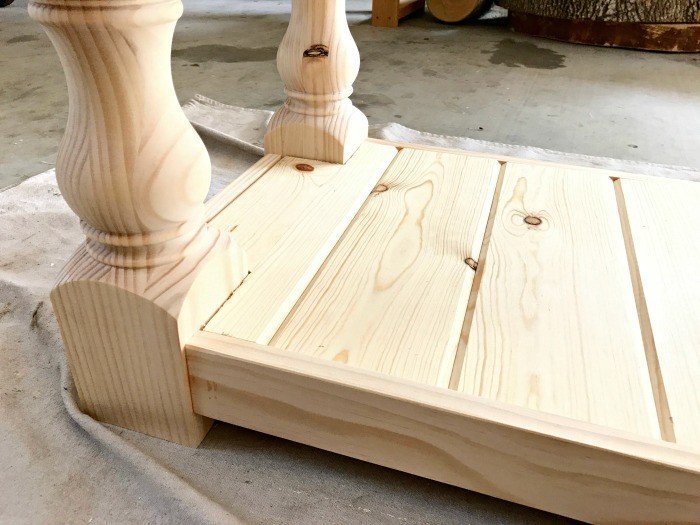
Slide the next pieces in place till you need to get your notch out measurements for the last full piece. Mark and cut these.
The final end will need about a 1″ wide piece cut. Once everything is cut and dry fit, to verify, glue the T&G to the 1″x2″ ledge.
Step Four – Clean Up & Wood Filler
Now you should have a completed frame. Wipe away any excess glue again. Then let everything set and dry. Apply wood filler as needed.
Once the wood filler has dried, sand any spots that may need another pass, wipe off the dust and dirt to prepare the surface for priming.
How I Finished The Frame Of The DIY End Of Bed Bench
Side Note: Because I am using a different urethane on the cedar, I decided it was easier to completely paint and poly the bench frame before attaching the cedar top, just because I wanted to avoid all of that taping off and touching up.

Apply 1 coat of primer to the entire assembled frame, with a foam brush. After drying, give any knots in the wood a second coat of primer.
This will just prevent bleed through and reduce the number of paint coats you’ll need in those spots. After drying, apply 2 to 3 coats of chalk paint, allowing each coat to dry between layers.
Once you have achieved a solid, finished look with the chalk paint, apply 1 to 2 layers of the Polycrylic.
Attach the Cedar Frame for the Top of the Bench
After the bench has been painted and poly’d, you can add your cedar accent pieces. Sand the rough bottom down with 60-grit, or similar, sandpaper. Then sand all 4 sides with 120-grit sandpaper.
I also knocked down the sharp edges again. Only do this on the outside edge. Keep the mitered edge squared.
To keep the Spar Urethane off the painted bench, I applied 2 coats of the Spar Urethane to the 4 cedar pieces before assembly. I avoided the mitered edges so that they can fit together snugly
Follow the directions on the can for the best results. Note: This Spar Urethane will yellow on paint, so only use on natural or stained wood. After a major mishap, I always test the finish on scrap wood.
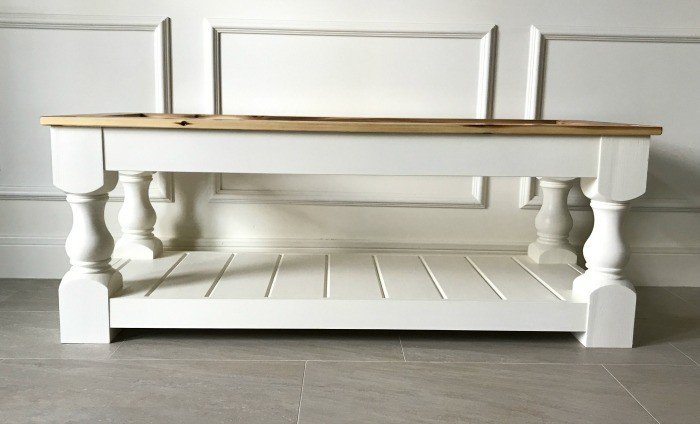
This urethane brings out the grain in the cedar on this DIY Farmhouse Bench and gives it a rich color that the water-based poly’s I tried couldn’t compare too. So, I had to go with it here.
Once the urethane has dried, you can use your Kreg to attach these pieces together before gluing to the bench. I went with just gluing and nailing the pieces down individually.
Each side should hang off the bench 1/2″. Use a ruler or tape measure to check that the pieces are centered and square.
Clamping a couple in place while you glue and nail the other two can help you hold square. I then used Minwax Wood Putty in Golden Oak to fill the thin gap between the pieces in the corner.
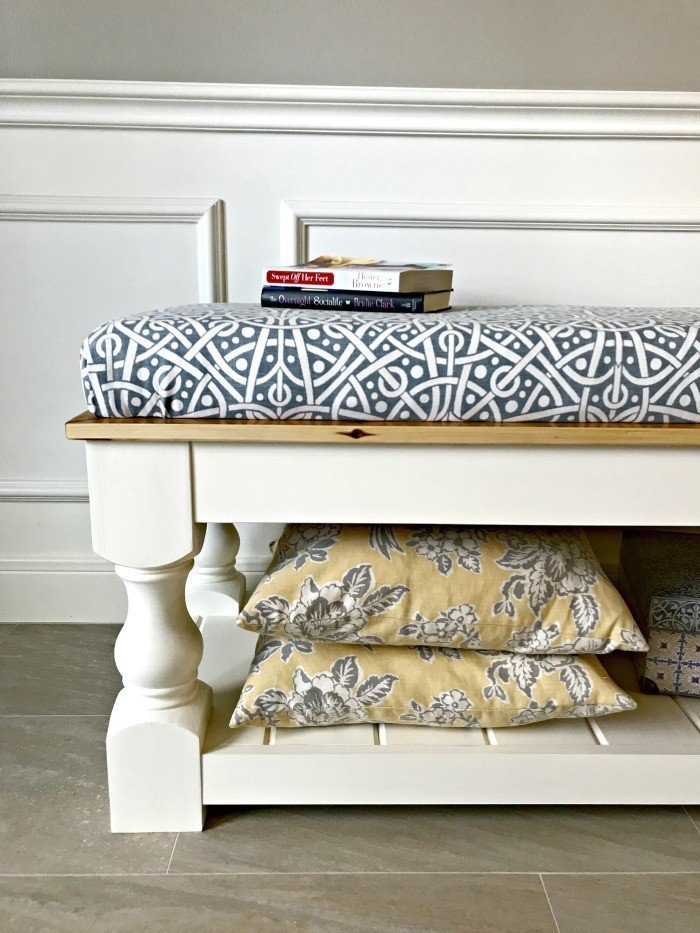
What About The Upholstered Top???
That’s how to build a DIY Farmhouse Bench or DIY End Of Bed Bench! The hardest part is over, we are ready to upholster.
You can find the steps for that easy, no sew upholstered top in the DIY Farmhouse Upholstered Bench Seat Tutorial.
Grab The Printable DIY End Of Bed Bench Plans
Printable Build Plans for this DIY Farmhouse Bench are available here FOR FREE in my Gumroad Store.
If you find any of these steps confusing, the printable will help explain things better, with plan images of each step and measurements 🙂
More DIY Projects For You
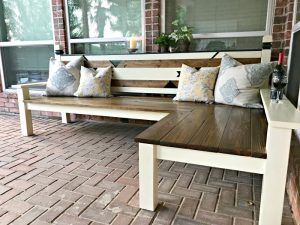
How about another DIY? Check out my L-shaped Backyard Bench entry for the IG Builders Challenge I mentioned earlier.
And, this DIY Table Over Washer and Dryer is always popular.

Would you rather buy? There’s 30 beautiful, highly rated, budget-friendly coffee tables on this big list of the 30 Best Amazon Coffee Table.


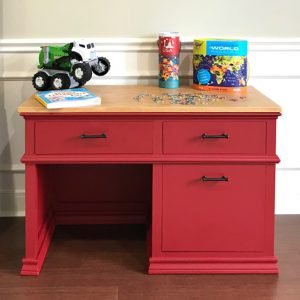
If you need a great little desk for your elementary age kids. Check out this DIY Childrens Desk with Storage Drawers.
Feeling inspired? Now that you know how to build this DIY Modern Farmhouse Bench, get out there and build your own.
Follow the links above to get the things you’ll need. Have fun and let me know if you have questions. Or post pictures of your work and tag Abbotts At Home on FB, I’d love to see it!


Stephanie Abbott has been remodeling homes, updating & building furniture, and working on DIY home maintenance and cleaning tips for over 20 years. Her remodeling has been featured in Better Homes and Gardens Magazine. And, her DIY YouTube channel has had more than 8 million views.
Most of the DIY tutorials and videos on this site focus on beginner to intermediate level DIY Projects that can be done in an affordable way without high-end, expensive tools. All of the cleaning tips on this website have been tested in her home.
Nancy
Wednesday 23rd of January 2019
I am not comfortable in adding programs to my computer. All I hoped for was a file with the plans for the bench. Is that possible without installing template finder and any other program? I have adobe and can read pdf files.
Stephanie
Wednesday 23rd of January 2019
It sounds like you got those weird PDF ads from Google. They are so annoying and tricky. I'll email you a copy. :)