
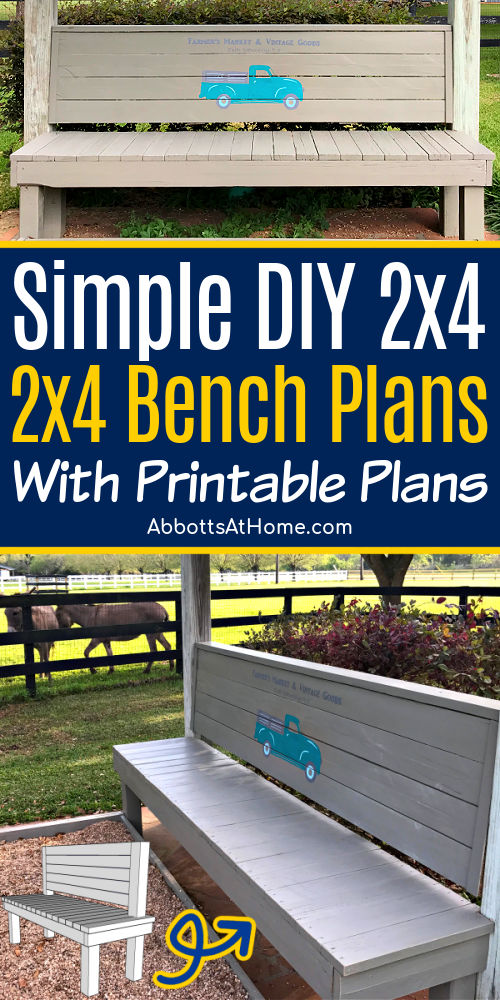
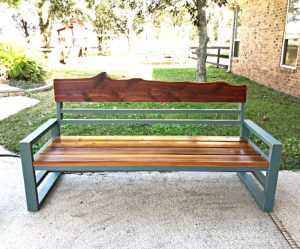
Build this easy DIY 2×4 bench plans with just a saw & drill. No special tools needed! This rustic outdoor bench is easy enough for beginners.
Easy DIY 2×4 Bench
Today, I have my easy to build DIY Rustic Outdoor Bench plans to share with you all. And it’s super affordable, winning!
In fact, you can buy the lumber you’ll need for this build for less than $50. BUT you could also reuse old lumber, like I did.
I upcycled old fence boards my husband was going to burn to make our DIY 2×4 bench. So when I built this bench it was 100% free. More winning!
Whether you’re using old or new lumber, the build steps for this easy outdoor bench are the same.
You Can Use Pressure Treated Lumber To Build A Bench
You can also use pressure treated or non-pressure treated lumber, depending on your preference. The old fence boards I used are pressure treated.
Which is probably why I was able to save so many of those 20-year old boards.
If you don’t use pressure treated lumber, you’ll definitely need to protect the wood from the elements with paint, stain, and/or outdoor polyurethane or spar urethane. Especially where the legs meet the ground.
For this bench, I used a Zinnser 123 Primer and a couple coats of an Exterior Latex Paint to finish the bench.
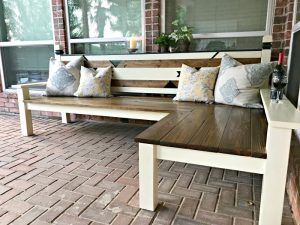
I have also had great results with staining pressure treated lumber and getting a beautiful finish. You can see how beautiful Minwax Jacobean Stain looks on my DIY Outdoor Corner Bench Build.
More Outdoor DIY’s Using Pressure Treated Lumber
- DIY Outdoor Sofa from 2×4 Pine – Build Plans
- How to Make a Kids Climbing Ramp or Rock Wall
- How to Build a Small Step Ladder, from 2×4’s
- DIY Swing Set Build – Easy Frame with Swing Hangers
- Is It Cheaper To Build Your Own Swing Set? (Cost of DIY vs Kits)
Simple 2×4 Bench Plans
Materials Needed
- Circular Saw OR Miter Saw
- A trusty Drill, like mine.
- Paint or Stain
- 1 – 4x4x10′ board
- 8 – 2x4x10′ boards
- 2 1/2″ self-tapping deck screws (screws with a special tip that let you build without pre-drilling)
- 1 – 2x2x6′ furring strip
Important Build Notes
I designed this outdoor bench plan to fit an extra long space in our backyard. Ours is probably about 8′ long. A 5′ long bench is probably a more common size.
So, I’ll use that as my tutorial length for this build. Just remember, you can change this length to fit your space.
I attached the back for this bench to our pergola posts. BUT the tutorial below and printable plans will tell you how to build yours with an attached back. It’ll be similar to how I attached the back to my L-shaped backyard bench.
My wood dimensions look a bit different than the plans. Like I mentioned earlier, I was using old fence, or corral boards that I resawed for this build. I recommend using 2×4’s for a new build.
OK, let’s get to the build steps for the DIY 2×4 bench plan.
Build Steps
Step 1
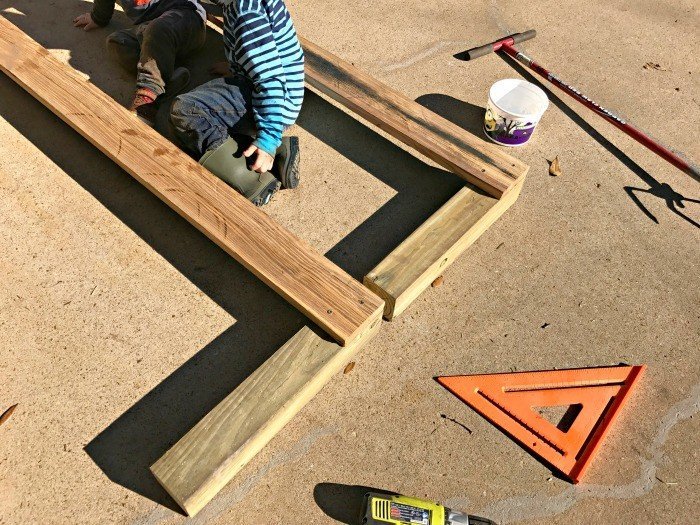
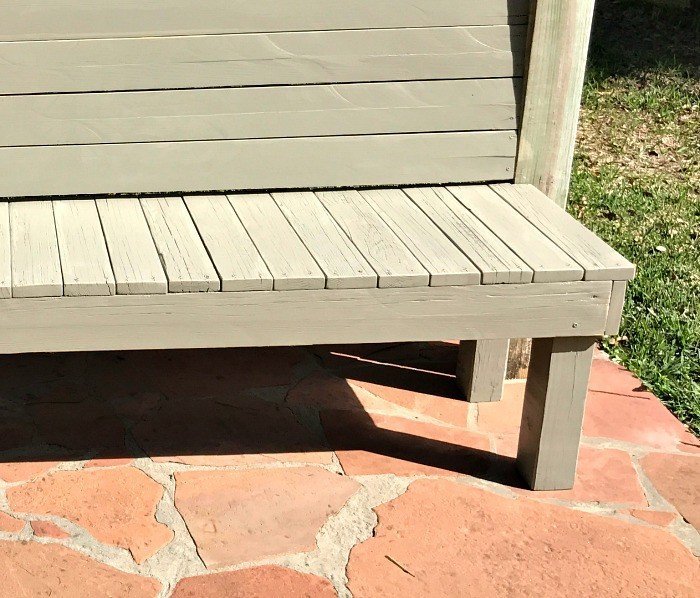
Cut 2 – 18″ long 4×4’s for the front legs and 2 – 40″ long 4×4’s for the back legs. Cut 2 – 57″ long 2×4’s and 2 – 23″ long 2×4’s for the bench frame.
Give everything a good sanding before assembling. When painting, I sand with 120 or 150-grit sandpaper to smooth the boards and round off sharp edges, a bit.
Step 2
Connect the 2 short legs with 1 of the 57″ long 2×4’s. Make sure to line up the top edge of the 2×4 with the top edge of the legs.
Use 2 of the self-tapping deck screws in opposite corners in each leg (see picture above). Self-tapping screws do not need to be pre-drilled.
Step 3
Mark the 40″ long back legs, 18″ up from the bottom. Connect those legs with the 2nd 57″ long 2×4. Line up the top of the 2×4 with the lines you marked on the back legs.
Step 4
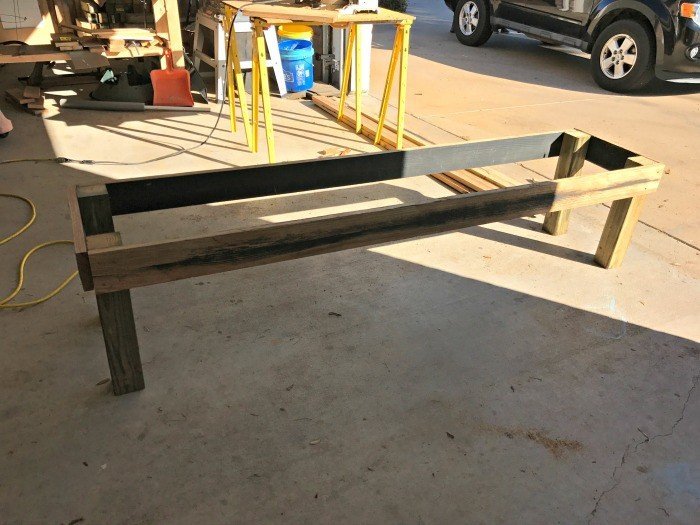
Stand up your front and back legs, with the framing 2×4’s facing out. You might need a partner to help you hold things for this step. Connect the front and back legs on each side with a 24″ long 2×4 on each side.
Use 2 screws on each corner again. Be sure to screw into the 4×4, not the end of the 57″ long 2×4. You’ll now have a finished base for your bench.
Step 5
Now you’ll need to cut 17 – 23 1/4″ long 2×4’s for the seat of this DIY Rustic Outdoor Bench. Sand these before attaching. Before attaching, mark the center of the seat frame.
Center the first seat board on that mark. You can even clamp it in the front and the back to keep it in place.
You’ll leave a 1/4″ overhang on the front of the bench. Carefully lay out the rest of the boards, about a penny’s width or 1/8″ apart.
This will give room for slight swelling during weather changes. You should have about 1/2″ overhang on each side too.
Step 6
You’ll need to notch out 2 of the boards on each end for the back leg/bench back. I generally use my jigsaw for notching. Once everything looks evenly spaced and has been notched out, attach the seats.
Use your 2 1/2″ self-tapping deck screws again. If you don’t use self-tapping screws, you will need to pre-drill the holes for your screws. Screws that don’t have the special self-tapping tip, will split the end of your boards.

Step 7
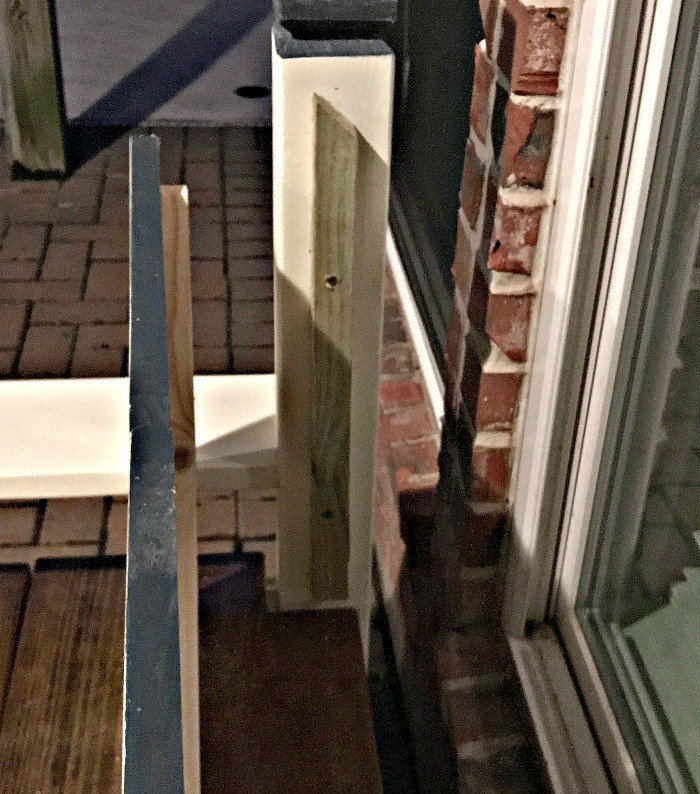
Now that the seat is complete, you can finish the back. Cut and screw on a 16″ long 2×2 furring strip along the length of each back posts.
This will support the boards for the bench back. Attach the furring strip 1 1/2″ back from the front of the back leg.
This will make sure that the back supports are even with the back leg, for a nice smooth look and feel.
AND make sure the top of the furring strip is 1 1/4″ below the top of the back leg. You don’t want that furring strip showing from the front of the bench.
Step 8
Cut, sand, and attach 5 – 50″ long back boards to the furring strips with your screws. Start with the top board, make sure each end is perfectly even with the top of the back legs.
Space each board a penny’s width apart again. You’ll be left with about a 2 1/2″ gap between the bench back and the bench seat.
If you prefer printable woodworking plans, I have a PDF version of this build plan with 3D drawings for the steps available in my Gumroad shop. Click the link below to see more details.
The rustic outdoor bench plans are for personal use only. They cannot be shared or sold without my permission. Please let me know if you have any questions and enjoy your build! 🙂

That’s it! Now that your DIY 2×4 Bench is built, you’re ready to finish it off.
Finishing Steps
You can finish your outdoor bench plans with paint or stain in any style you like. Check out this list of 25 Step by Step Beginner Furniture Painting Tutorials to get some design ideas.
If you are using new pressure treated lumber, you’ll need to let the boards dry out before painting or staining that lumber.
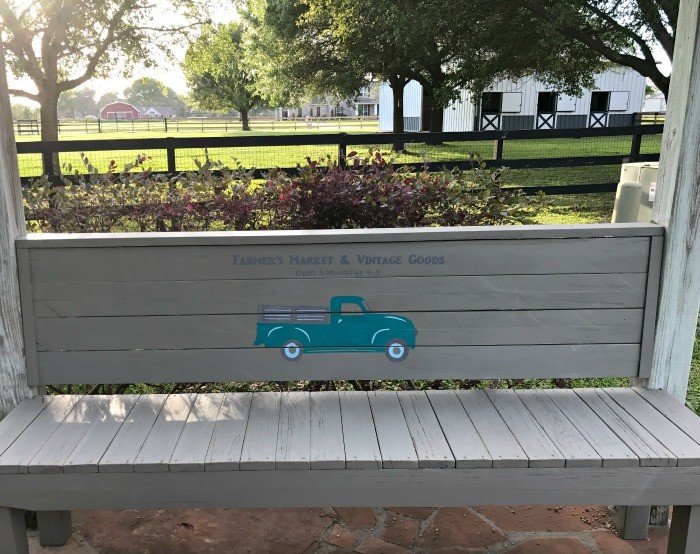
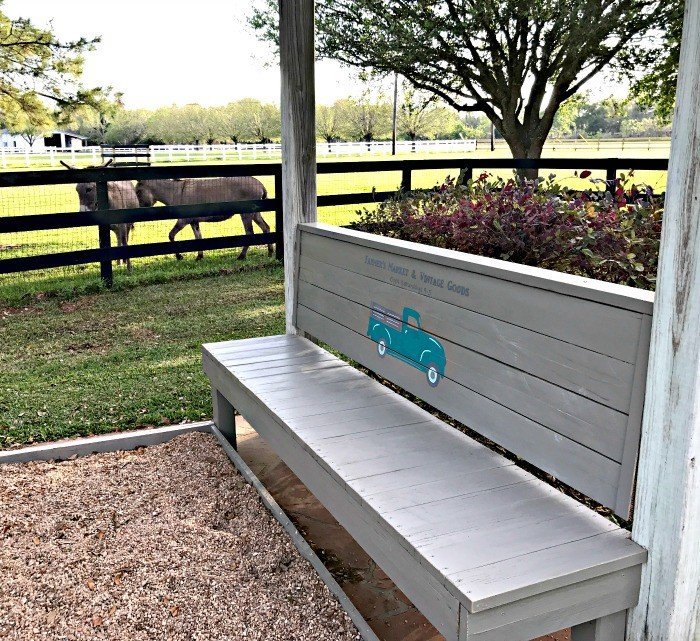
I went for a grey paint (Behr’s Squirrel Exterior Latex) that is already close to the grey color of the aged wood. I also distressed all the edges with sandpaper. This bench is in a gravel play area.
So, I knew it would take some abuse from my boys. When they bang and chip little bits of that paint, you really can’t tell.
The matching paint color makes any dings less obvious. In fact, I built this bench in early 2017 and it’s held up amazingly well.

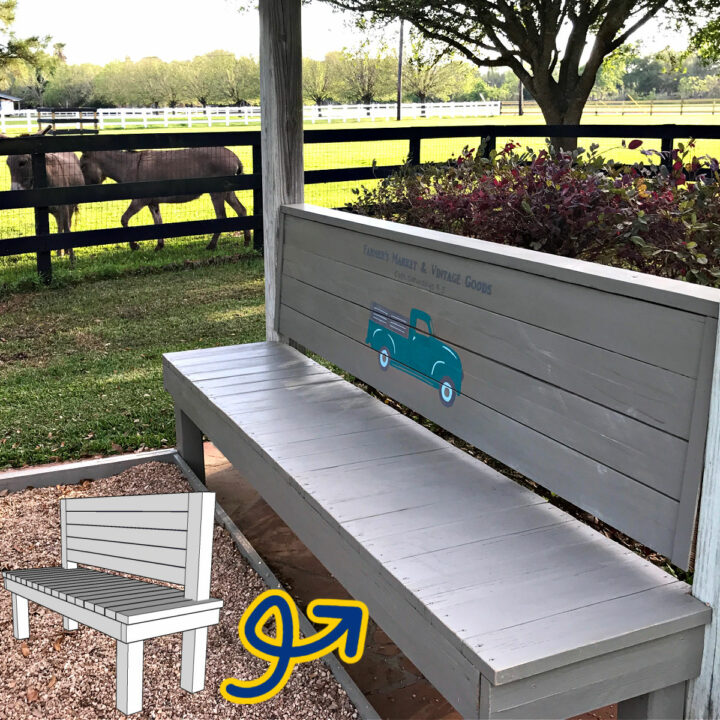
I gave this bench a fun Old Truck and Farmer’s Market design on the seat back. I’m horrible at drawing, so I found this great printable on the Nina Hendrick Blog to use for the design.
Then I used my DIY to resize and edit images to add the ‘Farmers Market’ text and adjust the size of the truck to this large scale.
More DIY Projects From This Blog
Looking for an big outdoor bench with more style? Check out my L-Shaped Backyard Bench tutorial.
I love this DIY Outdoor Sofa from 2×4 Pine and Cedar.
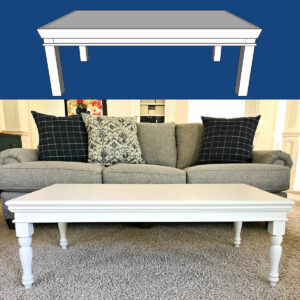
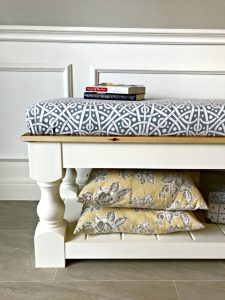
Looking for another great build. Check out this easy DIY Coffee Table with Turned Legs.
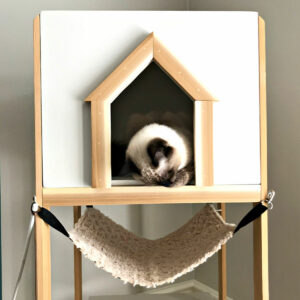
Your cat will love this DIY Cat Tree Wood House Build Plan too.
Or this beautiful DIY Chunky Leg Farmhouse Bench for inside your house.
Feeling inspired? Get started on these Easy DIY Rustic Outdoor Bench Plans. Have fun and let me know if you have questions.
Don’t forget to sign up for the Abbotts At Home email newsletter to get DIY, Remodeling, and Crafty ideas in your inbox.

Stephanie Abbott has been remodeling homes, updating & building furniture, and working on DIY home maintenance and cleaning tips for over 20 years. Her remodeling has been featured in Better Homes and Gardens Magazine. And, her DIY YouTube channel has had more than 8 million views.
Most of the DIY tutorials and videos on this site focus on beginner to intermediate level DIY Projects that can be done in an affordable way without high-end, expensive tools. All of the cleaning tips on this website have been tested in her home.