
Give furniture a BEAUTIFUL new look with this DIY Layered & Distressed Gray Chalk Paint Furniture Makeover. With easy steps & how-to video.
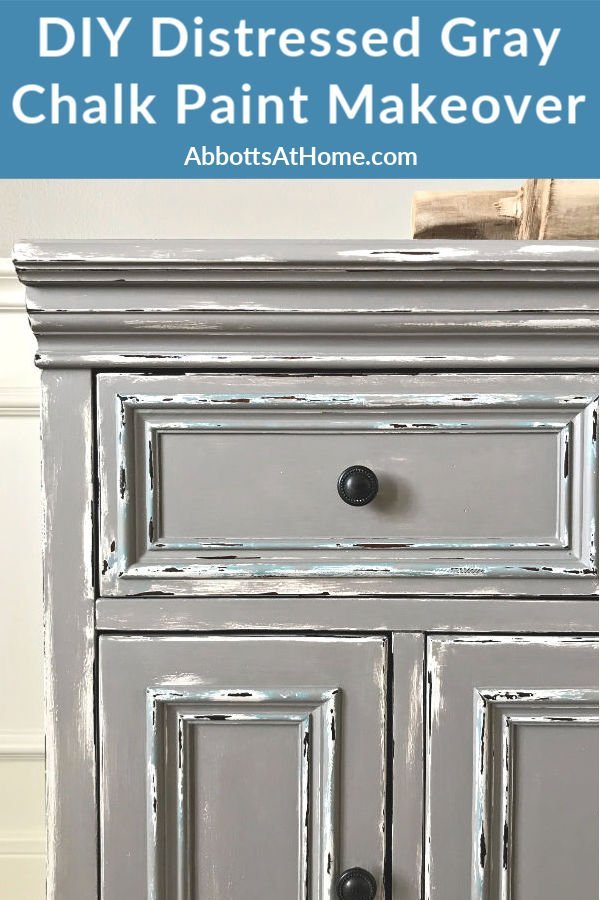
DIY Distressed Gray Chalk Paint Furniture Makeover
A few months ago, I used this layering and distressing technique on a DIY Pedestal Table Base. Well, I loved that white and grey distressed paint look so much that I wanted to see it on something bigger.
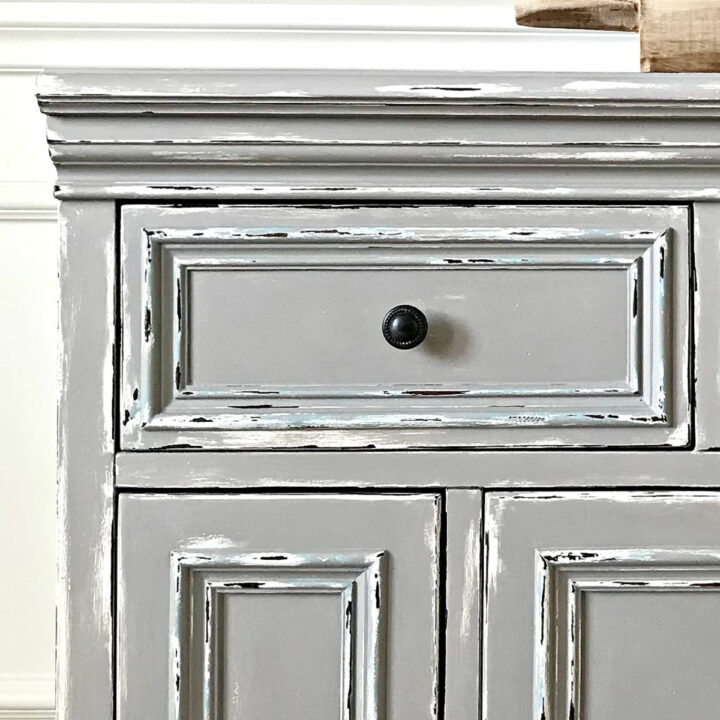
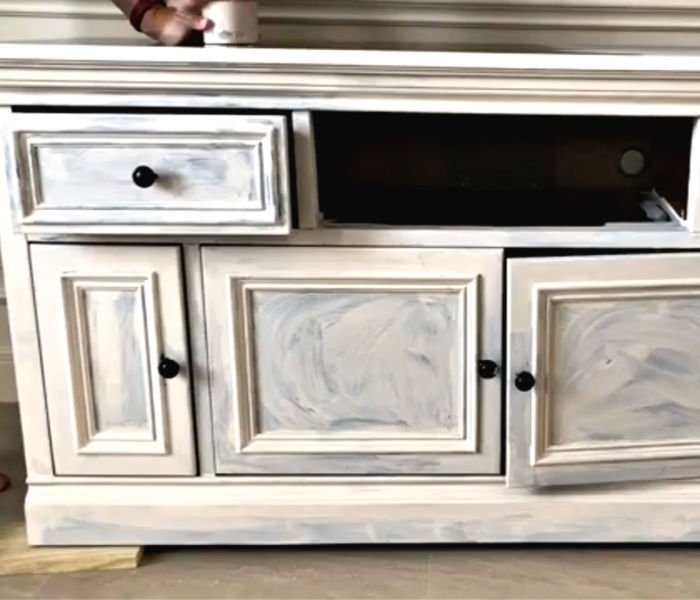
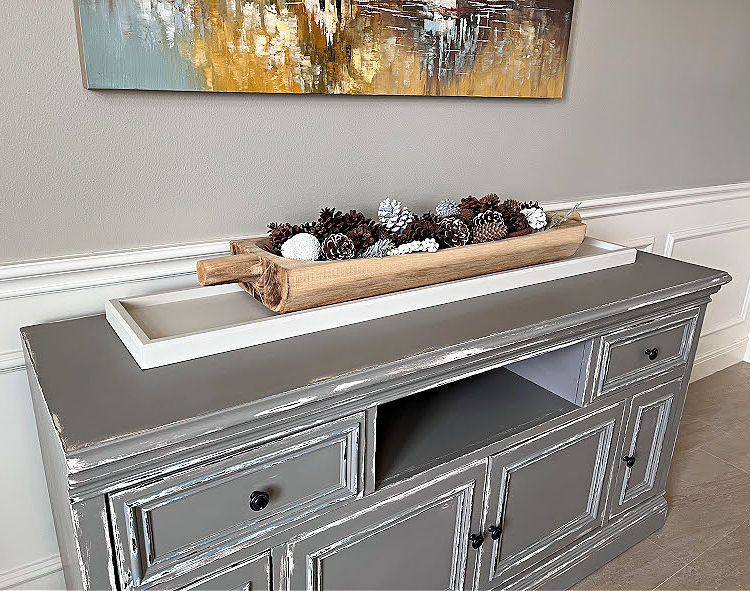
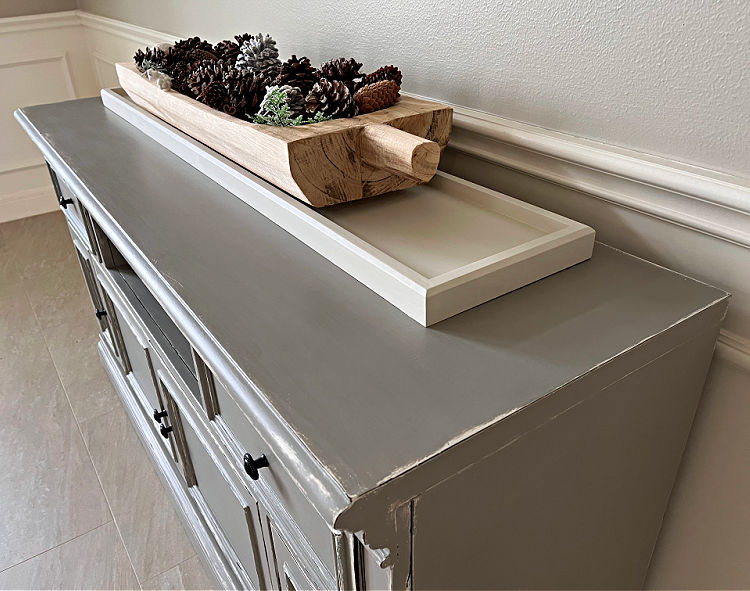
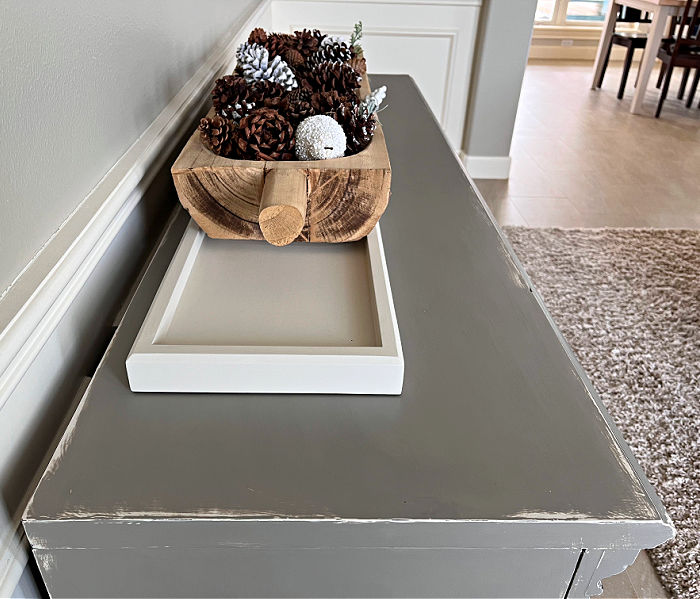
Our old entertainment center was perfect for this DIY Distressed Gray Chalk Paint Furniture Makeover. It has lots of molding, edges, and detail that can be highlighted by distressing.
You can use this technique with as little or as much distressing as you like. It’s all about personal preference and getting the look that you love. 🙂
I started with already stained furniture, for this project. If you want to get this look on unstained, bare furniture, I have included the steps to stain your wood below.
Don’t forget to follow me on YouTube for DIY project sneak peeks and quick how-to videos.
Now, let’s get to the steps for this DIY Gray Chalk Paint Furniture Makeover.
Watch the DIY Gray Paint Furniture Makeover Video Here
Seeing someone do something always helps me understand the instructions better. Watch this short video for a better look at each step. 🙂
Here’s What You’ll Need
These are the paint colors I used, but you can use any chalk paints in similar shades.
- Vaseline
- Danish Oil in Black Walnut – if starting with bare, unstained wood
- Vintage Duck Egg Chalk Paint by Dixie Belle
- Behr Latex Paint color Sandstone Cove, in Eggshell, that I mixed into chalk paint
- Amy Howard Chalk Paint color Selznick Grey
- Fine Grit Sanding Sponge
- Small Sander for targeted distressing, I used a Small Micro Zip Sander
- General Finishes Flat Out Flat (my favorite)
DIY Steps to Distress Gray Chalk Paint

Step One
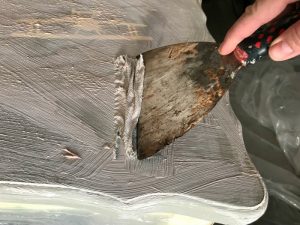
If starting with unfinished wood, use wood filler where needed, then sand to 150-grit. I like 150-grit under paint. I go for a higher grit when I’m just staining wood. Wipe away all dust with a tack cloth, or similar.
Now, wipe on 2 coats of Danish Oil in Black Walnut. Wear gloves and follow the directions on the can for best results.
I love Danish Oil as a stand alone stain or even under paint because it’s oils soak into wood and harden, which makes the wood harder and more durable. Make sure you wipe off all excess stain that the wood doesn’t absorb.
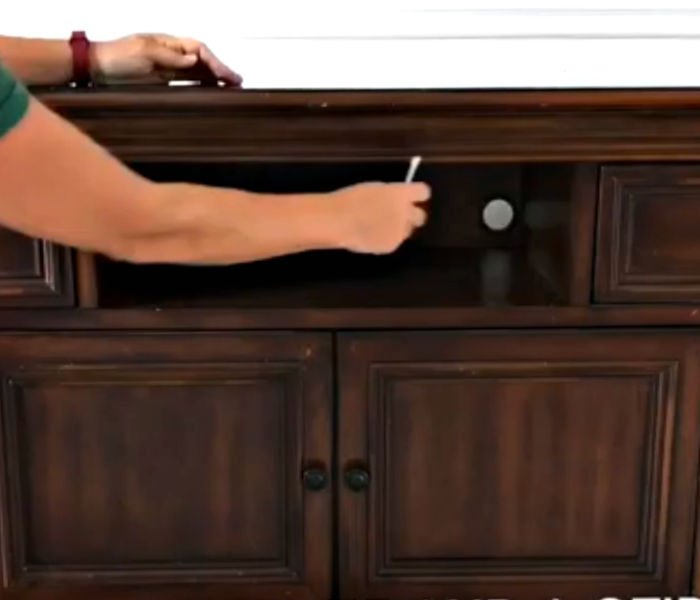
If you’re starting with furniture that is already stained, like mine, just give the surface a good clean. I used Dawn dishsoap mixed with warm water. If your furniture is really greasy or dirty, you can use TSP.
Step Two
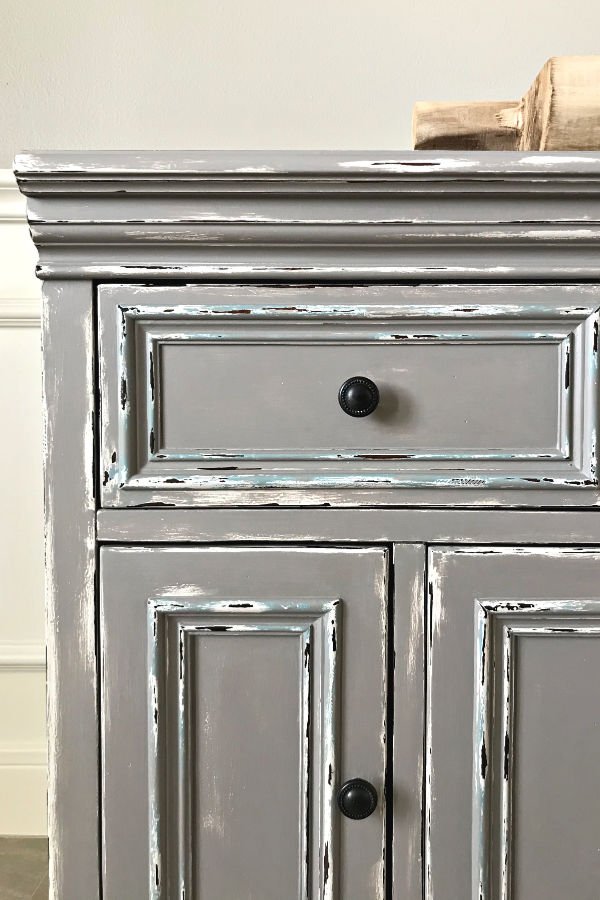
Once that stain dries, apply Vaseline with your finger tip or a q-tip to just the corners, edges, and any raised areas you definitely want the stained wood to show through the paint.
Don’t use too much Vaseline. If you make it gloppy or apply a lot, you’ll have a much bigger patch of stained wood show through.
You can see exactly how I applied mine with a q-tip in the DIY Gray Chalk Paint Furniture Makeover video above. I used a q-tip so that I could apply just the smallest amount to the corners and edges.
You can see how I distressed an office chair with thicker vaseline here. It still looks nice, but you see more wood and it has more of a rustic style.
Step Three
Now you can paint on 2 coats of an off white chalk paint. I’m using a good nylon brush to apply all of my chalk paints.

Step Four
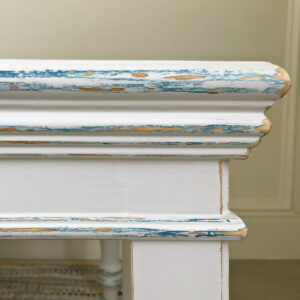
Add some blue accent color to a few raised details or corners. I applied Dixie Belle’s Vintage Duck Egg Blue to a few areas that I just wanted a bit of blue highlights showing through.
I applied mine to the raised moulding on the doors and drawers.
Step Five
Then, you need two layers of a Medium Grey. I used Amy Howard’s Selznick Grey Chalk Paint. I really recommend using chalk paint when distressing.
It dries harder and faster than latex paint. And, it sands more easily and evenly than latex.

Now for the fun part of this DIY Distressed Gray Chalk Paint Furniture Makeover!
Step Six
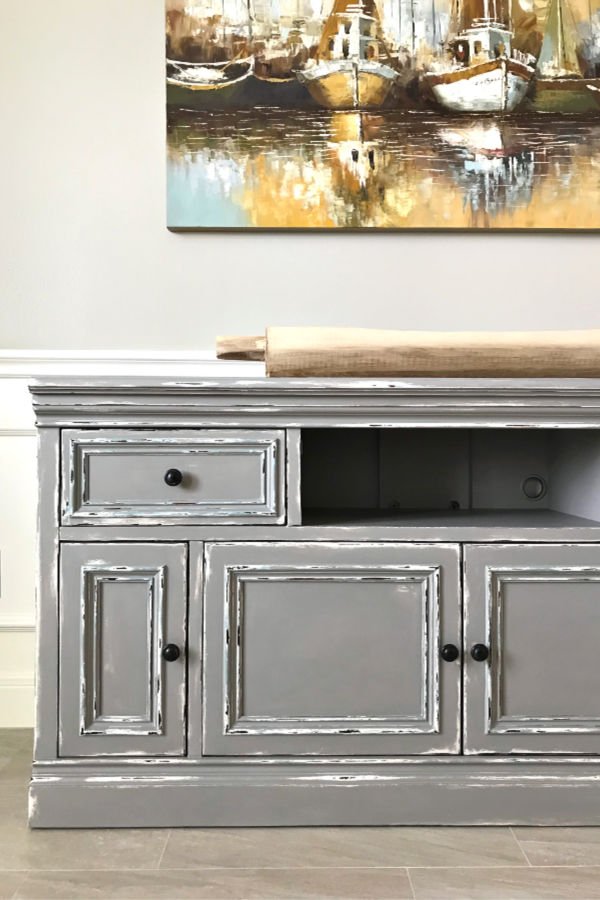
Once that last coat of paint dries, use a slightly damp Fine Grit Sanding Block to wet sand the edges, corners, and raised areas. Be sure to get all those spots you applied vaseline too.
You’ll need to rinse out your sanding block as the pores fill up with paint. Use a damp rag to wipe off the paint residue as you work too. That paint residue tends to build up pretty quickly, so keep it clean to avoid messing up.
I also lightly wet sand the entire surface of the furniture just to give the chalk paint a super smooth feel. Just keep the pressure light so that you don’t sand away the gray color.
When I wanted to get into small spots or target my distressing to just thin lines, I used a small, finger-sized sander with fine grit sandpaper.
Furniture will naturally wear at corners, edges, and raised spots over the years. So, I tend to stick to those spots for a more natural distressed look.
Go for what you like with this distressed paint look. I like to just step back as I work to see if I need to work on some spots more. It’s all personal preference though. Go with what you like.

Step Seven
Once you’ve finished distressing, give the whole painted surface another wipe down with a clean, wet rag to remove all leftover paint residue. Use a clean, dry rag to wipe off the water.
Now it’s time to seal with a good, durable water-based polyurethane. I used 3 coats of General Finishes Flat Out Flat. Follow the directions on the can to get the best result.
I love this topcoat because it has a subtle sheen and feels so smooth. It makes furniture look like it has a store-bought finish.
More Photos
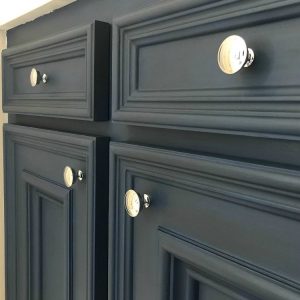
This old entertainment center is now a pretty buffet for our Dining Room. I’ll build or buy a pretty tray for the open area between the drawers.
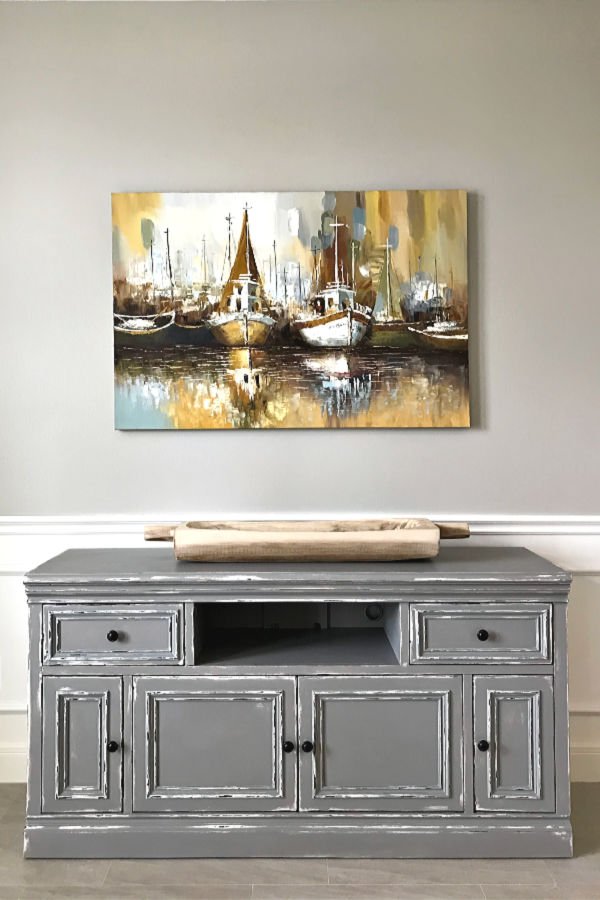
Next week, I’m adding a beautiful Simple DIY Coffered Ceiling Design to the ceiling that I’m very excited about. Check back to see how it turns out. 🙂
More DIY Projects You Might Like
Looking for more of my DIY Furniture Makeover videos? You can see them here, on my YouTube channel.
Check out this post for all of my tips and steps for How to Paint Furniture for Beginners. With a Free Printable Guide!
Here’s my steps for this beautiful DIY White and Blue Distressed Chalk Paint Makeover.
You might also like this DIY Weathered Paint Tutorial.

Or, check out this classic Dark Blue with Dark Wax Cabinet Makeover.
Here’s the easy DIY steps and how to video for Stripping Paint From Wood Furniture.
You can also find this popular Blue Distressed Paint Using Vaseline Tutorial and this easy DIY Stain Wood Furniture without Stripping tutorial on this blog.
Feeling inspired? Now that you’ve seen this DIY Distressed Gray Chalk Paint Furniture Makeover, you can do it too. Let me know if you have questions.
Don’t forget to sign up for the Abbotts At Home email newsletter to get DIY, Remodeling, and Crafty ideas in your inbox.

Stephanie Abbott has been remodeling homes, updating & building furniture, and working on DIY home maintenance and cleaning tips for over 20 years. Her remodeling has been featured in Better Homes and Gardens Magazine. And, her DIY YouTube channel has had more than 8 million views.
Most of the DIY tutorials and videos on this site focus on beginner to intermediate level DIY Projects that can be done in an affordable way without high-end, expensive tools. All of the cleaning tips on this website have been tested in her home.