If you are ready to give furniture painting a try, but don’t know where to start, this post is for you! It’s everything you need to know about how to paint furniture for beginners.
How to Paint Furniture for Beginners
Furniture painting can seem overwhelming for beginners, when you see all of the types of paints available. And, there are so many, many ways to paint furniture.
From just a simple single color over the entire piece to layering many colors for a true artistic look. So many options can make it feel like it’s hard to do.
But painting furniture is absolutely not hard. You just need to learn the basics and give them a try. With practice you can add in new furniture painting techniques or new types of paint to design your own looks.
I have all of the basic steps for painting furniture for you in this post.
For more answers to common furniture painting questions, check out this post on More DIY Tips for How to Paint Furniture and this post for 20+ Step by Step Furniture Painting Tutorials.
Table of contents
What Kind of Paint Do You Use on Furniture
I recommend using paints on furniture that are easy to use, low VOC (or fumes), water-based, fast drying, and durable. To keep things simple, let’s talk about 4 of the most popular types of paint used on furniture.
Latex Wall Paint on Furniture
Most interior latex wall paints can be used on furniture. A lot of beginners start furniture painting with latex or acrylic wall paint. They are easy to apply with a nylon brush, paint sprayer, or foam roller.
These paints are water-based, so easy to clean up with just water.
Latex and paints have low VOC’s, meaning they have low fumes. So, you can use them to safely paint furniture indoors.
You don’t need to use a top coat on latex paint, unless you want to. But, you should use a good water-based primer under latex paint.
I recommend using an eggshell or satin sheen on furniture. It looks pretty, hides imperfections better. And, that sheen makes it easier to wipe off dirt and spills.
Latex paints dry a bit slower than acrylic paint. And, latex paints take longer to fully cure, or harden too.
I have used 3 layers of latex paint on furniture that didn’t fully harden for 3 months. That’s a long time, guys. Setting a lamp on that paint would leave a dent in the paint because it hadn’t cured.
You can make latex paint dry and cure faster by mixing it into chalk paint with this DIY chalk paint recipe. That recipe will make your latex paint harden faster and easier to sand for distressing too.
Acrylic Paint on Furniture
Like latex paint, most interior acrylic wall paints can be used on furniture. They are easy to apply with a nylon brush, paint sprayer, or foam roller. They’re water-based, so easy to clean up with just water.
Acrylic paints also have low VOC’s, meaning they have low odor and don’t release dangerous fumes. So, you can use them to safely paint furniture indoors.
Acrylic Paints cure faster than latex, generally. So, they are ready to set things on within a day or two. And, acrylic paints are more flexible than latex paints. So, acrylic wall paints are my preference over latex these days.
Acrylic paints are a great furniture paint for beginners. I really love the Magnolia Homes by Kilz line of Acrylic paints. I use them a lot.
This Magnolia Homes by Kilz says it is a paint and primer in one. I usually ignore that when it comes to furniture.
It’s generally referring to use on walls. For furniture, it’s probably best to always use a good water-based primer under latex and acrylic wall paints.
I recommend using acrylic paint in an eggshell or satin sheen. It doesn’t require a top coat. The one limitation is that it doesn’t sand well for distressed paint looks. So, if you want to distress and layer paints, use chalk paint instead.
You can make acrylic paint dry and cure faster by mixing it into chalk paint with this DIY chalk paint recipe. That recipe will make your acrylic paint harden faster and easier to sand for distressing too.
Oil Based or Alkyd Paints on Furniture
Oil Based paints provide a durable finish BUT take much longer to harden. They are also a lot harder to clean up. You have to use Mineral Spirits or Paint Thinner to clean up oil based or alkyd paints.
And, oil based paints have high VOC’s. They release strong fumes or gases for days or weeks after using them. We know now that breathing in those fumes is not good for you. In fact, some areas have outlawed their sale.
Oil based paints also have special rules for safe disposal. Which is just another reason why they are not easy to use. In fact they are a giant pain to use.
Oil based paints also yellow over time. Which isn’t ideal when you are wanting a nice crisp white on furniture or wood trim in your home. So, I say avoid oil based or alkyd paints on furniture and home trim. Don’t use oil based paints if you are learning how to paint furniture.
Chalk Paint AND Chalk-Like Paints on Furniture
Chalk Paint is another one of my absolute favorite paints on furniture! And, chalk paint is a great furniture paint for beginners. It is water based and can be easily cleaned up with water.
Chalk paints are a very low VOC paint with practically no odor. So, they can be safely used indoors. They’re also easy to apply with nylon brushes, foam brushes, foam paint rollers, or specially made chalk paint brushes.
Chalk Paints dry fast and cure faster and harder than wall paints. They are also great for layering paint colors to create pretty, distressed paint looks.
Chalk-style paints are usually actually latex or acrylic paints with something like plaster of paris mixed in to make it act like chalk paint. Meaning, it dries harder, cures faster, and is easier to sand than normal latex and acrylic wall paints.
I like chalk paint and chalk-style paint. You can find cheap and expensive options online, in stores, or at specialty shops. I say avoid the expensive stuff. They’re really no different than the cheap stuff.
The only limitation with chalk paint is the limited range of colors available. Most chalk paint lines might have 20 to 30 colors. That’s why I like to buy latex or acrylic wall paint that’s available in hundreds of colors, then I mix that into easy homemade chalk paint.
5 Of The Best Paints To Use On Furniture
Here’s some of my favorite paints to use on furniture. All of these fit my requirements for safe, easy to use, easy to clean up, fast drying, durable paints.
And, all of these are great for beginners that want to learn how to paint furniture.
- Rust-Oleum’s Chalked Paint
- Country Chic Chalk Style Paint
- Retique It Chalk Style Paint
- Magnolia Homes by Kilz acrylic interior paint or chalk style paint
- My DIY Chalk Paint Recipe with Plaster of Paris and Latex or Acrylic Paint
Grab the 19 page free printable version of my Beginner’s Guide to Painting Furniture that includes everything from this post, plus answers to 12 Common Questions about Painting Furniture.
20+ Beginner Furniture Painting Tutorials
Check out this Video for Beginner Level Furniture Painting Ideas. You can find tutorials for everything in this video in this Step by Step Furniture Painting Tutorials post.
Quick & Easy Steps For Furniture Painting
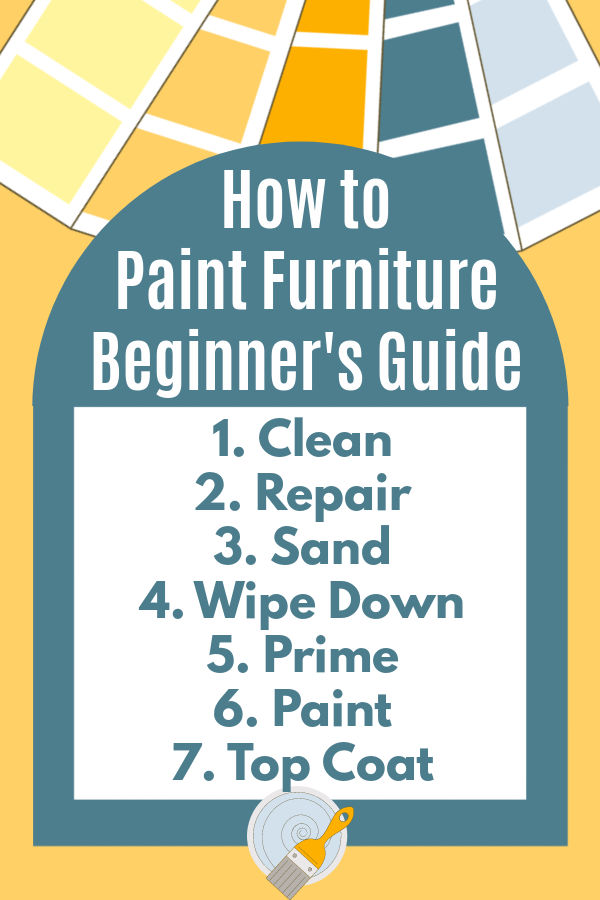
Here’s a quick look at the general steps for furniture painting. There are 7 steps on this list, but 4 are optional depending on your furniture and the paint you pick. You can find a detailed explanation of each below.
- Clean and degrease the furniture.
- Repair damage with wood filler or Bondo, if needed.
- Sand to get a smooth finish and better grip, if needed.
- Wipe down with a tack cloth.
- Apply a good, water-based primer, if needed.
- Then apply 2-3 coats of paint.
- Apply 2-3 coats of top coat, if needed.
Steps to Paint Furniture (Beginners Guide)
Here are the basic steps for how to paint furniture for beginners. These steps to furniture painting will work with most Chalk, Chalk-Style, Latex, and Acrylic Paints. This is really the easiest way to paint furniture for long lasting results.
Step One
Prep your furniture for painting by cleaning off built up dirt and oils with a degreaser safe for wood, like TSP.
Step Two
Optional, won’t always need to be done.
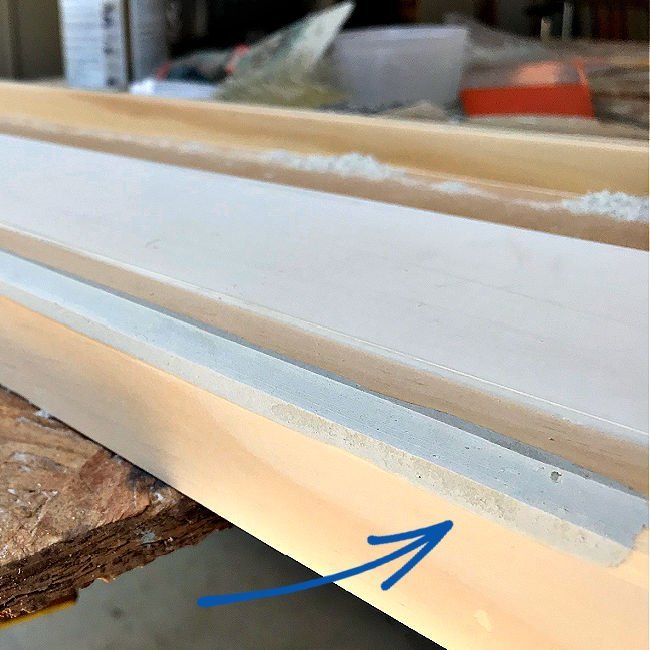
Repair any small dents, dings, cracks and damage with paintable wood filler. Repair furniture damage with bondo all purpose putty, if the damage is bigger than a quarter. Sand the repair smooth with 180-grit sandpaper once the filler is dry.
Step Three
Optional, won’t always need to be done.
Lightly sand the entire surface of the furniture with 180-grit sandpaper. If the furniture you are sanding looks great already and has a smooth finish, just lightly sand the finish to make it easier for the primer to stick.
You want to have the surface smooth and looking great before painting. I recommend just hand sanding with a sanding block. Power sanders in corners can sometimes cause damage to furniture. You only really need a power sander on really uneven, chippy old paint surfaces.
Be sure to always wear a mask when sanding. And, be careful sanding laminated furniture. Sanding laminated furniture too much can remove the laminate or veneer and you’ll be left with rough plywood or chipboard.
You can usually skip sanding if the surface is smooth and undamaged AND you are using chalk paint or chalk-like paint. If you are using chalk paint or chalk-like paint it will stick to most surfaces without sanding or a primer.
Laminated furniture, non-wood furniture or high gloss paints and stains should probably still get a light sanding for a better bond with the chalk paint. It’s better to be safe than sorry.
Step Four
Wipe down the furniture with a tack cloth to remove all dust. This is one of the most important steps to learn for how to paint furniture. It’s easy to do, but if you skip this step your paint will look terrible.
Step Five
Optional Step, won’t always need to be done.
Apply a good water-based primer. You need primer if you aren’t using chalk paint. Chalk paint sticks to almost anything. You might also need a primer on non-wood furniture or even laminated furniture, before using chalk paint. Just to be extra sure it will stick.
Follow the directions on the primer for the best results. Use a quality nylon brush, foam roller, or foam brush to avoid brush marks. Allow it to fully dry before step six.
Step Six
Apply 2 to 3 coats of chalk paint, chalk-like paint, latex paint, or acrylic paint. Follow the directions on the paint container for the best results. You usually only need 2 coats. But some light colors and red colors need 3 coats.
Remember latex interior paint and acrylic interior paint are designed for walls. You can use them on furniture with the tips discussed in the section above about latex and acrylic paint. I like eggshell and satin sheen latex and acrylic paints on furniture.
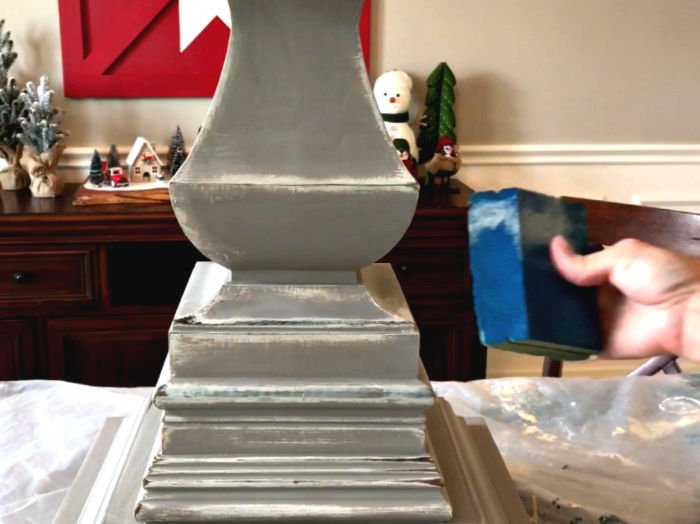
Chalk paint and chalk-light paint will likely need a light wet sanding with a fine grit sanding block after the final coat to get a super smooth, furniture store feel to the paint. You can read more about this in how to get a smooth finish with chalk paint.
After wet sanding, wipe down the paint with a clean damp cloth to remove the residue.
Step Seven
Optional Step, won’t always need to be done.
Apply a Protective Finish. I love the professional looking light sheen and durability in General Finishes Flat Out Flat or Minwax Polycrylic in Matte. The sheen in these products looks just like the sheen on expensive furniture from furniture stores.
Again, follow the directions on the product you are using for the best result. That’s the last step to learn for how to paint furniture for beginners. Not too hard, right?!
That’s it, guys. Looking for more of my Furniture Painting Videos? Check out this Beginner Furniture Painting playlist on YouTube.
And, one more tip, I love putting unique drawer pulls and knobs on any furniture I make or paint. Here’s 23 unique drawer pulls and knobs I absolutely love.
More DIY’s You Might Like
Here’s how to do this Shabby Chic Style DIY White Distressed Chalk Paint Look.
I also love this Easy DIY Furniture Redo with Smoky Blue Paint.
Here’s How to Get a Super Smooth Finish with Chalk Paint. It’s a-mazingly easy!
You might also like this DIY for How to Whiten Tile Grout. It’s a Game Changer!
And, if it is time to Stain your Front Door, check out these steps for how I restain a front door without stripping it or removing it.
Feeling inspired? Now that you’ve read these tips for How to Paint Furniture for Beginners, you can do it too. Let me know if you have questions. Don’t forget to sign up for the Abbotts At Home email newsletter to get DIY, Remodeling, and Crafty ideas in your inbox.
Stephanie Abbott has been remodeling homes, updating & building furniture, and working on DIY home maintenance and cleaning tips for over 20 years. Her remodeling has been featured in Better Homes and Gardens Magazine. And, her DIY YouTube channel has had more than 8 million views.
Most of the DIY tutorials and videos on this site focus on beginner to intermediate level DIY Projects that can be done in an affordable way without high-end, expensive tools. All of the cleaning tips on this website have been tested in her home.

