
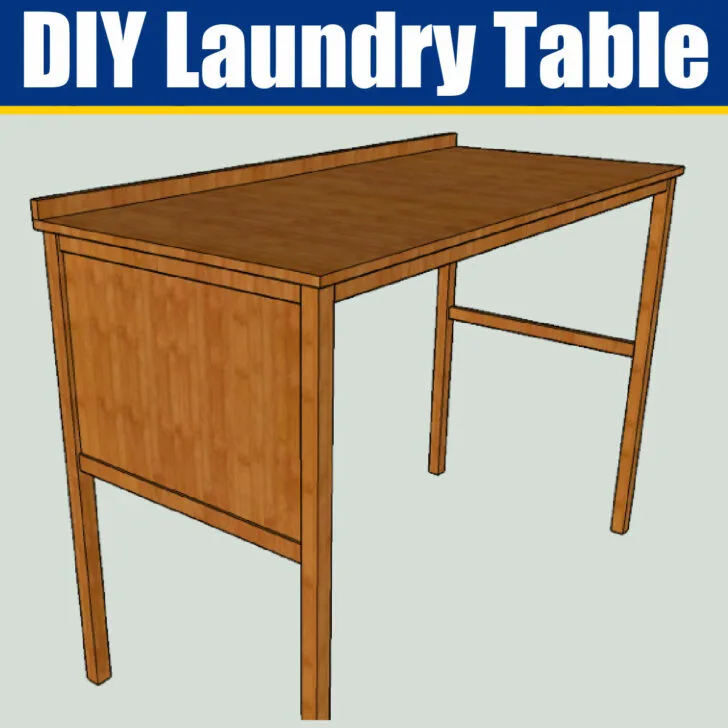
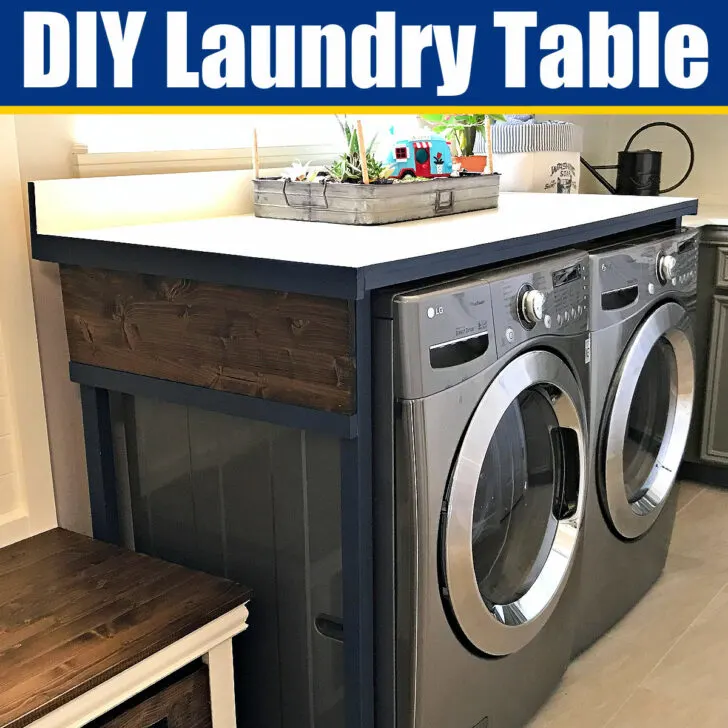
Hide that washer dryer with this $85 DIY Laundry Table. It’s BEAUTIFUL farmhouse-style dresses up any laundry room and makes folding SO EASY.
Easy DIY Laundry Table Build Plans
I’m so excited about this easy woodworking project, guys! This DIY Washer Dryer Laundry Table transformed our laundry room into a functional and beautiful space.
Have you ever noticed there is a serious flaw in the design of washing machines and dryers? What’s the flaw? It’s that huge, laundry-eating, eyesore of a gap behind the machines.
It’s an 8-inch deep abyss at my house and it taunted me every time I walked into our Laundry Room.
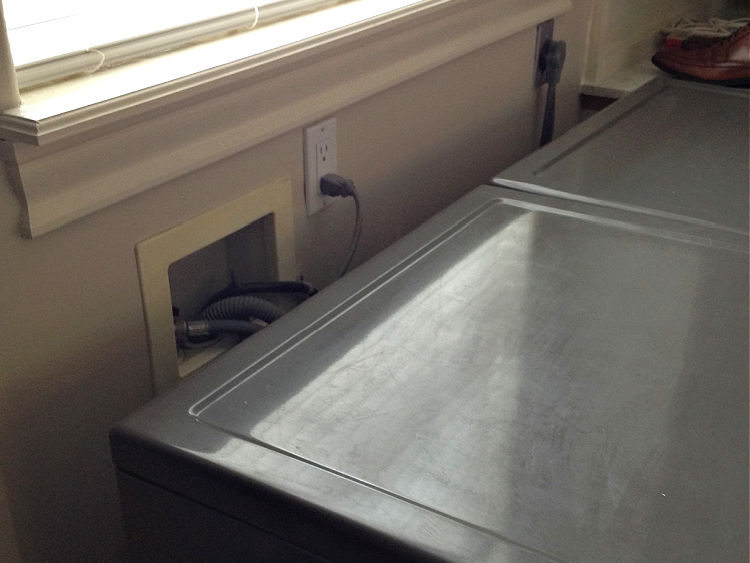
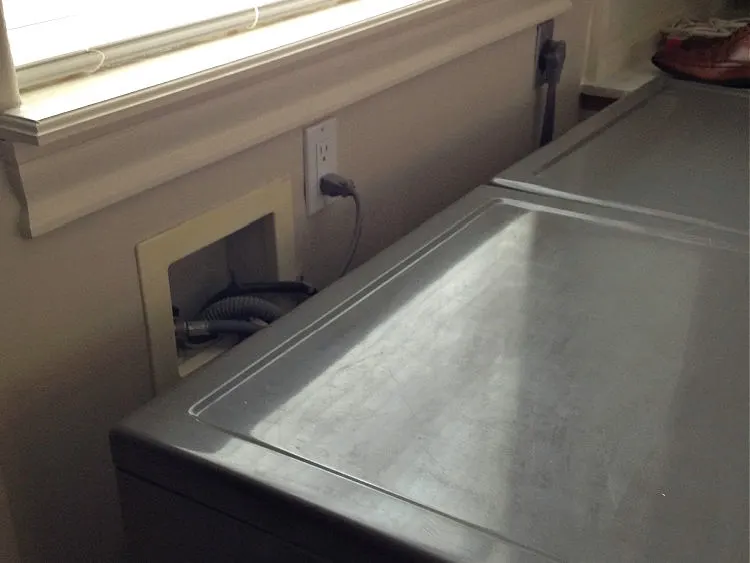
I mean who could ignore this? It gobbled up laundry, pens, and toys left on top of the machine. It also gathered tons of dust.
And, constantly seeing the plumbing and outlets ruined my attempts at making the laundry room the cute and cozy room I dreamed of.

Washer Dryer Table Top Design Notes
At first, I thought about attaching a Laundry Table Top to the wall, but figured that really wouldn’t work. It would be too deep to be safely supported by just one wall.
Plus, I wanted something that could be easily removed, when needed. So, it had to be a table in my situation.

Let’s get into the build.
Cost to Make this DIY Laundry Table
I spent around $85 for the lumber and leg hardware for this table. I mostly used common whiteboard for this build. Not a bad price for a custom piece that adds so much function and style to our laundry room.
2022 UPDATE: The price of lumber has gone UP, UP, UP in the last couple years. You can save money by building this with a plywood top instead.
Build A DIY Washing Machine Table
The instructions below tell you exactly how I built this DIY laundry table. But the specific measurements I used aren’t always mentioned.
Laundry tables really need to be built to fit your machines and available space. Don’t worry, my build details explain how to figure out your measurements to build your own washer dryer laundry table.


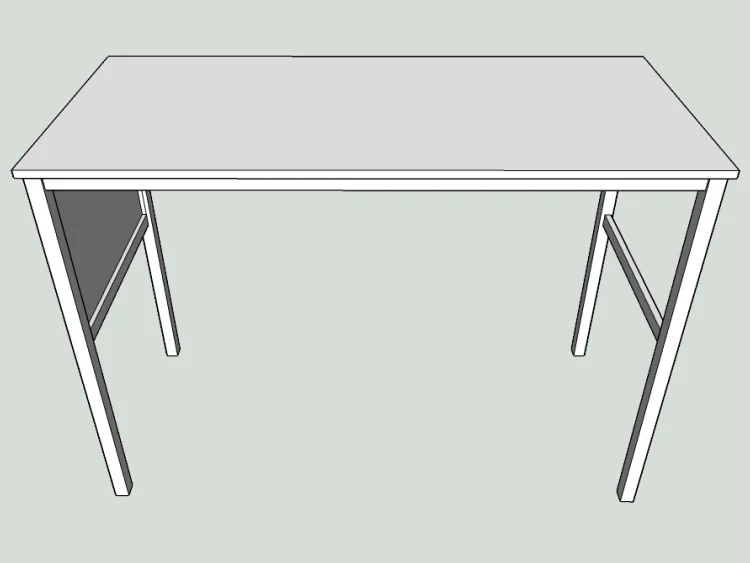
Build A Supporting Frame
I originally built this Laundry Table 5 years ago. And, I’ve learned a lot more about woodworking since then.
At this point, I’m going to tell you the way I should have built this Washer Dryer Laundry Table frame. But, don’t worry, the new way is BETTER and EASIER to build.
Again, you need to build this to fit your machines. The opening under the frame and between the legs should be big enough for the Laundry Table to slide over your washer and dryer.
Connect The Front Legs And Back Legs
I used 2×2’s for the legs on this table. We’ll still use those. But, you should connect all 4 legs with 1×2 dimensional lumber to make the frame sturdier.
I set the 1×2’s about 1/4″ back from the outside edges of the 2×2’s. Use wood glue and Kreg Jig pocket holes to connect the 2 front and 2 back legs of this frame.
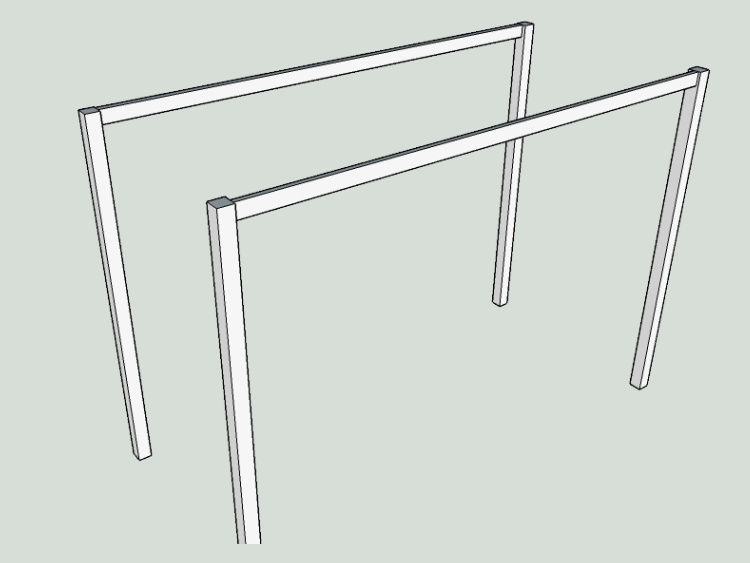

Measure the height of your washer and dryer AND the width of the 2 machines to figure out how long the legs and how wide the opening between them should be.
Add about 1/2″ to 1″ for a gap so that the DIY Laundry Table doesn’t touch the machines.
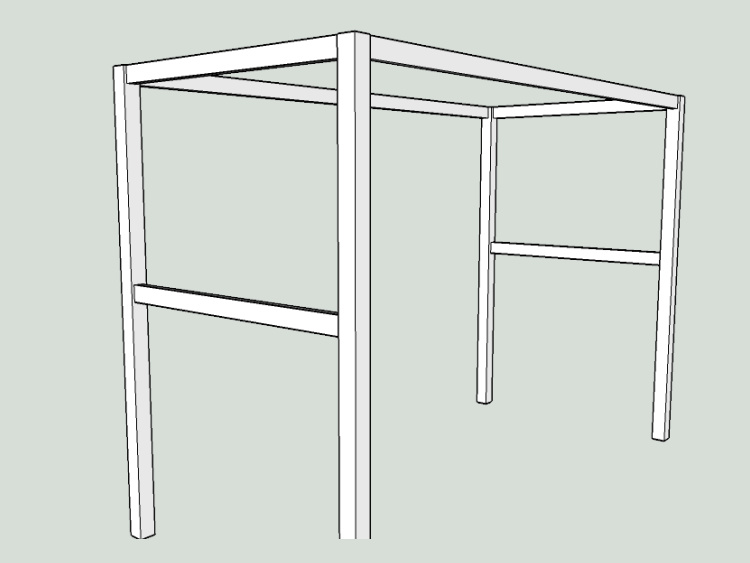
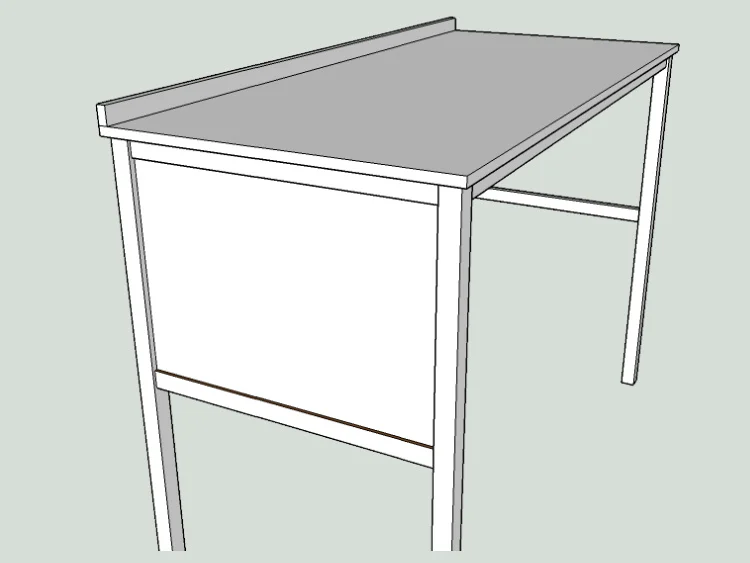
Connect The Right And Left Legs
Now we’re going to add even more connecting pieces between the right and left set of legs. This is just more support on those unusually tall legs.
Without the extra side supports, the Laundry Table will be too jiggly. At the very least, you need to use 2 1×2’s on each short side of the table.
The first should be along the top of the legs. And, the 2nd about half way down. Set those 1×2’s about 1/4″ back from the 2×2 legs again. And, use pocket holes and wood glue.

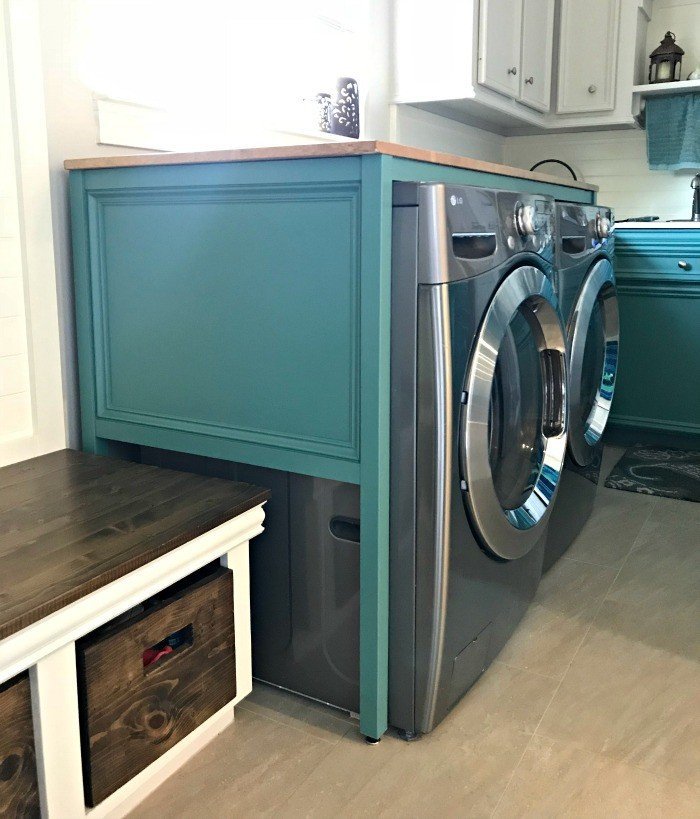
Optional Style Upgrade: If you have 1 or 2 open sides on your washer dryer, you can cover the machines on that side by adding 1/2″ thick plywood between the 1×2’s.
Use wood glue to connect the 1/2″ plywood to the 1×2’s above and below it BEFORE connecting all 3 pieces to the 2×2 legs.

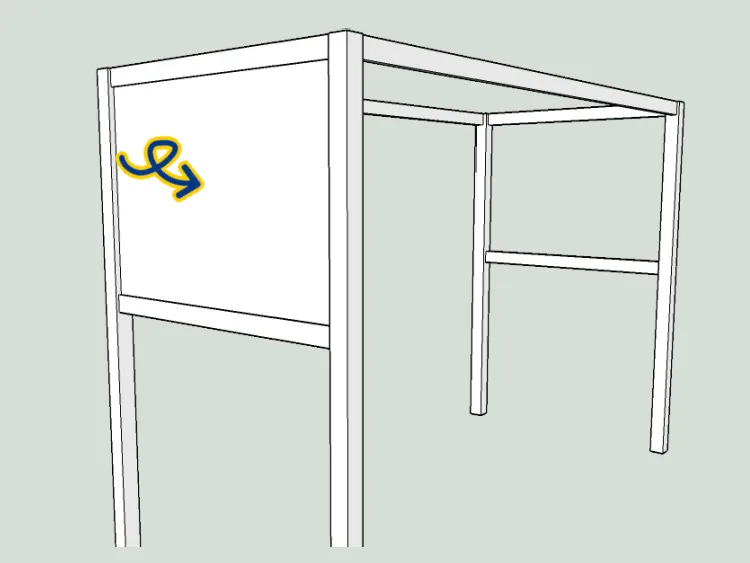
You only need that extra plywood piece on a side that is visible (like the left side of my machines). Otherwise, you only need the 2 – 1×2’s to stabilize the legs.
Building The Laundry Table Top
BUILD THE TABLE TOP 1″ LONGER AND DEEPER THAN THE FRAME. That way you’ll get a 1/2″ overhang on all 4 sides of the frame.
Original Table Top Design
To create the original tabletop 5 years ago, I used 5 – 3/4″ boards of various widths of dimensional lumber to create a 28″ x 60″ top.
If you want to use dimensional lumber (like Select Pine or Whiteboard), use wood glue and pocket holes every 8″ to join the 5 – 60″ long table top boards together.
Easier, Cheaper Table Top Option
With lumber prices up, you can make the table top with 3/4″ plywood. More good news, it’s a lot easier and faster too.
Make the edges of your plywood look pretty by ironing on edge-banding.
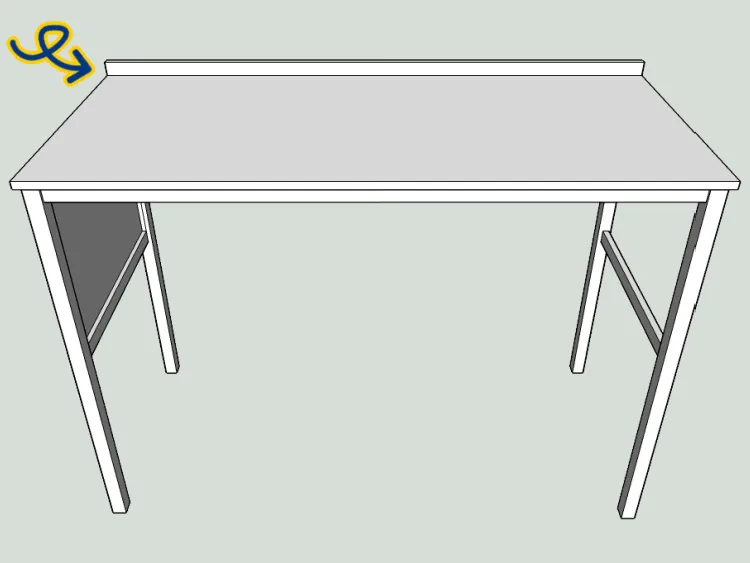
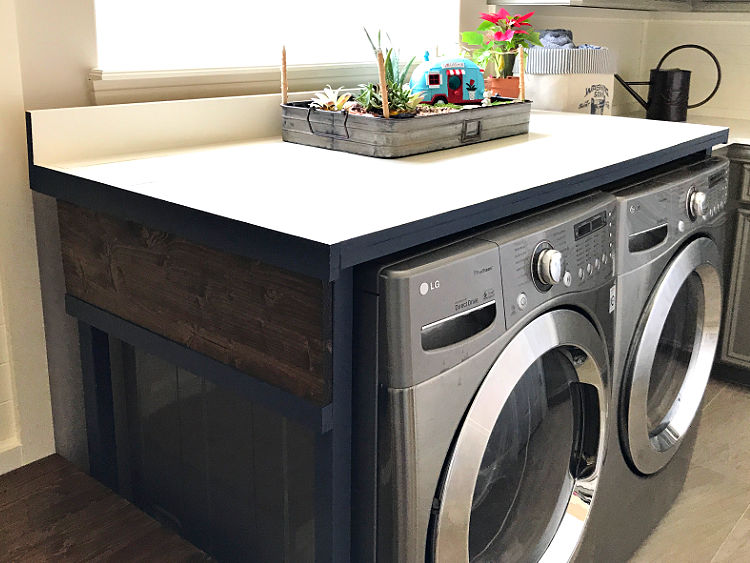
Optional: Add A Catch-All Board Along the Table Top Back
To finish the DIY Laundry Table Top off, I used glue and my brad nailer to attach a 1″ x 2″ board along the back of the tabletop. If you’d like, you can add a pretty routed-edge along the top of this board.
This back keeps items from falling behind the machines and hides the ugly washing machine outlets and plumbing. Double win!


Attach the Washer Dryer Table Top To The Frame
To attach the top to the frame, you can use Kreg Jig pocket holes to attach the table top to the frame.
OR, you can use little angle brackets that attach the frame to the top. Use 6 brackets total. 3 on each of the long sides. Put 1 near each end (inside the frame) and 1 in the middle.
3 along each long side will evenly hold the top in place, while helping it resist warping. You can see an example of the type of angle brackets to use here.

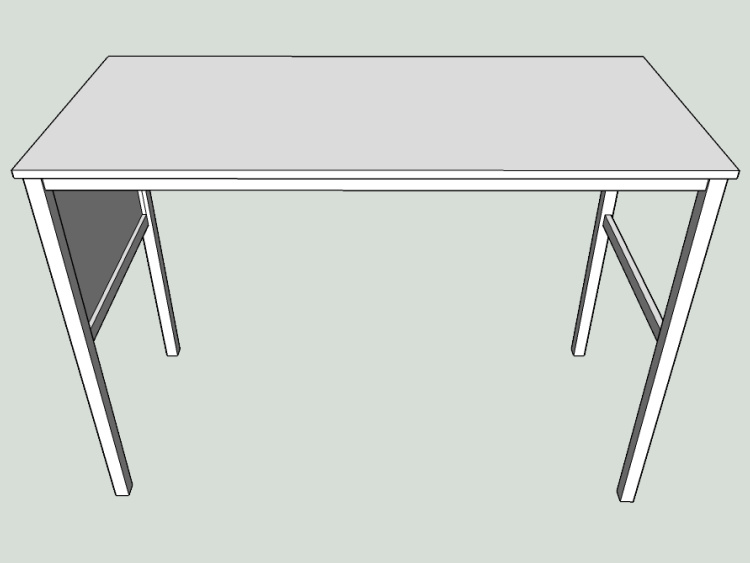
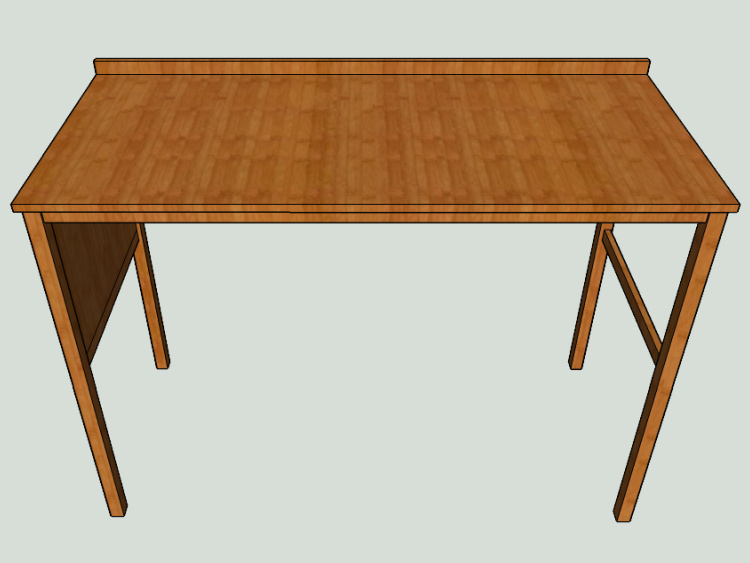
How I Painted My DIY Laundry Table
I went with a white top (Behr’s Polished Pearl) to match the rest of the trim and molding in my house. Then, I painted the legs, cross supports, and table edges in Sherwin William’s Hale Navy
And since I love stained wood, I stained the 1″ x 10″ board with this stain, my go to color. Of course, everything then got a couple coats of Rust-oleum’s Matte Ultimate Polyurethane.

I love this laundry table. It is so nice to not have to see that gap or the outlets. And we love having a place to drop things when we walk in the door!
UPDATE: I gave my Laundry Room a full makeover a few years later. And, decided to build a new Laundry Table to match the new design. You can see the latest Laundry Table design with free printable build plans now.

More DIY Furniture Projects You Might Like
- Beautiful DIY Console Table Plan with Drawers
- Build A Simple DIY Pedestal Table Base
- 10 Best Ways To Make Cabinets Look Like Built In Furniture
- Easy DIY Canvas Frame Build (Made with 1×2 Wood)
- DIY Play Kitchen for Kids: Easy PDF Build Plan And Video
- Beautiful DIY Christmas Tree Box Stand : PDF Build Plans And Video
- Easy DIY Cat Tree Wood House – Cat Tower Build Plans
Feeling inspired? Want to create your own DIY laundry table? Have fun and let me know if you have questions. Or post pictures of your work and tag Abbotts At Home on FB, I’d love to see it!


Stephanie Abbott has been remodeling homes, updating & building furniture, and working on DIY home maintenance and cleaning tips for over 20 years. Her remodeling has been featured in Better Homes and Gardens Magazine. And, her DIY YouTube channel has had more than 8 million views.
Most of the DIY tutorials and videos on this site focus on beginner to intermediate level DIY Projects that can be done in an affordable way without high-end, expensive tools. All of the cleaning tips on this website have been tested in her home.
Emily
Sunday 28th of May 2017
That's awesome! Thanks for sharing at #HomeMAttersParty
Michelle Leslie
Friday 26th of May 2017
That's just brilliant Stephanie and it looks so good too. I really need to try and do something similar in our laundry room too. I'm convinced every sock that's missing a buddy must be behind our washer ;-)
Stephanie
Friday 26th of May 2017
So true, I got tired of trying to shimmy the machines far enough out to reach down there with a hanger to get things. Problem solved. :)
Mary
Thursday 25th of May 2017
That is a very clever idea Stephanie. Not only is it super practical but it looks great too! Pinning!
Stephanie
Friday 26th of May 2017
Thanks so much, Mary. It's been a game changer here. :)
Debrashoppeno5
Friday 19th of May 2017
I love this and you have given me an idea how to make one although my laundry room is so much smaller than yours.
Stephanie
Friday 19th of May 2017
Fantastic. I hope I get to see it when you're done!
Sara @ finditfixitorbuildit.com
Saturday 4th of February 2017
Great idea! Makes a huge difference in the look of the laundry room. Love it:)