
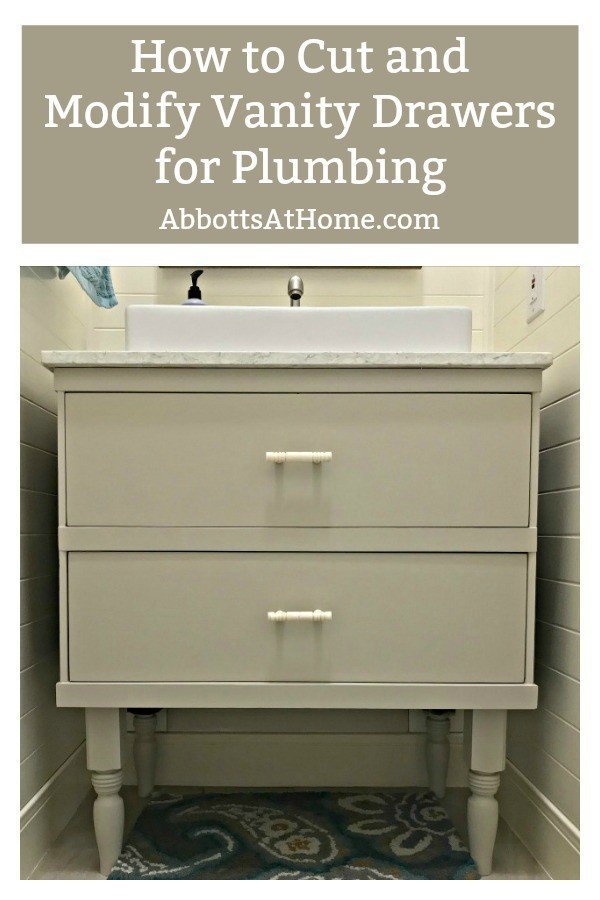
If you’re wondering how to convert that dresser into a vanity, I’ve got tons of tips and steps for How to Cut and Modify Vanity Drawers for Plumbing.
How to Cut and Modify Vanity Drawers for Plumbing
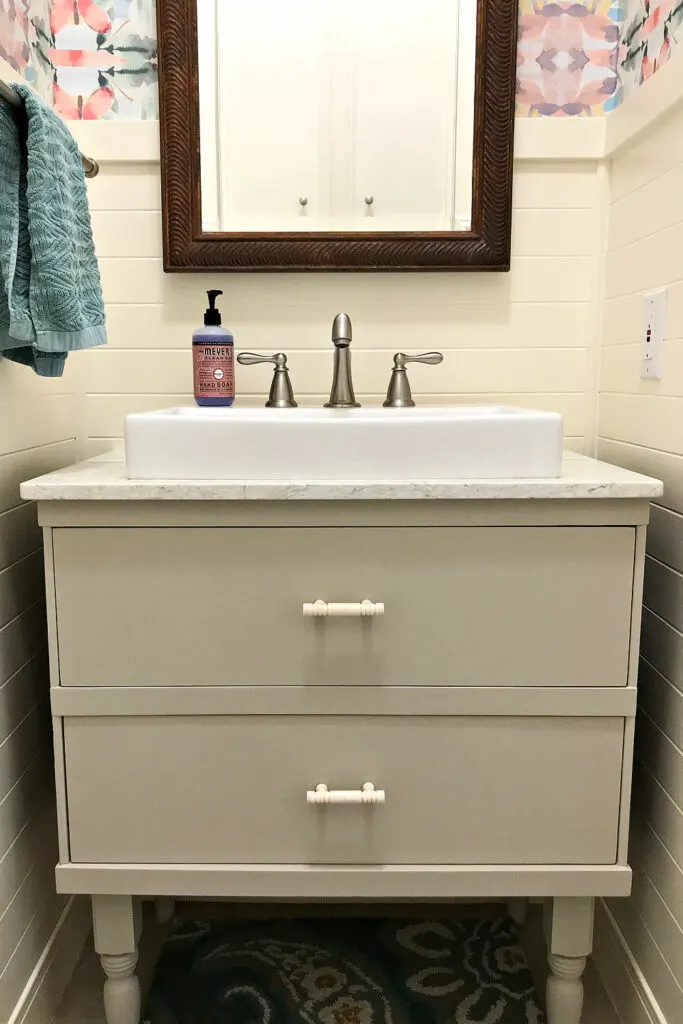
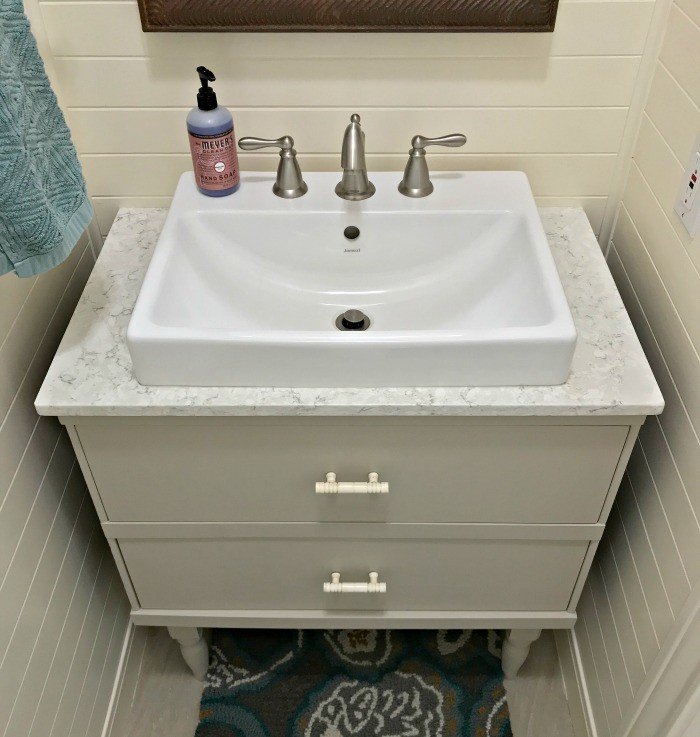
I’m just wrapping up a full makeover on our powder room. So, I thought it was time to show you guys how I modified the drawers for our dresser vanity.
Hopefully it helps you modify your own dresser into a vanity too!
You can also head over to the very first blog post I ever wrote to see how I cut a dresser in half to create this vanity. The other half of that dresser is now a beautiful painted night stand for our guestroom.
10 Tips to Use a Dresser as a Bathroom Vanity
Before we get started with how to modify vanity drawers for plumbing, I have a few tips for turning a dresser or any piece of furniture into a vanity.
Tip One
Pick a piece of furniture that is strong enough to be cut up or be ready to build supports inside the dresser to strengthen it.
The dresser I used was actually a tall 4 drawer dresser that I cut in half to make this vanity and toy storage.
If the dresser has flimsy sides and seems pretty close to falling apart already, you’ll have to give it a bunch of TLC to reinforce the sides and glue everything back together.
Tip Two
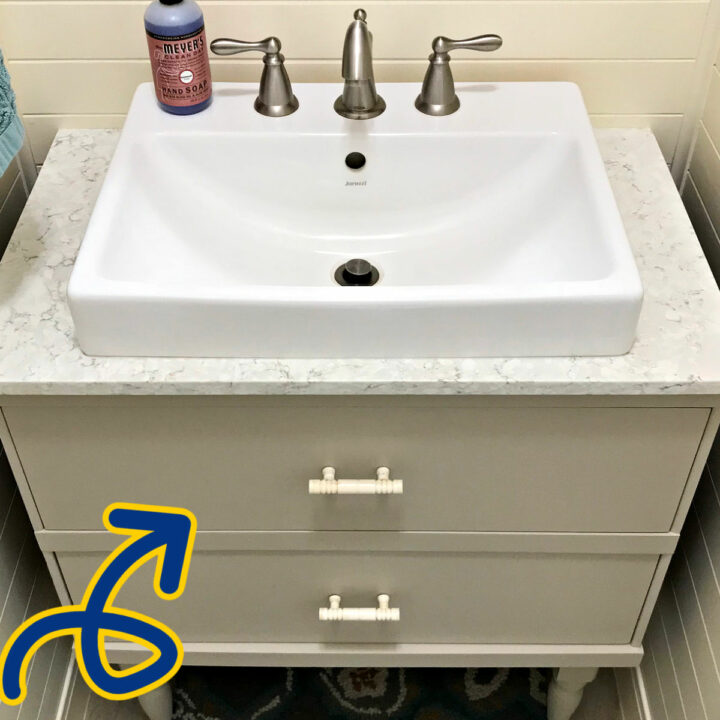
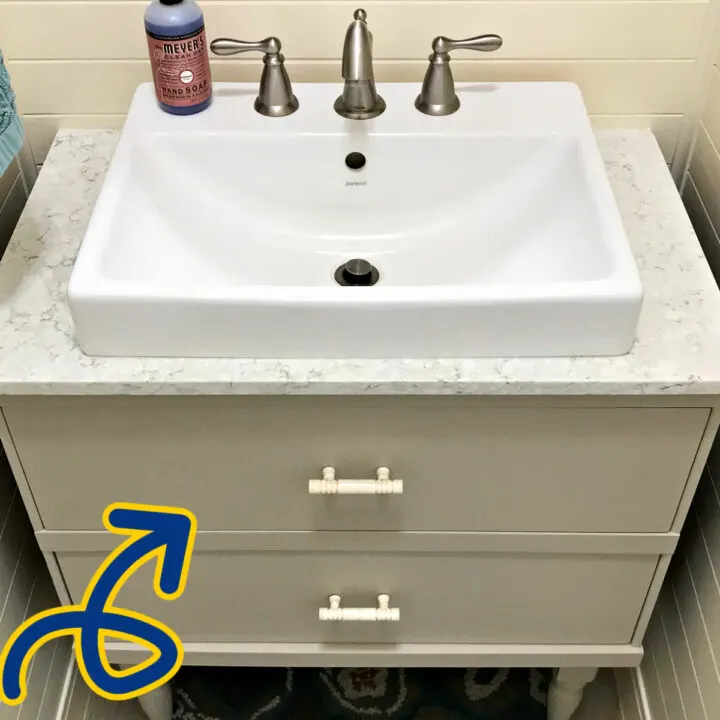
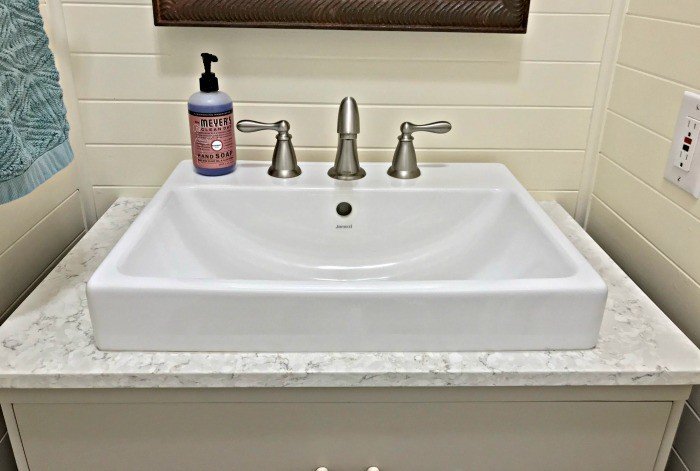
Pick a sink that works for you. A vessel sink that sits on top of the counter doesn’t take up any space inside the vanity. So, you’ll probably have more room for storage in the drawers, if you need it.


Tip Three
If you do pick an inset sink, you could fix the drawer face in place, use glue, Velcro, magnets, or even latches, depending on whether or not you’ll need to do any maintenance behind that drawer later.
Tip Four
What countertop material will you use? Wood looks beautiful, but the original dresser finish will probably get that hazy look after getting wet, and may even permanently show water damage.
You might want to strip the old finish and use a butcher clock grade oil as the new finish. Or a great water-tight finish, like Waterlox, that can handle water.
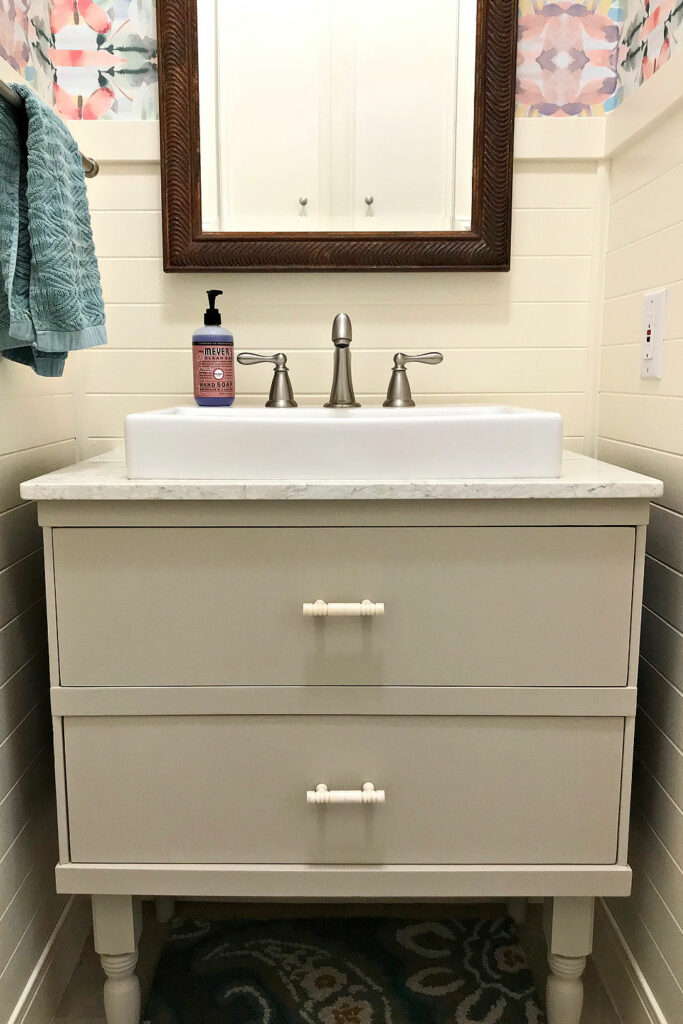
I was able to have a remnant of our kitchen countertop installed on ours when we had our kitchen remodeled.
Tip Five
How much effort will it take to clean? I put 10″ high legs on the dresser I converted into a vanity for 2 reasons. First, I wanted it to be easy to clean under.
Secondly, I wanted to be able to slide the kids stool underneath and out of the way. If you want to skip cleaning underneath completely, make sure your vanity sits fully on the floor.
Tip Six
Make sure the vanity will be at a comfortable height for use. 36 inches from the top of the counter to the floor is standard.
So, try to get within a couple of inches of that to make the new vanity comfortable to use and reach for most people.
Tip Seven
Cleaning around the sides is another thing to think about. There is a gap on either side of our vanity. So the wall seems to get tons of dirty drips from our little guys.
I’m constantly wiping our walls down. If that would bother you, you might want to find a dresser that can fill the space.
Tip Eight
Also, think about a backsplash or how you’ll protect that back wall from water. You want to make sure the vanity top is snuggly against the wall. The wall should be protected by a short backsplash of some sort.
Go with some sort of tile, vinyl, stainless steel, wood, or even something like the MDF V-groove wainscoting I used. MDF and water don’t normally mix, but this is protected by the factories protective coating, 2 coats of primer, and 2 coats of paint. So, it works.
I also put a bead of Clear Silicone Caulk between the wall and counter. This keeps water from slipping into the crack and causing rot.
Tip Nine
This may not be necessary at all, but as a safety-conscious mom, I screwed this vanity into the wall studs at 2 spots with 3″ screws.
It would be really hard to pull a vanity away from the wall after it’s plumbed in. But, I just remember all of the times I climbed up on bathroom counters as a kid, and decided, better safe than sorry.
Tip Ten
Just as a design note, really pretty drawer pulls or knobs turn any dresser into a beautiful conversation piece.
Now, let’s get to my steps for How to Cut and Modify Vanity Drawers for Plumbing!
Materials Needed to Modify Drawers for Plumbing
- Brad Nailer with Brad Nails
- Circular Saw and Jigsaw
- straight edge and tape measure
- 1/2″ or 3/4″ Lumber or Plywood to Rebuild
- Wood Filler and Wood Glue
DIY Drawer Cut Out for Bathroom Plumbing
Please Note: These steps may not work with all types of materials and joinery or construction. These steps will work best with drawers that are completely constructed of wood and firmly glued and joined together.
Step 1
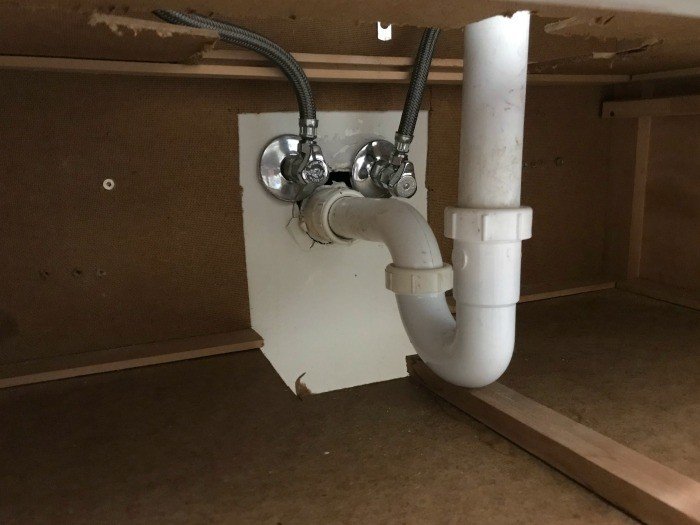
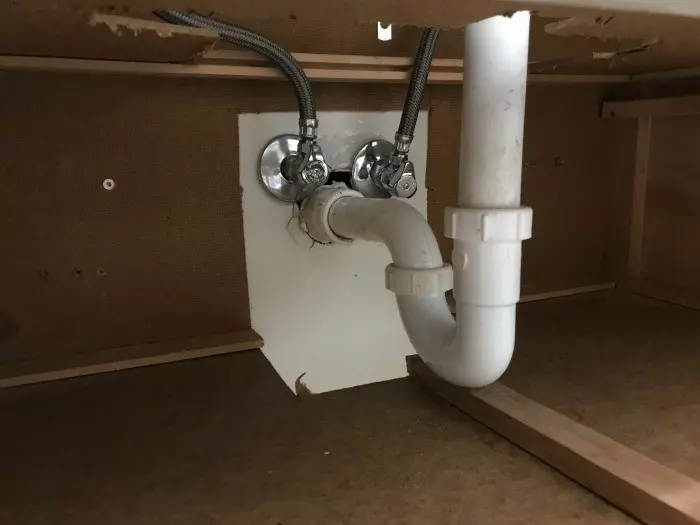
First of all, don’t cut your drawers until the sink and vanity are fully plumbed and installed. I got a little impatient and cut before I had even picked a sink. Big mistake. My drawers could have been larger if I had waited.

Step 2
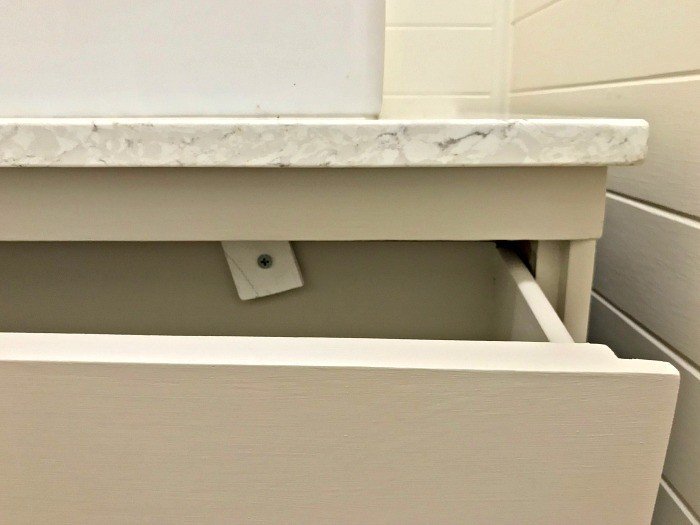
After the sink and plumbing is installed, measure the width and depth of the plumbing, and possibly sink, for each drawer. Add 1 1/2″ around the plumbing to make sure your drawer will be well away from the plumbing.
Mark the measurements on the drawers. If you flip the drawer over, be sure to flip the measurements correctly too. Connect the marks with straight lines, to act as cut lines.
If your drawers use side-mounted metal drawer slides or runners, try to keep that intact whenever possible. Most drawers work best and have the most amount of storage when cut into a U-shape.
This keeps the sides intact and just cuts out a section of the back and middle.
If you can work with that shape, do it. If not, you could just create a really shallow drawer, like mine.
And, if you do need to create a shallow drawer and previously had metal drawer slides, you might consider replacing the metal slide with a wooden drawer guide to maintain the same track.
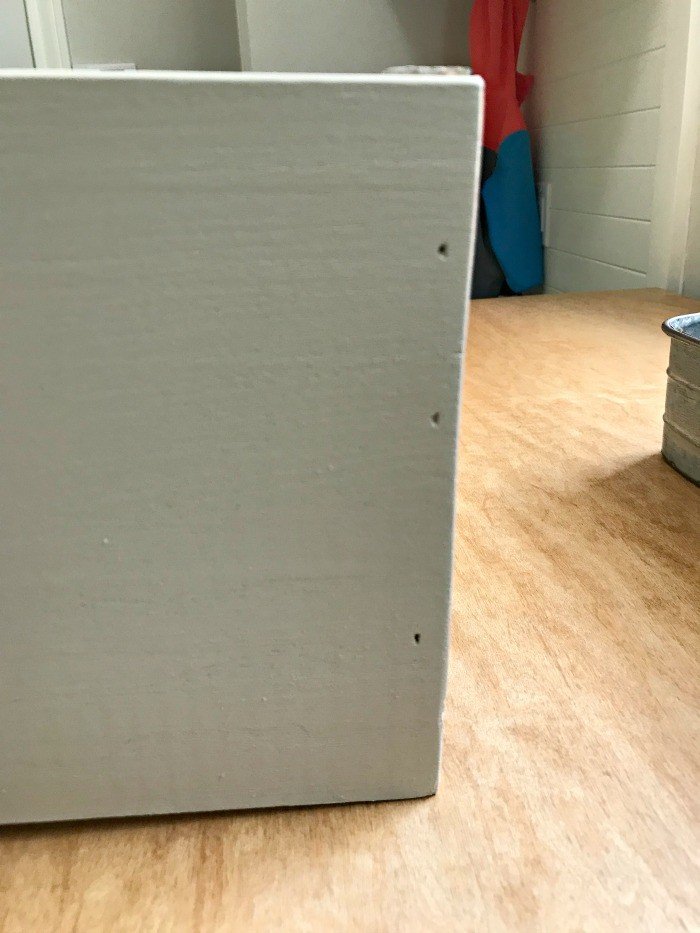
If your drawers have a wooden drawer runner underneath or on the sides, you should be able to cut those and glue them tightly back into place. Make sure it is glued into the exact same spot to keep the drawer aligned correctly.
I recommend tracing the line of the runner across the bottom or side of the drawer, or dresser frame, with a pencil before making any cuts.
Step 3
If making a U-shaped cutout a Circular Saw will make the quickest and cleanest cuts on the back side of the drawer. Then you can finish up the cuts on the bottom of the drawer with a jigsaw.
If you need to cut a shallow, straight-backed drawer, the circular saw will work fine across the job. It’s possible that you could save the original back of the drawer to reattach to the shortened front, if you carefully cut the sides off of the back.
Step 4
For U-shaped drawers, that just have a notch cut out of the back, build a 3-piece patch. The patch will be U-shaped to. Just follow the cutout you just made to get your measurements.
Always use wood glue to create a strong support. I prefer to put my patch on top of the old bottom so that it can create the strongest hold with glue and nails.
For shallow, straight-backed drawers; I used plywood that sits on top of the original bottom and inside the original sides. I used wood glue across all 3 sides and my brad nailer to nail it in place.
Step 5
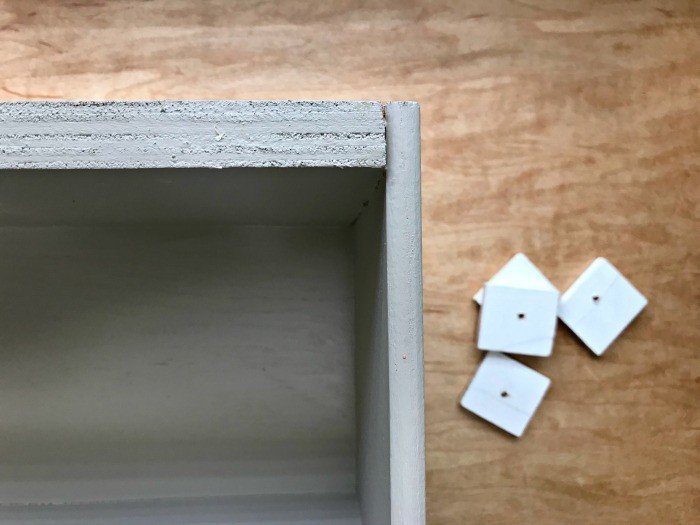
Optional: Add some sort of drawer stops to prevent someone from accidentally pulling a shortened drawer out of the vanity. Something like this Hillman Drawer Stop or this Rockler Drawer Stop might work.
I just grabbed some leftover Lattice Boards from my DIY Plank Ceiling to make my own stops. I connected the stops to the back of the drawer with a tightened nut and bolt.
When I need to remove the drawers later, I can just turn the stop to the side so that it doesn’t catch on the inside of the dresser anymore.
How to Cut and Modify Vanity Drawers for Plumbing

Must see tips and steps to convert furniture into a bathroom vanity. With DIY steps to cut and modify vanity drawers for plumbing.
Materials
- Furniture to Use as a Vanity
- Sink
- Plumbing
Tools
- Power Saw & Drill
Instructions
How to Cut and Modify Furniture for Bathroom Plumbing
Please Note: These steps may not work with all types of materials and joinery or construction. These steps will work best with drawers that are completely constructed of wood and firmly glued and joined together.
- First of all, don't cut your drawers until the sink and vanity are fully plumbed and installed. I got a little impatient and cut before I had even picked a sink. Big mistake. My drawers could have been larger if I had waited.
- After the sink and plumbing is installed, measure the width and depth of the plumbing, and possibly sink, for each drawer. Add 1 1/2" around the plumbing to make sure your drawer will be well away from the plumbing.
- Mark the measurements on the drawers. If you flip the drawer over, be sure to flip the measurements correctly too. Connect the marks with straight lines, to act as cut lines.
- If your drawers use side-mounted metal drawer slides or runners, try to keep that intact whenever possible. Most drawers work best and have the most amount of storage when cut into a U-shape. This keeps the sides intact and just cuts out a section of the back and middle.
- If you can work with that shape, do it. If not, you could just create a really shallow drawer, like mine. If you do need to create a shallow drawer and previously had metal drawer slides, you might consider replacing the metal slide with a wooden drawer guide to maintain the same track.
- If your drawers have a wooden drawer runner underneath or on the sides, you should be able to cut those and glue them tightly back into place. Make sure it is glued into the exact same spot to keep the drawer aligned correctly.
- I recommend tracing the line of the runner across the bottom or side of the drawer, or dresser frame, with a pencil before making any cuts.
- If making a U-shaped cutout a Circular Saw will make the quickest and cleanest cuts on the back side of the drawer. Then you can finish up the cuts on the bottom of the drawer with a jigsaw.
- If you need to cut a shallow, straight-backed drawer, the circular saw will work fine across the job. It's possible that you could save the original back of the drawer to reattach to the shortened front, if you carefully cut the sides off of the back.
- For U-shaped drawers, that just have a notch cut out of the back, build a 3-piece patch. The patch will be U-shaped to. Just follow the cutout you just made to get your measurements.
- Always use wood glue to create a strong support. I prefer to put my patch on top of the old bottom so that it can create the strongest hold with glue and nails.
- For shallow, straight-backed drawers; I used plywood that sits on top of the original bottom and inside the original sides. I used wood glue across all 3 sides and my brad nailer to nail it in place.
- Optional: Add some sort of drawer stops to prevent someone from accidentally pulling a shortened drawer out of the vanity. Something like this Hillman Drawer Stop or this Rockler Drawer Stop might work.
- I just grabbed some leftover Lattice Boards from my DIY Plank Ceiling to make my own stops. I connected the stops to the back of the drawer with a tightened nut and bolt. When I need to remove the drawers later, I can just turn the stop to the side so that it doesn't catch on the inside of the dresser anymore.
Notes
Before we get started with how to modify vanity drawers for plumbing, I have a few tips for turning a dresser or any piece of furniture into a vanity.
Tip One
Pick a piece of furniture that is strong enough to be cut up or be ready to build supports inside the dresser to strengthen it. The dresser I used was actually a tall 4 drawer dresser that I cut in half to make this vanity and toy storage.
If the dresser has flimsy sides and seems pretty close to falling apart already, you'll have to give it a bunch of TLC to reinforce the sides and reglue everything back together.
Tip Two
Pick a sink that works for you. A vessel sink that sits on top of the counter doesn't take up any space inside the vanity. So, you'll probably have more room for storage in the drawers, if you need it.
Tip Three
If you do pick an inset sink, you could fix the drawer face in place, use glue, Velcro, magnets, or even latches, depending on whether or not you'll need to do any maintenance behind that drawer later.
Tip Four
What countertop material will you use? Wood looks beautiful, but the original dresser finish will probably get that hazy look after getting wet, and may even permanently show water damage.
You might want to strip the old finish and use a butcher clock grade oil as the new finish. Or a great water-tight finish, like Waterlox, that can handle water. I was able to have a remnant of our kitchen countertop installed on ours when we had our kitchen remodeled.
Tip Five
How much effort will it take to clean? I put 10" high legs on the dresser I converted into a vanity for 2 reasons. First, I wanted it to be easy to clean under.
Secondly, I wanted to be able to slide the kids stool underneath and out of the way. If you want to skip cleaning underneath completely, make sure your vanity sits fulling on the floor.
Tip Six
Make sure the vanity will be at a comfortable height for use. 36 inches from the top of the counter to the floor is standard. So, try to get within a couple of inches of that to make the new vanity comfortable to use and reach for most people.
Tip Seven
Cleaning around the sides is another thing to think about. There is a gap on either side of our vanity. So the wall seems to get tons of dirty drips from our little guys. I'm constantly wiping our walls down. If that would bother you, you might want to find a dresser that can fill the space.
Tip Eight
Also, think about a backsplash or how you'll protect that back wall from water. You want to make sure the vanity top is snuggly against the wall. The wall should be protected by a short backsplash of some sort.
Go with some sort of tile, vinyl, stainless steel, wood, or even something like the MDF V-groove wainscoting I used. MDF and water don't normally mix, but this is protected by the factories protective coating, 2 coats of primer, and 2 coats of paint. So, it works.
I also put a bead of Clear Silicone Caulk between the wall and counter. This keeps water from slipping into the crack and causing rot.
Tip Nine
This may not be necessary at all, but as a safety-conscious mom, I screwed this vanity into the wall studs at 2 spots with 3" screws.
It would be really hard to pull a vanity away from the wall after it's plumbed in. But, I just remember all of the times I climbed up on bathroom counters as a kid, and decided, better safe than sorry.
Tip Ten
Just as a design note, really pretty drawer pulls or knobs turn any dresser into a beautiful conversation piece.
More DIY Projects For You
Check out my DIY Over Washer and Dryer Table to see how I covered the huge gap behind our machines while adding a pretty folding space.
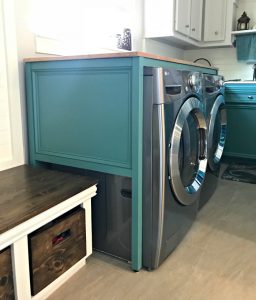
And be sure to check out the full Laundry Room Makeover for more inspiration.
Check out the budget-friendly tips in the 14 Best Ways to Renovate A Living Room on a Budget!


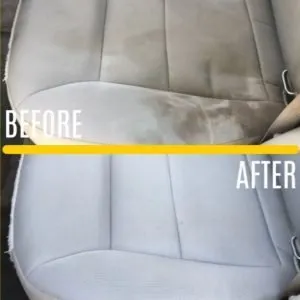
You might also like this post for How to Clean Car Seats At Home!

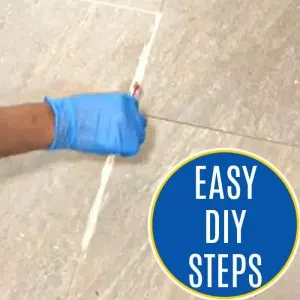
And, this is my secret for How to Whiten Grout. This makes ugly, dirty grout look beautiful again.

Feeling inspired? Now you know How to Cut and Modify Vanity Drawers for Plumbing. Have fun and let me know if you have questions.
Don’t forget to sign up for the Abbotts At Home email newsletter to get DIY, Remodeling, and Crafty ideas in your inbox.


Stephanie Abbott has been remodeling homes, updating & building furniture, and working on DIY home maintenance and cleaning tips for over 20 years. Her remodeling has been featured in Better Homes and Gardens Magazine. And, her DIY YouTube channel has had more than 8 million views.
Most of the DIY tutorials and videos on this site focus on beginner to intermediate level DIY Projects that can be done in an affordable way without high-end, expensive tools. All of the cleaning tips on this website have been tested in her home.
Charlee
Thursday 23rd of August 2018
This turned out so good! Beautiful job!
Aloha, Charlee
Stephanie
Thursday 23rd of August 2018
Thanks so much, Charlee.
Chas Greener
Wednesday 22nd of August 2018
I love this, it looks fantastic! Thanks for the tutorial and sharing on To Grandma's House We Go!
Stephanie
Wednesday 22nd of August 2018
Thanks so much, Chas!
Ann
Wednesday 22nd of August 2018
This looks really great! I'd luv to invite you to join us over at Wall to Wall DIY Wednesday! Hope you can stop by.
Stephanie
Wednesday 22nd of August 2018
Thanks, Ann! Will do.
vrmm26
Thursday 16th of August 2018
Looks great! I really want to use an old cabinet as a vanity in our currently horrible powder room! I'm pinning for future reference. Visiting from Funtastic Fridays.
Stephanie
Friday 17th of August 2018
Good luck and I hope it helps. :)
acraftymix
Monday 13th of August 2018
Darn it I wish I had this tut way back when. We converted a TV unit into a vanity but messed up badly with the back bits. This would have been so useful but maybe I can still use it to fix our patch work job
Stephanie
Tuesday 14th of August 2018
I hope it helps. You're so crafty, I'm sure you can fix it. :)